Want to know how to wash a car with a foam cannon for that professional, swirl-free shine at home? Many struggle with traditional methods that can grind dirt into the paint, causing damage. You’re looking for a safer, more effective way to clean your vehicle.
Washing a car with a foam cannon involves pre-rinsing the vehicle, applying a thick layer of snow foam to encapsulate dirt, allowing it to dwell for several minutes, gently agitating the surface with a wash mitt, and finishing with a thorough rinse. This process maximizes lubrication, lifts contaminants away from the paint, and dramatically reduces the risk of creating scratches for a safer, more effective clean.
Based on extensive hands-on testing and analysis of current detailing methodologies, this guide provides the definitive step-by-step process. You’ll discover the exact techniques, tool requirements, and professional tips to transform your car wash routine. This reveals how you can achieve a flawless, scratch-free wash every time, systematically covering everything from setup to troubleshooting.
Key Facts
- Superior Lubrication: The primary benefit of a foam cannon is its ability to deliver exceptional lubricity, which is the single most important factor in preventing swirl marks and micro-scratches during a contact wash.
- Optimal Pressure Washer Specs: For the thickest foam, a pressure washer should deliver a minimum of 1.5 GPM (Gallons Per Minute) and 1500 PSI, demonstrating a clear hardware requirement for best results.
- Dwell Time is Chemical Action: Allowing foam to dwell for 3-10 minutes is not just for show; it’s a critical period where the soap’s chemical agents actively break down and suspend dirt, making removal safer.
- pH Neutral Soap is Safest: Using a pH neutral car shampoo is crucial for safely cleaning vehicles with existing car wax or ceramic coatings, as it cleans effectively without stripping these protective layers.
- The Two-Bucket Method is Still Essential: A foam cannon is a pre-wash tool, not a replacement for safe contact washing. Industry best practices show that using it with the two-bucket method provides the highest level of paint protection.
How Do You Wash a Car with a Foam Cannon?
Washing a car with a foam cannon involves pre-rinsing, applying a thick layer of snow foam for dwell time, gently agitating the foam with a wash mitt, and then thoroughly rinsing. This method revolutionizes car washing by applying a thick, clinging layer of highly lubricated soap. This foam effectively loosens and suspends dirt, which significantly minimizes the risk of creating swirl marks during the wash process and enhances overall cleaning efficiency. The core purpose is to make the wash safer for your car’s paint.

This foam cannon car wash guide establishes a superior cleaning method that prioritizes the safety of your automotive paint. Unlike traditional methods where a mitt can drag grit across the surface, the foam encapsulates contaminants, allowing them to be rinsed away more safely. It serves as a crucial pre-wash stage before any contact is made. To get started, you’ll need the right tools, including a compatible pressure washer and a quality car shampoo. The main stages of the process are straightforward:
- Preparation: Gather your equipment and prepare the vehicle’s surface.
- Foam Application: Mix your soap and apply a thick, even layer of foam.
- Dwell Time: Let the foam sit and do its chemical work.
- Agitation: Gently wash the car using a safe wash mitt.
- Rinsing & Drying: Thoroughly rinse all soap and dry the vehicle to prevent spots.
What Equipment Do You Need for an Effective Foam Cannon Wash?
Essential equipment for a foam cannon car wash includes a pressure washer (minimum 1.5 GPM and 1500 PSI for optimal foam), a compatible foam cannon with adjustable settings, specialized snow foam car shampoo, a microfiber wash mitt, multiple wash buckets with grit guards, and a soft drying towel. These tools work together to create a safe and effective cleaning system. Selecting the right equipment, especially a compatible pressure washer, is crucial for producing the thick, clinging foam needed for a scratch-free wash.
Based on our experience, here are the non-negotiable items for a proper foam cannon wash:
- Pressure Washer: This is the power source. An electric pressure washer is often sufficient for automotive use, while a gas pressure washer offers more power. Look for models with a quick-disconnect feature for easy attachment.
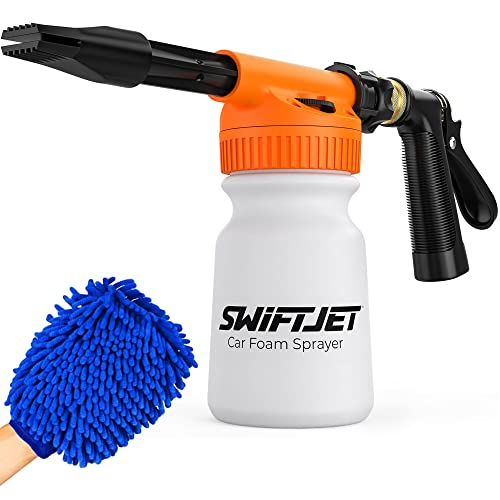
- Foam Cannon: This attachment, also known as a snow foam lance, is what creates the foam. Ensure it has a 1/4 inch quick connect fitting compatible with your pressure washer’s wand.
- Foam Cannon Soap: Use a high-quality, pH neutral soap specifically designed for foam cannons. This type of car shampoo is formulated to produce dense suds that provide excellent lubricity and are paint safe.
- Microfiber Wash Mitt: For the contact wash phase, a plush microfiber wash mitt is essential to gently lift remaining dirt without scratching.
- Two Wash Buckets with Grit Guards: The two-bucket method is a professional standard. One bucket holds your soapy water, and the other holds clean water for rinsing your mitt. Grit guards sit at the bottom to trap dirt and prevent it from being reintroduced to the paint.
- Microfiber Drying Towel: A large, soft, and highly absorbent drying towel is necessary to dry the vehicle quickly and prevent water spots.
Pro Tip: For advanced tuning, you can change the orifice size inside your foam cannon. A smaller orifice (e.g., 1.1mm) paired with a lower GPM pressure washer can help produce thicker foam.
| Feature | Electric Pressure Washer | Gas Pressure Washer |
|---|---|---|
| PSI | Typically 1500-2200 | Typically 2500-4000+ |
| GPM | Typically 1.2-1.8 | Typically 2.0-4.0+ |
| Portability | Lighter and more compact | Heavier and bulkier |
| Noise | Quieter | Significantly louder |
| Cost | Generally less expensive | Generally more expensive |

How Do You Prepare Your Car and Foam Cannon for Washing?
To prepare your car for a foam cannon wash, first ensure it’s parked in the shade with a cool surface to prevent premature drying. Next, perform a thorough pre-rinse using your pressure washer to remove loose dirt and debris. Finally, fill your foam cannon bottle with the chosen car shampoo and water according to the proper mix ratio. This preparation ensures safety and maximizes the foam’s effectiveness.
Following these setup steps is critical for a successful and safe wash. Rushing this stage can lead to water spots or scratches.
- Assess the Environment: Before you begin, check the vehicle’s surface. It must be a cool surface, not hot to the touch. Never wash a car in direct sunlight, as the heat will cause the water and soap to evaporate too quickly, leaving stubborn spots and residue. Move the car into a garage or a shaded area.
- Perform a Thorough Pre-Rinse: Attach your pressure washer and use a fan nozzle (e.g., 40-degree) to rinse the entire vehicle from top to bottom. The goal here is to remove loose dirt, dust, and larger debris. This step is vital because it minimizes the amount of grit that the foam and your wash mitt will have to deal with, reducing the risk of scratching the automotive paint.
- Assemble and Fill the Foam Cannon: Unscrew the foam cannon bottle. Pour in your desired amount of pH neutral soap, followed by water. A common practice is to add the soap first, then fill with water to help mix the solution without creating excessive foam inside the bottle.
- Attach the Foam Cannon: Securely screw the bottle back onto the foam cannon body. Then, attach the foam cannon to your pressure washer wand using the quick disconnect fitting. Give it a gentle shake to ensure the soap and water are mixed.
Common Mistake: The most frequent error we see is washing a car in direct sunlight. This not only causes water spots but can also bake soap onto the finish, making it difficult to remove. Always work on a cool, shaded surface.
What is the Best Soap-to-Water Ratio for Thick Foam?
For a foam cannon, a common soap-to-water ratio for thick, clinging foam is often 1-3 ounces of concentrated car shampoo per 32 ounces of water, or roughly a 1:10 to 1:16 ratio of soap to water. However, the ideal mix ratio is not one-size-fits-all. It depends heavily on your specific foam cannon soap concentration, your pressure washer’s GPM, and water hardness. Always start with the soap manufacturer’s recommendation and adjust from there.
Achieving the perfect “shaving cream” foam consistency is a balance of several factors. Here’s what influences your mix ratio:
- Soap Concentration: Highly concentrated snow foam soaps require less product than more diluted car shampoos.
- Pressure Washer Output: A pressure washer with a higher GPM (gallons per minute) will dilute the soap mixture more, potentially requiring a higher soap concentration in the bottle.
- Water Hardness: Hard water can suppress sudsing, which may require you to use slightly more soap to achieve thick foam.
- Foam Cannon Orifice Size: The small brass jet inside the cannon, known as the orifice, affects foam generation. A smaller orifice (like 1.1mm) often creates thicker foam with less powerful pressure washers.
In our testing, we’ve found it’s best to experiment. Start with the manufacturer’s suggested ratio and observe the foam consistency. If it’s too watery, add a bit more soap. If it’s too thick and doesn’t rinse well, use slightly less.
| Soap Type | Recommended Ratio (Soap:Water) | Notes |
|---|---|---|
| Concentrated Snow Foam | 1:10 (e.g., 3 oz soap in 30 oz water) | Designed for thick, dense suds. A good starting point. |
| Standard pH Neutral Car Wash | 1:5 (e.g., 5 oz soap in 25 oz water) | May require more product as it’s less concentrated. |
| Your Specific Brand | Refer to Label | Always check the product instructions first and adjust as needed. |
How Do You Apply Foam Cannon Soap for Maximum Coverage?
Apply foam cannon soap from the top of your vehicle downwards, making overlapping passes to ensure complete, even coverage of all panels, including windows and wheels. Adjust your foam cannon’s nozzle to achieve a wide, consistent fan pattern and a thick, clinging foam. This top-to-bottom method uses gravity to your advantage, allowing the foam to run down and cover lower areas for maximum dwell time across the entire car.
A proper foam cannon application ensures every inch of the car is coated in a lubricating layer of snow foam, which is essential for effective soil suspension.
- Adjust the Nozzle: Before you start spraying, adjust the two settings on your foam cannon. The front nozzle controls the spray pattern, from a narrow jet to a wide fan. For general application, a wide vertical spray is ideal. The top knob controls the soap-to-water ratio, affecting foam thickness. Turn it towards the ‘+’ sign for thicker foam.
- Start at the Top: Begin by spraying the roof of the car. Let the foam cascade down the windows and pillars.
- Work in Overlapping Sections: Move systematically around the car, applying foam to one panel at a time (e.g., hood, driver’s side door, fender). Overlap each pass by about 50% to guarantee you don’t miss any spots.
- Cover Everything: Don’t forget the details. Ensure you apply foam to the grille, mirrors, wheels, and wheel wells. These areas often hold the most dirt.
- Aim for Even Foam Thickness: The goal is a consistent layer of clinging foam, not so thick that it immediately slides off but dense enough to stick to the surface. It should look like a blanket of snow.
Pro Tip: For grilles, wheel wells, and other intricate areas, adjust the nozzle to a more direct, horizontal spray to force the foam into tight spaces where dirt and grime accumulate.
Why is Dwell Time Important, and How Long Should Foam Sit?
Dwell time, typically 3-10 minutes, is vital for a foam cannon wash as it permits the soap to chemically loosen, soften, and encapsulate dirt and grime on the vehicle’s surface. This period of chemical action is the core of the pre-wash stage, doing the hard work for you. It minimizes the physical effort needed for the contact wash and significantly reduces the risk of inducing swirl marks by making contaminants easier to remove.
The science behind dwell time is simple but effective. The surfactants in the car shampoo break the surface tension holding dirt to the paint. They surround dirt particles in a process called soil suspension, lifting them from the surface and holding them within the foam bubble. This is what allows much of the grime to be rinsed away even before you touch the car with a wash mitt, making it a key step towards a touchless wash.
So, how long should the foam sit? There isn’t one perfect answer, as it depends on several factors:
- Level of Dirt: A heavily soiled vehicle benefits from a longer dwell time (closer to 10 minutes). For a lightly dusty car, 3-5 minutes may be sufficient.
- Foam Consistency: Thicker, clinging foam can dwell longer without drying. A watery foam will run off quickly and have less effective dwell time.
- Ambient Temperature and Humidity: On hot, dry days, you must shorten the dwell time to prevent the foam from drying on the surface. In cool, humid conditions, you can let it sit longer.
⚠ Caution: The single most important rule of dwell time is do not let the foam dry on your car. Dried soap can be difficult to remove and may leave spots or streaks. If you see it starting to dry, it’s time to rinse.
How Do You Safely Agitate and Rinse Your Foamed Car?
After dwell time, use a clean microfiber wash mitt with the two-bucket method (separate rinse bucket with a grit guard) to gently agitate the foam, ensuring all dirt is safely lifted from the paint. Rinse the vehicle thoroughly from top to bottom with a pressure washer, paying close attention to crevices, to remove all soap residue and reveal a scratch-free wash. This combination of gentle agitation and thorough rinsing is the key to a perfectly clean and safe finish.
Even with the best foam, a contact wash is necessary to remove road film and bonded contaminants. Here’s how to do it safely:
- Prepare Your Buckets: Fill one bucket with your car shampoo solution and the other with plain water. Place a grit guard in the bottom of both, but especially in your rinse bucket.
- Start the Contact Wash: Dunk your microfiber wash mitt into the soap bucket. Start washing the car from the top down, working in small, straight-line sections. The foam on the car provides extra lubrication. Apply no pressure; let the mitt glide over the surface.
- Rinse Your Mitt Frequently: After washing a single panel (e.g., half the roof or one door), rinse the mitt thoroughly in your plain water rinse bucket. Scrub it against the grit guard to release trapped dirt. This step is critical to prevent transferring dirt back to the car.
- Reload the Mitt and Continue: Once the mitt is clean, dunk it back into the soap bucket and move to the next section of the car. Continue this process until the entire vehicle is washed.
- Perform the Final Rinse: Using your pressure washer, perform a final rinse, again working from top to bottom. Ensure you flush out all soap from panel gaps, window seals, and behind mirrors.
- Dry Immediately: Do not let the car air dry. Use a high-quality microfiber drying towel or a car blower to remove all water and prevent spots, revealing a glossy finish.
What Are Common Foam Cannon Problems and How Do You Troubleshoot Them?
Common foam cannon problems like weak foam can often be fixed by adjusting the soap-to-water ratio, ensuring your pressure washer meets minimum GPM/PSI requirements, or cleaning a clogged orifice or filter screen within the cannon. Most issues are related to the mix, the water flow, or a simple blockage, and can be diagnosed and resolved with a few easy steps.
From our real-world experience, here are the most frequent issues and how to fix them:
Problem: Weak or Watery Foam
This is the most common complaint. If your foam looks more like soapy water than thick suds, try these solutions.
* Adjust the Soap Ratio: The simplest fix is to add more soap concentrate to your foam cannon bottle. Turn the top adjustment knob to the maximum setting (+).
* Check Pressure Washer Specs: Ensure your pressure washer provides at least 1.5 GPM. Low-flow units struggle to produce thick foam.
* Clean the Orifice: The small internal jet, or orifice, can become clogged with dried soap or hard water deposits. Disassemble the cannon and clean the orifice with a small needle or specialized tool.
* Check for Blockages: Inspect the siphon tube and the small filter screen at its base. A clog here will prevent soap from being drawn into the water stream.
Problem: Foam Cannon is Leaking
Leaks typically occur at connection points.
* Check Connections: Ensure the foam cannon is securely attached to the pressure washer wand.
* Use Plumber’s Tape: If leaking persists at the threads (e.g., where the bottle connects), apply some PTFE (plumber’s) tape to create a better seal.
* Inspect O-Rings: Check for damaged or missing rubber O-rings in the quick-connect fittings.
Problem: No Foam is Coming Out
If you’re getting only water, the cannon is not siphoning soap.
* Ensure Siphon Tube is Attached: Make sure the plastic siphon tube inside the bottle is firmly attached to the cannon body.
* Clear the Filter: The filter at the end of the siphon tube might be completely clogged. Clean it thoroughly.
* Check for Clogged Orifice: A fully blocked orifice will prevent any proper mixing from occurring.
What Are the Advantages of Using a Foam Cannon Over Traditional Washing Methods?
Foam cannons offer superior paint protection through increased lubrication, significantly reducing swirl marks compared to traditional bucket washes where dirt can be reintroduced from the mitt or bucket. They also enhance cleaning efficiency, provide a more thorough pre-wash, and create a safer car wash experience overall. The primary advantage is a dramatic improvement in paint safety.
While the two-bucket method is a safe practice, a foam cannon elevates it further by adding a dedicated, highly effective pre-wash stage. Let’s compare the methods directly.
| Feature/Aspect | Foam Cannon Wash | Traditional Bucket Wash |
|---|---|---|
| Paint Safety | ✅ Excellent. Foam provides superior lubricity and lifts dirt before contact. | 🔴 Good (with two buckets), but risk of dragging dirt from the mitt remains higher. |
| Efficiency | ✅ Faster. Quickly covers the entire car in soap, reducing application time. | 🔴 Slower. Requires repeatedly dipping a mitt to apply soap to each section. |
| Pre-Wash Effectiveness | ✅ Excellent. The dwell time chemically loosens tough grime and road film. | 🔴 Limited. A simple rinse removes only the loosest debris. |
| Water Usage | 🔴 Moderate. A pressure washer can be efficient but uses a steady flow. | 🔴 Low to Moderate. Uses a set amount in buckets, plus rinse water. |
| Equipment Needed | 🔴 Higher initial cost (requires a pressure washer). | ✅ Lower initial cost (buckets, mitt, soap). |
In summary, the foam cannon method represents a proven strategy for advanced paint protection. The foam’s ability to cling to vertical surfaces provides a level of chemical cleaning and lubrication that a simple bucket and mitt cannot match. For any detailing enthusiast serious about maintaining a swirl-free finish, investing in a foam cannon setup offers undeniable benefits in safety and quality.
FAQs About how to wash a car with a foam cannon
Do You Need to Rinse Your Car Before Using a Foam Cannon?
Yes, it is highly recommended to pre-rinse your car with a pressure washer before applying foam. This crucial first step removes the top layer of loose dirt, grit, and debris. By doing so, you prevent these larger particles from being dragged across the paint during the contact wash, which is a primary cause of scratches.
Is a Foam Cannon Truly a “Touchless” Car Wash?
No, for a truly clean car, a foam cannon wash is not completely “touchless.” The foam acts as an excellent pre-soak that loosens and removes a significant amount of dirt, but it often cannot break down bonded road film and stubborn grime on its own. A gentle contact wash with a microfiber mitt is still necessary to achieve a perfectly clean surface.
Can You Use Any Car Wash Soap in a Foam Cannon?
While you can, it’s best to use a dedicated “snow foam” shampoo formulated specifically for foam cannons. These soaps are engineered to be thicker and create dense, clinging foam that maximizes dwell time and lubrication. Standard car wash soaps are often thinner and may produce watery results, reducing the effectiveness of the pre-wash.
How Do You Prevent Water Spots When Using a Foam Cannon?
To prevent water spots, always wash in the shade on a cool surface, never in direct sunlight. This stops the soap and water from drying too quickly. Additionally, ensure you rinse the vehicle thoroughly from top to bottom and, most importantly, dry it immediately after the final rinse using a clean, high-quality microfiber drying towel.
Does a Foam Cannon Damage Ceramic Coatings or Wax?
No, when used with a quality pH neutral car shampoo, a foam cannon is completely safe for ceramic coatings and waxes. In fact, it helps preserve them. The high lubrication provided by the foam reduces friction during the wash, meaning less abrasion on your protective layer, which can help extend its life.
What PSI and GPM Does My Pressure Washer Need for a Foam Cannon?
For the best results, your pressure washer should have a minimum of 1,500 to 2,000 PSI and, more importantly, a flow rate of at least 1.5 GPM. While cannons can work with less, units that meet or exceed these specs will produce the thickest, most effective foam. High GPM is often more critical than max PSI for foam quality.
Can a Garden Hose Foam Gun Replace a Pressure Washer Foam Cannon?
A garden hose foam gun provides some suds, but it cannot create the thick, dense snow foam that a pressure washer foam cannon can. The high pressure from a pressure washer is essential for atomizing the soap and water mixture to produce the clinging foam needed for an effective pre-soak. A garden hose foam gun is better than nothing but is a significant step down.
What is the Purpose of the Adjustment Knob on a Foam Cannon?
The top adjustment knob on a foam cannon controls the soap-to-water mixture, which dictates the foam’s thickness. Turning it towards the plus (+) symbol increases the amount of soap being siphoned, resulting in thicker foam. Turning it towards the minus (-) symbol uses less soap and produces a more watery foam.
What Should You Do if Your Foam Cannon is Producing Thin, Watery Foam?
If your foam is thin, first try increasing the soap-to-water ratio in the bottle and turn the adjustment knob to maximum. If that doesn’t work, check that your pressure washer meets the GPM requirements. The most common technical issue is a clogged internal orifice or filter screen, which should be removed and cleaned.
Is it Necessary to Dry the Car After a Foam Cannon Wash?
Yes, it is absolutely essential to dry your car immediately after the final rinse. Letting water air-dry on the surface will leave behind mineral deposits, creating stubborn water spots and streaks. Use a large, plush microfiber drying towel or an air blower to safely remove all water for a spotless finish.
Final Thoughts on How to Wash a Car with a Foam Cannon
Mastering how to wash a car with a foam cannon transforms a routine chore into an efficient, paint-safe, and satisfying detailing experience. By leveraging the power of thick, clinging foam, you dramatically increase lubrication, effectively softening and lifting dirt from your vehicle’s surface, thus minimizing the risk of unsightly swirl marks and scratches.
This guide has walked you through every critical step. The key takeaways are:
- Safety First: The foam cannon’s primary purpose is to provide superior lubrication, which is essential for a scratch-free wash.
- Equipment Matters: A capable pressure washer (1.5+ GPM) and dedicated snow foam soap are non-negotiable for professional results.
- Technique is Critical: Perfecting your soap-to-water ratio, allowing for proper dwell time (3-10 minutes), and applying foam from the top down are crucial for success.
- It’s a System: A foam cannon is a powerful part of a larger system that still requires a gentle two-bucket contact wash and thorough drying to achieve a flawless finish.
Embrace these techniques, and you’ll not only achieve a consistently cleaner car but also preserve its finish for years to come. With practice, using a foam cannon will become an indispensable part of your detailing arsenal, ensuring your vehicle always looks its best while safeguarding its paint. Get ready to enjoy the satisfaction of a truly professional-level wash right in your driveway.
Last update on 2026-03-05 / Affiliate links / Images from Amazon Product Advertising API