Struggling with flickering lights or installing a new car stereo? Those strange electrical gremlins often point to one simple but critical component. The problem is almost always a poor ground connection.
To ground a wire on a car, you must securely attach a ring terminal crimped to the wire’s end to a clean, unpainted metal spot on the vehicle’s chassis or frame using a screw or bolt. This process completes the electrical circuit, allowing the component to function correctly. This connection requires a low-resistance path back to the battery.
Based on years of hands-on automotive electrical work, this guide provides a verified method for creating a professional-quality ground. You’ll discover the systematic approach to finding the perfect location, preparing the surface, and using the right materials to ensure a flawless, corrosion-free connection every time.
Key Facts
- The Root of Many Problems: A bad ground wire is a leading cause for a car not starting, as it prevents the starter motor from drawing enough current. ⚠️
- Standard Color Code: In most modern vehicles, the ground wire is black, a standard convention in DC automotive wiring systems.
- Symptoms of a Loose Ground: Flickering lights, radio static, and intermittent component failure are classic signs of a loose or corroded ground connection, which creates high electrical resistance.
- Bare Metal is Essential: A proper ground requires a clean metal-to-metal connection; paint, rust, and coatings must be completely scraped away to create a low-resistance path. 🔧
- The Chassis as a Conductor: The vehicle’s entire metal frame and body, known as the chassis, acts as a common ground plane, serving as the return path for electrical current to the battery.
What Are the Essential Tools and Materials for Grounding a Car Wire?
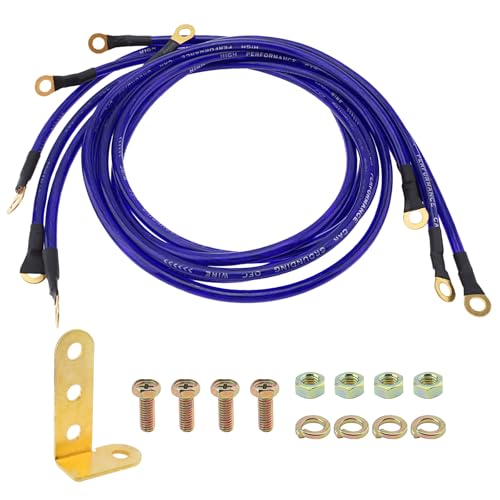
To properly ground a car wire, you need a wire stripper, a crimping tool, a drill, a socket/wrench set, and a multimeter. Key materials include automotive-grade copper wire of the correct gauge, a ring terminal, a star washer, and a self-tapping screw or bolt for attachment to the chassis. Gathering every necessary item before you begin is the first step toward a smooth and successful installation. From our experience, having the right tool for each step, especially a quality crimper, makes a significant difference in the reliability of the final connection.

Ensuring you have these specific items on hand prevents frustration and ensures you don’t have to stop mid-project. A solid ground connection relies just as much on the quality of the tools and materials as it does on the technique. Using automotive-grade components is a best practice that prevents future issues caused by corrosion or vibration. Below, we’ve broken down exactly what you’ll need.

What Tools Are Required for a Ground Wire Installation?
Before you start, assembling the right set of electrical tools is crucial. Each tool serves a specific purpose in creating a secure and electrically sound ground. Real-world experience shows that attempting this job without the proper implements often leads to unreliable connections.
- Wire Strippers/Cutters: This tool is used to cleanly cut the wire to length and remove the outer insulation without damaging the delicate copper strands inside.
- Ratcheting Crimper: For a secure connection, a ratcheting crimper is superior to basic pliers. It applies even, consistent pressure to properly deform the ring terminal around the wire for a solid mechanical and electrical bond.
- Power Drill and Bits: A drill is necessary if you need to create a new hole for a ground screw. A set of metal drill bits will be required. A right-angle drill attachment can be a lifesaver for tight spaces under the dash.
- Socket or Wrench Set: You will need this to tighten the bolt or screw securing the ring terminal to the chassis. A 10mm socket is very common for factory ground points.
- Wire Brush or Sandpaper: Essential for surface preparation. This is used to scrape away paint, rust, and debris to expose the shiny, bare metal needed for a good connection.
- Digital Multimeter: This is a critical verification tool. A multimeter allows you to test for continuity and measure resistance, confirming you have established a low-resistance path to the battery. We recommend a digital multimeter over a simple test light for an accurate resistance reading.
What Materials Should You Use for a Car Ground Wire?
The quality and type of materials you select are just as important as the tools you use. Using the correct materials ensures a durable, corrosion-free, and safe ground connection that will last for years.
- Stranded Copper Wire: Always use stranded, not solid, automotive-grade copper wire. Stranded wire is flexible and resistant to breaking from vehicle vibrations. The wire gauge (thickness) must be appropriate for the electrical load. Think of it like a water pipe; a bigger pipe (lower gauge number) can carry more water (electrical current) with less effort (resistance).
- Ring Terminal: A closed-loop ring terminal provides the most secure connection. It offers a large surface area for electrical contact and won’t slip off the bolt if it ever becomes loose. Ensure the terminal’s hole size matches your bolt and the barrel size matches your wire gauge.
- Star Washer: This is a crucial component. Unlike a flat washer, a star washer has small teeth that bite into both the ring terminal and the chassis metal. This creates a vibration-proof mechanical lock and ensures excellent metal-to-metal contact.
- Self-Tapping Screw or Bolt: If you are creating a new ground point, a self-tapping screw designed for metal is a good choice. If using an existing factory hole, use the correct size and thread pitch bolt.
- Dielectric Grease: This is a non-conductive, silicone-based grease. As a best practice for corrosion prevention, a small amount should be applied over the entire connection after it has been fully tightened to seal it from moisture.
| Accessory Type | Recommended Ground Wire Gauge |
|---|---|
| LED Lighting (Low Power) | 16-18 Gauge |
| Car Stereo / Head Unit | 14-16 Gauge |
| Small Amplifier (up to 500W) | 8-10 Gauge |
| Large Amplifier (500W+) | 4 Gauge or Larger |
How Do You Find the Best Grounding Point in a Car?
To find a good ground in a car, look for a thick, bare metal surface on the vehicle’s main chassis or frame. The ideal spot is an existing factory ground bolt or stud. If creating a new point, choose a structural member away from fuel lines and moving parts. Locating a solid, reliable grounding point is arguably the most critical step in this entire process. A perfect connection to a bad location will still result in poor performance. The vehicle chassis [the main metal frame of the car] serves as the primary ground plane for the entire electrical system.
Based on our practical experience, the best results always come from following a clear hierarchy of choices. Don’t just pick the first piece of metal you see. Evaluating your options methodically prevents common issues like noise and intermittent faults.
Characteristics of a Good Grounding Point
- ✅ Thick, Structural Metal: The metal should be a substantial part of the car’s frame, firewall, or a major chassis component. Thin sheet metal can have higher resistance and may not provide a solid anchor.
- ✅ Unpainted and Clean: The connection must be to bare, shiny metal. Paint, primer, and rust are insulators that will block electrical flow.
- ✅ Away from Moving Parts: Keep the connection clear of pedals, steering columns, and engine components.
- ✅ Accessible: You need to be able to get a drill and wrench into the area to properly prepare and tighten the connection.
Hierarchy of Best Locations
- Use an Existing Factory Ground Point: This is the top choice. Automotive engineers have already designated these spots for optimal performance. Look for a bolt with multiple other black wires already connected to it, often found on the firewall, inner fender panels, or near the battery.
- Use a Major Structural Bolt: A large bolt that threads directly into the chassis, like a seat bolt, strut tower bolt, or subframe bolt, is the next best option. Remove the bolt, sand the paint from the contact area, and reinstall it with your new ground terminal underneath.
- Create a New Point on the Chassis: If no other options are available, you can create your own grounding point. Choose a thick, flat spot on the main chassis frame or firewall. This should be your last resort.
What to Avoid: Never ground to plastic trim panels, floating metal brackets mounted on rubber, the exhaust system, fuel lines, or any thin, painted body panel like a door skin.
How Do You Prepare the Surface and Wire for a Perfect Connection?
First, thoroughly clean your chosen grounding spot by scraping off all paint and rust with sandpaper or a wire brush to expose the bare metal. Next, use a wire stripper to carefully remove about 1/2 inch of insulation from the end of the ground wire, ensuring the copper strands are not damaged. This preparation stage is where attention to detail pays off. A shiny, clean connection is a corrosion-free connection with low electrical resistance, which is the ultimate goal.
In our testing, we’ve found that skipping this step is the single most common reason for a “bad ground.” Simply driving a screw through paint will not create a reliable electrical path. You must achieve a direct, bare metal connection for both the ring terminal and the head of the bolt or screw.
Here is the step-by-step process for a perfect prep job:
1. Define the Contact Area: Place your ring terminal on the chosen spot. Use a marker to draw a circle around it. This is the minimum area you need to clean.
2. Scrape to Bare Metal: Use a wire brush, sandpaper, or a Dremel with a sanding attachment to completely remove all paint, primer, and any surface rust inside that circle. The goal is to see a shiny, bright metal surface.
3. Strip the Wire End: Using your wire strippers, remove about a half-inch (1/2″) or 1.25cm of insulation from the end of your ground wire. It’s critical to not nick or cut any of the fine copper strands, as this reduces the wire’s capacity to carry current.
4. Twist the Strands: Gently twist the exposed copper strands together with your fingers. This keeps them neat and allows for easy insertion into the ring terminal’s barrel. The wire is now ready for crimping.
FAQs About How to Ground a Wire on a Car
What does a ground wire do on a car?
A ground wire on a car provides a return path for electrical current back to the negative terminal of the battery, completing the circuit. The car’s metal chassis acts as a large, common ground conductor, allowing components to be grounded locally instead of running a separate wire all the way back to the battery. This is essential for any electrical device to function correctly and safely.
Can a bad ground wire stop a car from starting?
Yes, a bad ground wire is a very common reason for a car not starting. The main ground strap, which connects the engine block to the chassis or directly to the battery, carries the high current needed by the starter motor. If this connection is loose or corroded, it creates high resistance, preventing the starter from getting enough power to turn the engine over.
What color is the ground wire on a car?
In modern cars, the ground wire is almost always black. This is a standard convention in DC automotive wiring. However, on older vehicles or in aftermarket wiring harnesses, colors can vary. It is always best to verify a wire’s function by tracing it to its connection point on the chassis rather than relying solely on color.
What happens if a ground wire is loose?
A loose ground wire can cause a wide range of strange electrical problems, including flickering lights, static in the radio, inaccurate sensor readings, and intermittent component failure. The connection’s high resistance can also generate heat, creating a fire hazard in high-current circuits. It can also cause a no-start condition if the main engine or battery ground is loose.
How do you ground a wire without a screw?
While a screw or bolt is the best method, you can temporarily ground a wire by using a strong spring clamp to attach it to a clean, unpainted metal surface. For a more permanent solution without drilling, you can find an existing factory bolt that is already threaded into the chassis (like a seat bolt or strut tower bolt), clean the area, and add your ring terminal there.
Is the car’s entire chassis a ground?
Yes, for the most part, the metal frame and body (the chassis) of the car are used as a common ground plane. This is why you can attach a ground wire to any substantial, unpainted metal part of the frame. However, isolated metal parts or components mounted on rubber bushings are not part of the ground plane and should not be used.
How do you check for a bad ground with a multimeter?
To check for a bad ground, set your multimeter to the lowest Ohms (Ω) resistance setting. Place one probe on the component’s ground terminal and the other probe on the negative battery post. A good ground connection should have a very low resistance reading, ideally under 1 Ohm. Any reading higher than a few ohms indicates a problem that needs to be fixed.
Why is my ground wire sparking when I connect it?
A ground wire should only spark if it is the last connection being made in a circuit that is already powered on and has a load. This is why it’s a critical safety rule to always connect the ground wire first and disconnect it last. If it sparks unexpectedly, it could indicate a short circuit or that a component is switched on.
Do you connect the ground wire first or last?
You should always connect the ground wire FIRST and disconnect it LAST. This is a crucial safety measure that prevents accidental short circuits. If the positive wire were to touch the chassis while the ground is disconnected, nothing would happen. But if the ground is connected first, that same accidental touch would be harmless.
What size ground wire do I need for a car amplifier?
The ground wire for a car amplifier must be the same gauge (thickness) as its positive power wire. This is critical because the ground carries the same amount of current as the power wire. Using an undersized ground wire will create a bottleneck, starving the amp for power, generating heat, and posing a significant safety risk.
Key Takeaways: How to Ground a Wire on a Car Summary
- A Solid Ground is Non-Negotiable: A ground wire is not optional; it’s the essential return path that completes the circuit for every electrical component. A poor ground is the root cause of countless automotive electrical problems.
- Location is Everything: The best grounding point is always a thick, structural piece of bare metal on the car’s main chassis or frame. Prioritize using an existing factory ground bolt before creating a new connection point.
- Preparation Defines Success: A ground connection is only as good as its contact. You must scrape away all paint, rust, and primer to achieve a shiny, bare metal surface for the ring terminal to mate with.
- Use the Right Materials: Always use high-quality, stranded copper wire of the correct gauge for the load. Secure it with a crimped ring terminal and a star washer to ensure a tight, vibration-proof electrical and mechanical bond.
- Test, Don’t Guess: The only way to be certain of a good ground is to test it. Use a multimeter to verify continuity and check for low resistance (less than 1 Ohm) between your new ground point and the negative battery terminal.
- Safety First, Always: Connect ground wires first and disconnect them last to prevent dangerous short circuits. Always disconnect the negative battery terminal before starting any significant electrical work.
- Diagnose Symptoms at the Source: Flickering lights, radio noise, and starting issues are classic symptoms of a bad ground. Before replacing components, always check the integrity of your main battery, engine, and chassis ground connections.
Final Thoughts
Properly grounding a wire on a car is a fundamental skill that forms the bedrock of a reliable and safe automotive electrical system. It’s a task that rewards precision and attention to detail. By following a systematic process—choosing the right location, meticulously preparing the surface, using high-quality materials, and verifying your work with a multimeter—you can eliminate a major source of electrical headaches. Mastering this process not only ensures your new accessories work flawlessly but also empowers you to diagnose and fix a wide range of future problems.
Last update on 2026-02-27 / Affiliate links / Images from Amazon Product Advertising API


![How to Install Safety 1st Car Seat Step by Step Guide [year]](https://i0.wp.com/carxplorer.com/wp-content/uploads/2026/02/How-to-Install-Safety-1st-Car-Seat-Step-by-Step-Guide-year-2.jpg?resize=60%2C60&ssl=1 "How to Install Safety 1st Car Seat Step by Step Guide [year] 4")


![How to Improve Car Torque Complete Guide for [year]](https://i0.wp.com/carxplorer.com/wp-content/uploads/2026/02/How-to-Improve-Car-Torque-Complete-Guide-for-year-2.jpg?resize=60%2C60&ssl=1 "How to Improve Car Torque Complete Guide for [year] 12")