Struggling to get the best performance out of your belt-driven Redcat RC car? You’re not alone. Many RC enthusiasts find dealing with belt tension adjustments frustrating, often leading to issues like slipping belts, annoying noises, or even premature wear on vital components. Getting that tension just right can feel like a dark art, impacting speed, acceleration, and the overall lifespan of your car.
Adjusting belt tension on your Redcat RC car typically involves locating and loosening the motor mount screws, carefully sliding the motor to achieve the correct belt deflection (often 1-2mm or 1/4-1/2 inch, check your manual!), verifying pulley alignment, and securely retightening the screws.
Don’t worry, mastering this crucial maintenance task is easier than you think! This guide will break down exactly how to adjust the belt tension on your Redcat RC car, step-by-step. We’ll cover why it’s essential, the tools you’ll need, troubleshooting common problems, and best practices to keep your machine running smoothly and efficiently. Stick around, and you’ll learn how to unlock peak performance and prevent costly damage.
Key Facts:
* Optimal Tension is Crucial: Correct belt tension ensures smooth power delivery, preventing slippage under load and maximizing acceleration according to RC maintenance guides.
* Prevents Premature Wear: Improper tension (too tight or too loose) drastically shortens the life of belts, pulleys, and even motor bearings, as noted by sources like Carbuzzpro.
* Too Tight is Damaging: An overly tight belt puts excessive strain on the motor, bearings, and transmission components, increasing friction and potentially leading to broken belts or motor failure.
* Too Loose Causes Slipping: A loose belt will likely slip on the pulleys, especially during acceleration or braking, leading to power loss, inefficiency, and potential heat buildup.
* Regular Checks Needed: Experts recommend checking belt tension every few runs or after heavy use, as belts can stretch slightly over time.
Why is Proper Belt Tension Essential for Your Redcat RC Car?
Proper belt tension on your Redcat RC car ensures smooth power delivery from the motor, prevents premature wear on belts and pulleys, and avoids slippage during acceleration. Maintaining correct tension is key to optimal performance and extending the life of your RC car’s components. A well-adjusted belt drive system is the heart of your car’s powertrain, directly translating motor power into wheel-spinning action. Getting it wrong can lead to a cascade of problems, hindering performance and potentially causing damage.
Think of the belt like the chain on a bicycle. If it’s too loose, it might skip or fall off. If it’s too tight, it makes pedaling harder and wears everything out faster. Your Redcat’s belt drive works similarly. Correct tension ensures efficient power transfer without unnecessary strain. It allows the motor to spin the wheels effectively without the belt slipping under load or binding due to excessive tightness. This translates to better acceleration, consistent speed, and a more responsive feel during driving.
Furthermore, maintaining the right tension significantly impacts the longevity of your RC car’s parts. Belts, pulleys, bearings, and even the motor itself are subjected to less stress when the tension is dialed in correctly. This simple adjustment is one of the most effective preventative maintenance tasks you can perform to keep your Redcat running strong for longer.
Understanding Belt Drive vs. Shaft Drive in RC Cars
Belt drive systems, like those found in some Redcat models, are known for their smooth and quiet operation. They often provide slightly more forgiving power delivery compared to shaft drive systems. However, they require periodic tension checks and adjustments. Shaft drive systems, conversely, are often considered more durable and lower maintenance in terms of adjustments, but can sometimes be noisier and transfer vibrations more directly. Neither is definitively “better”; they offer different performance characteristics and maintenance requirements.
Consequences of Incorrect Belt Tension
Failing to maintain proper belt tension can lead to several frustrating issues:
- Loose Tension:
- Slipping: The most common symptom. The belt skips over the pulley teeth, especially during hard acceleration or braking, resulting in poor performance and potential heat generation.
- Poor Acceleration: Power isn’t transferred efficiently from the motor to the wheels.
- Increased Wear: Slipping causes friction, which wears down both the belt and the pulley teeth prematurely.
- Heat Buildup: Friction from slipping generates heat, which can further damage the belt and nearby components.
- Tight Tension:
- Excessive Wear: Puts constant strain on the belt, pulleys, bearings (in the motor and transmission), leading to rapid wear.
- Reduced Efficiency: Increased friction requires the motor to work harder, potentially reducing runtime and top speed.
- Broken Belts: The constant high tension can cause belts to snap unexpectedly.
- Motor/Bearing Strain: Places significant stress on the motor shaft and bearings, potentially leading to premature failure.
What Tools Are Required for Redcat Belt Adjustment?
To adjust your Redcat RC belt, you’ll need basic hand tools like a screwdriver set, hex wrench set (Allen wrenches), and possibly needle-nose pliers. Optional but helpful tools include a caliper for precise measurement, thread lock for securing screws, and silicone-based belt lubricant. Having the right tools makes the job much easier and helps prevent stripping screws or damaging components.
Most adjustments involve loosening motor mount screws, which typically require hex drivers (Allen wrenches) of specific sizes common in RC cars. A good set covering sizes from 1.5mm to 3mm will usually suffice. Phillips head or flathead screwdrivers might be needed for other nearby components or body panels depending on your specific Redcat model. Needle-nose pliers can be helpful for holding small parts or manipulating wires out of the way.
While not strictly necessary for a basic adjustment, tools like a caliper can help measure belt deflection more accurately, though the “feel” method is often sufficient. Thread-locking compound (like blue Loctite) is recommended for re-securing motor mount screws to prevent them from vibrating loose over time. A silicone-based lubricant designed for belts can sometimes help reduce noise and friction, but use it sparingly.

- Essential Tools:
- Screwdriver Set: Phillips and potentially flathead drivers.
- Hex Driver Set (Allen Wrenches): Metric sizes (e.g., 1.5mm, 2.0mm, 2.5mm, 3.0mm) are crucial for most Redcat screws.
- Needle-Nose Pliers: Useful for gripping small parts or moving wires.
- Optional (Recommended) Tools:
- Caliper: For precise measurement of belt deflection (less common, usually done by feel).
- Thread Lock (Blue): Prevents motor mount screws from vibrating loose.
- Silicone-Based Belt Lubricant/Dressing: Can quiet noisy belts and potentially reduce friction (use sparingly).
- Small Brush: For cleaning debris from belts and pulleys.
How Do You Adjust Belt Tension on a Redcat RC Car Step-by-Step?
Adjusting Redcat RC belt tension involves locating and loosening motor mount screws, sliding the motor to achieve the correct belt deflection (often 1-2mm or about 1/4-inch of give, consult your manual), checking pulley alignment, retightening screws securely, and testing for smooth operation without slipping or grinding noises. This process is generally straightforward but requires careful attention to detail.
Take your time and make small adjustments. The goal is to find the sweet spot where the belt is tight enough to prevent slipping under load but not so tight that it binds or puts excessive strain on the components. Always refer to your specific Redcat model’s manual if available, as procedures and tension specifications can vary slightly.
Step 1: Initial Inspection – Check Belt Condition and Tension
Before adjusting, press the middle of the longest belt span; it should typically have about 1-2 mm of give (or roughly 1/4-inch deflection – check your manual). Inspect the belt visually for cracks, fraying, or missing teeth, and check pulleys and gears for any signs of damage, excessive wear, or misalignment using a straight edge if needed. This initial check tells you if an adjustment is necessary and if any parts need replacement.
Gently push down on the center of the belt run. Does it feel extremely tight with almost no movement, or very loose and sloppy? Look closely at the belt’s teeth and surface for any signs of wear or damage. Also, sight down the belt path – do the pulleys appear to line up perfectly straight? Any issues found here should be addressed before or during the tensioning process.
Step 2: Locate and Loosen the Motor Mount Screws
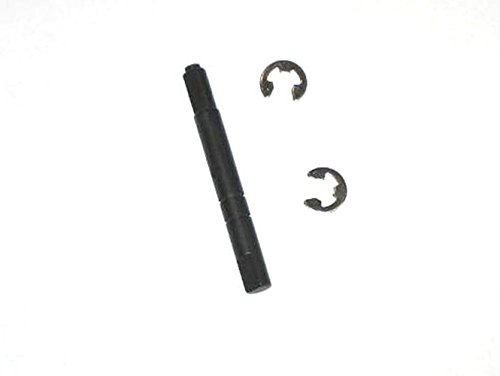
Identify the screws securing the motor to its mount or the mount to the chassis, usually located near the transmission or where the motor meshes with the drive system. Use the appropriate screwdriver or hex wrench to loosen these screws just enough so the motor can slide slightly for adjustment. Do not remove them completely. There are typically 2 to 4 screws holding the motor in place.
You need only loosen them enough to allow the motor assembly to shift position relative to the belt pulleys. Loosening them too much might make realignment tricky, while not loosening them enough will prevent adjustment. Ensure you have the correct size hex driver to avoid stripping the screw heads.
Step 3: Adjusting the Motor Position for Correct Tension
Carefully slide the motor away from the main drive pulley/transmission to tighten the belt, or slide it closer to loosen it. Make small, incremental adjustments, checking the tension frequently by pressing on the belt after each minor movement to avoid over-tightening or leaving it too loose. Patience is key here.
You might need to gently pry the motor or use the leverage points designed into the mount. Some chassis have dedicated adjustment screws that push or pull the motor. Check the tension after each small nudge. You’re aiming for that slight give specified earlier (or in your manual). It’s better to start slightly loose and gradually tighten than to overtighten immediately.
Step 4: Verifying Proper Belt Tension
Press the belt again in the middle of its longest span; aim for the deflection specified in your Redcat manual (often around 1/4 to 1/2 inch or a few millimeters). Rotate a wheel connected to the belt drive by hand; the movement should feel smooth throughout a full rotation without noticeable binding, excessive resistance, slipping, or grinding sounds. This confirms the tension is likely correct.
Double-check the feel. The belt shouldn’t feel like a guitar string (too tight) nor excessively floppy (too loose). The hand rotation test helps identify if the tension is causing binding or if the belt is still loose enough to skip teeth under manual load. Listen closely for any odd noises.
Step 5: Securing the Motor and Checking Pulley Alignment
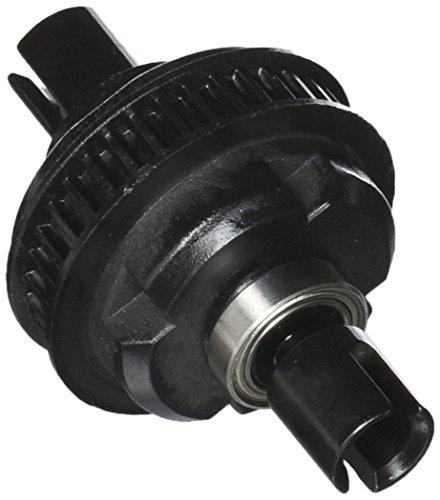
Once the tension feels correct, securely retighten all the motor mount screws evenly, applying a drop of blue thread lock before final tightening if desired. Use a straight edge (like a ruler or credit card) placed across the faces of the drive and driven pulleys to confirm they are perfectly aligned; adjust individual pulley positions by loosening their set screws, aligning, and retightening if necessary. Proper alignment is crucial for belt life.
Tighten the motor screws firmly but don’t overtighten and strip them. Alternating between screws can help ensure even pressure. Re-check the pulley alignment after tightening the motor mount, as the motor can sometimes shift slightly during tightening. If pulleys are misaligned, the belt will wear quickly on its edges and may try to walk off the pulley.
Step 6: Optional Lubrication
If desired, apply a very thin layer of silicone-based lubricant or belt dressing specifically designed for RC belts onto the belt surface. Wipe away any excess lubricant with a clean cloth. This step is optional and sometimes debated among enthusiasts. It may help quiet a noisy belt or reduce friction slightly, but overuse can attract dirt. If you choose to lubricate, ensure it’s a product safe for rubber/plastic belts and use it sparingly. Never use petroleum-based lubricants like WD-40, as they can damage the belt material.
Step 7: Final Testing Under Power
Reinstall the battery, turn on your transmitter and RC car, and conduct a low-speed test drive on a clean, flat surface. Listen carefully for any unusual noises (grinding, squealing, clicking) and observe the car’s acceleration. Ensure the belt isn’t slipping under gentle acceleration. This is the ultimate confirmation that your adjustment is successful.
Start slowly and gradually increase speed. Punch the throttle briefly to check for slippage. Drive forwards and backwards. If everything sounds smooth and performance feels responsive without belt skipping, your adjustment is complete. If you hear noises or notice slipping, revisit the tension and alignment steps.
How Can You Troubleshoot Common Redcat Belt Drive Issues?
Common Redcat belt issues include slipping (check tension, belt wear, pulley alignment, debris), grinding noises (inspect gears, bearings, debris), or squeaking (check tension, belt condition, consider belt dressing/lubricant). Incorrect tension is often the root cause, but worn parts or debris can also be culprits. Troubleshooting involves systematically checking these potential causes.
If your Redcat isn’t performing right after running it or adjusting the belt, don’t panic. Most belt drive problems stem from a few common areas. By methodically checking tension, alignment, component condition, and cleanliness, you can usually pinpoint and fix the issue quickly.
What Causes Belt Slipping and How to Fix It?
Belt slipping is often characterized by a loss of power during acceleration or a high-pitched squeal as the belt fails to grip the pulley.
- Causes:
- Loose Tension: The most frequent cause. The belt doesn’t have enough grip on the pulleys.
- Worn Belt Teeth: The belt’s teeth are rounded or damaged and can no longer properly engage the pulley grooves.
- Worn Pulley Teeth: The pulley grooves are worn down, preventing proper belt engagement.
- Debris: Dirt, pebbles, or grass caught between the belt and pulley can cause slipping.
- Misaligned Pulleys: If pulleys aren’t aligned, the belt may try to walk off and slip.
- Oil/Grease Contamination: Lubricants not meant for belts can cause them to slip.
- Solutions:
- Adjust Tension: Re-check and correctly set the belt tension (See Step 4).
- Replace Belt: Install a new, high-quality belt if the old one is worn or damaged.
- Replace Pulleys: Replace worn pulleys.
- Clean Components: Thoroughly clean the belt and pulleys, removing any debris.
- Align Pulleys: Ensure pulleys are perfectly aligned using a straight edge (See Step 5).
- Clean Contamination: Clean any improper lubricants off the belt and pulleys (replacement might be necessary if contaminated).
Identifying and Stopping Squeaking or Grinding Noises
Unusual noises are a clear sign something isn’t right in the drivetrain.
- Squeaking:
- Causes: Often due to incorrect tension (usually too loose, but sometimes too tight), a glazed or dirty belt, or sometimes dry pulley bearings.
- Solutions: Adjust tension correctly. Clean the belt and pulleys. Sparingly apply silicone belt dressing if tension and cleanliness don’t solve it. Check pulley bearings for smoothness.
- Grinding:
- Causes: This usually indicates a more serious issue like damaged gear teeth (in the transmission or differential connected to the belt system), failing bearings (making a rough, gritty noise), debris caught in gears, or severely misaligned components causing hard contact.
- Solutions: Stop running the car immediately! Carefully inspect all gears connected to the belt drive system for broken or chipped teeth. Check bearings for roughness or seizure. Clean out any visible debris from the drivetrain. Double-check pulley and gear alignment. Component replacement is often necessary for grinding issues.
What Are Best Practices for Maintaining Your Redcat’s Belt Drive System?
Maintain your Redcat belt drive by regularly inspecting tension (every few runs), cleaning belts and pulleys with a dry cloth or soft brush, replacing worn or damaged belts promptly with quality Redcat-approved parts, checking pulley alignment periodically, and storing the RC car in a clean, dry place. Consistent maintenance prevents most common issues and maximizes the lifespan of your components.
Treating your belt drive system with a little preventative care goes a long long way. A few minutes of inspection and cleaning after your runs can save you from frustrating failures and costly repairs down the road. Keeping the system clean and properly tensioned ensures reliable performance every time you hit the track or trail.

How Often Should You Inspect Belt Tension?
A quick check of belt tension is recommended every few runs, or always after a particularly hard bash session or landing hard jumps. A visual glance can often spot a very loose belt. A physical check (pressing on the belt) should be done periodically, perhaps every 3-5 battery packs, or if you notice any change in performance or noise. Belts can stretch slightly over time, especially when new, so initial checks might need to be more frequent.
Cleaning Belts and Pulleys Effectively
Use a clean, dry cloth or a soft brush (like an old toothbrush) to wipe down the belts and pulley grooves. Focus on removing any visible dirt, dust, sand, or small pebbles. Avoid using harsh chemicals, solvents, or excessive water, as these can degrade the belt material over time. The goal is simply to keep the contact surfaces clean for optimal grip and minimal wear.
Knowing When to Replace the Belt
Replace your Redcat belt if you observe any clear signs of wear or damage. Don’t wait for it to fail completely during a run. Look for:
- Cracks: Visible cracks on the flat back side or between the teeth.
- Fraying: Edges of the belt look fuzzy or are coming apart.
- Missing Teeth: Any teeth broken off or severely chunked.
- Excessive Stretching: If the belt seems noticeably looser than usual even after adjustment, or if you run out of adjustment range.
- Glazing: The belt surface looks shiny and hardened (reduces grip).
Always replace belts with high-quality parts specifically designed for your Redcat model (check Redcat Racing parts diagrams or your manual). Using incorrect or low-quality belts will lead to poor performance and premature failure.
FAQs About Adjusting Redcat RC Car Belts
Here are answers to some common questions about Redcat belt adjustments:
How tight should the belt be on my Redcat RC car?
It should be snug but not overly tight. A common guideline is allowing about 1/4 to 1/2 inch (or a few millimeters) of deflection when pressing firmly on the longest belt span. Always consult your specific Redcat model’s manual for precise recommendations, as it can vary. Over-tightening is generally more harmful than being slightly loose.
Can I use any lubricant on my RC car belt?
No, you should only use silicone-based lubricants or belt dressings specifically designed for RC car belts, and use them very sparingly. Avoid petroleum-based products like WD-40, grease, or oils, as they can damage the belt material and cause excessive slipping. Many users run belts dry without issues.
What happens if my Redcat belt is too loose?
A loose belt will likely slip on the pulleys, causing poor acceleration, loss of power, inefficient performance, and potential heat buildup. It can also increase wear on the belt and pulley teeth due to the friction of slipping. You might hear a squealing sound during acceleration.
What tools do I absolutely need for belt adjustment?
You absolutely need the correct size hex drivers (Allen wrenches) or screwdrivers to fit the motor mount screws on your specific Redcat model. Needle-nose pliers can also be very helpful. While other tools are useful, these are essential for the basic adjustment.
How do I know if my Redcat pulleys are aligned correctly?
Use a straight edge (like a metal ruler or credit card) placed across the faces of both the driving and driven pulleys. The edge should sit perfectly flat against both pulley faces simultaneously. If there’s a gap on one side of either pulley, they are misaligned and need adjustment.
Will adjusting the belt improve my Redcat RC car’s performance?
Yes, ensuring correct belt tension is crucial for optimal performance. It allows for efficient power transfer, leading to better acceleration, potentially higher top speeds, and more consistent power delivery compared to a car with a slipping or overly tight belt.
Why does my Redcat belt keep skipping?
Recurring belt skipping is usually caused by incorrect tension (too loose), a worn-out belt, worn-out pulleys, debris interfering with the belt/pulleys, or misaligned pulleys. Systematically check each of these potential causes to diagnose the root problem.
Where can I find replacement belts and Redcat parts?
Replacement belts and other parts can typically be found through the official Redcat Racing website, authorized Redcat dealers, local hobby shops specializing in RC cars, and major online RC hobby retailers. Ensure you get the correct part number for your specific model.
Is belt drive better than shaft drive for Redcat cars?
Neither is inherently “better”; they offer different characteristics. Belt drives are often smoother and quieter but require tension checks. Shaft drives are generally more robust and lower maintenance regarding adjustments but can be louder. The choice often depends on the specific model and intended use.
How often should I replace the belt on my Redcat RC?
There’s no fixed schedule; replace the belt based on its condition. Inspect it regularly (as mentioned in maintenance) and replace it when you see signs of significant wear like cracks, fraying, missing teeth, or excessive stretching. Belt life varies greatly depending on usage, power levels, and maintenance.
Summary: Key Takeaways for Redcat Belt Adjustment
Keeping your belt-driven Redcat RC car performing at its peak relies heavily on maintaining proper belt tension. It’s a critical adjustment that prevents frustrating issues like slipping and noise, while also extending the life of your valuable components.
Remember these key points:
- Correct Tension is Vital: Aim for the manufacturer-recommended deflection (often a few mm or 1/4-inch play) – not too tight, not too loose.
- Follow the Steps: Systematically inspect, loosen motor mounts, adjust motor position, verify tension and alignment, and retighten securely.
- Inspect Regularly: Check tension and belt condition every few runs.
- Keep it Clean: Remove debris from belts and pulleys.
- Replace When Worn: Don’t push a damaged belt; replace it promptly with quality parts.
- Troubleshoot Systematically: Address slipping or noise by checking tension, wear, alignment, and cleanliness.
By incorporating these simple checks and adjustments into your regular maintenance routine, you’ll ensure your Redcat RC car delivers consistent power and reliable fun for countless runs to come.
Now that you know the process, give it a try! Do you have any other tips for Redcat belt maintenance? Share your thoughts or questions in the comments below!


![3W Expedition Max Mats Review: Worth the Investment? [year]](https://i0.wp.com/carxplorer.com/wp-content/uploads/2026/04/3W-Expedition-Max-Mats-Review-Worth-the-Investment-year-scaled-1.webp?fit=128%2C73&ssl=1 "3W Expedition Max Mats Review: Worth the Investment? [year] 8")

![Yitamotor Ford Fusion Floor Mats Review: Worth It? [year]](https://i0.wp.com/carxplorer.com/wp-content/uploads/2026/04/Yitamotor-Ford-Fusion-Floor-Mats-Review-Worth-It-year-scaled-1.webp?fit=128%2C73&ssl=1 "Yitamotor Ford Fusion Floor Mats Review: Worth It? [year] 12")