Lost under the hood, staring at a confusing array of caps and reservoirs? Figuring out where does the antifreeze go in the car can feel like a high-stakes puzzle, especially when you know putting the wrong fluid in the wrong place can spell trouble for your engine. Many drivers feel uncertain identifying the correct fill point or worry about the safety steps involved in adding coolant.
Antifreeze (coolant) is added to the dedicated coolant reservoir or overflow tank located in the engine bay, typically a translucent plastic container near the radiator marked with ‘Min’ and ‘Max’ lines. Always ensure the engine is cool before opening the system.
Getting this simple maintenance task right is crucial for your car’s health, preventing both freezing in winter and overheating in summer. Stick around, and we’ll guide you step-by-step to confidently locate the antifreeze reservoir, understand the different types of coolant, and safely top up your system like a pro. We’ll cover everything from identifying the right components under the hood to the essential checks after you’ve added the fluid.
Key Facts:
* Dual Purpose: Antifreeze, technically engine coolant, works year-round, preventing freezing down to -30°F (or lower) and boiling up to 265°F (or higher) in a typical 50/50 mix when the system is pressurized.
* Corrosion is Key: Beyond temperature regulation, modern coolants contain sophisticated inhibitor packages to prevent rust, corrosion, and scale buildup within the engine block, radiator, water pump, and hoses.
* Water Pump Lubrication: Coolant also acts as a lubricant for the water pump’s seals and bearings, extending its lifespan. Running plain water can lead to premature pump failure.
* Lifespan Varies: Coolant doesn’t last forever. Traditional coolants might need changing every 2 years/30,000 miles, while long-life coolants can last 5 years/150,000 miles or even longer, depending on the type and manufacturer recommendations.
* Toxicity: Most traditional antifreeze contains ethylene glycol, which is highly toxic if ingested and harmful to pets attracted by its sweet taste. Proper handling and disposal are essential.
Why is Antifreeze Essential for Your Car’s Engine?
Antifreeze, also called coolant, is crucial for your car as it prevents the engine from overheating in hot weather and freezing in cold weather. It circulates through the engine, absorbing excess heat generated during combustion and carrying it away to the radiator, where it’s dissipated. Simultaneously, its chemical properties lower the freezing point of the water mixture, preventing it from turning solid and expanding in cold temperatures, which could crack the engine block or radiator.
Think of your car’s cooling system like the circulatory system in your body. Just as blood regulates body temperature and carries vital elements, coolant circulates constantly to maintain the engine within its optimal operating temperature range. An engine running too hot can lead to warped cylinder heads, blown head gaskets, or even catastrophic seizure. Conversely, an engine that doesn’t warm up properly or freezes internally experiences increased wear, poor fuel efficiency, and potential component damage. Effective temperature regulation is paramount for engine longevity and performance.
Beyond temperature control, antifreeze contains vital anti-corrosion additives. The mix of metals within an engine (iron, aluminum, copper, solder) and the circulating fluid can create an environment ripe for galvanic corrosion if left unprotected. These additives form a protective layer on internal surfaces, preventing rust, scale, and corrosion that could clog narrow passages in the radiator or heater core, impede heat transfer, and damage components like the water pump. Therefore, maintaining the correct level and type of antifreeze is a fundamental aspect of responsible vehicle ownership, safeguarding your engine against a multitude of potential problems.
Where Exactly Does the Antifreeze Go in the Car?
Antifreeze (coolant) goes into the coolant reservoir (also called the overflow tank or expansion tank) under your car’s hood. This is almost always a translucent or white plastic container situated near the radiator, making it easy to visually check the fluid level against the markings on its side. Look for a cap that often has a warning symbol (like steam or a radiator icon) indicating not to open it when the engine is hot.
Finding this reservoir is usually straightforward. Pop the hood and scan the engine bay, particularly around the large, finned radiator at the front of the vehicle. The reservoir is connected to the radiator via a small hose. It’s intentionally made of semi-clear plastic so you can see the coolant Clevel without removing the cap. Don’t confuse it with the windshield washer fluid reservoir, which usually has a symbol resembling a windshield and wipers on its cap.
Properly identifying this engine coolant reservoir is step one. It serves as the primary point for checking the coolant level and adding more fluid when necessary. While some older vehicles might require adding coolant directly to the radiator (when cold!), modern cars overwhelmingly use this reservoir system for ease and safety. Always consult your owner’s manual if you’re unsure, but the plastic tank near the radiator is your target.
Identifying the Coolant Reservoir vs. the Radiator Cap
It’s critical to add antifreeze to the coolant reservoir, not directly into the radiator through the radiator cap (unless specifically instructed by a mechanic for certain service procedures like system bleeding). Distinguishing between the two is simple once you know what to look for:
- Coolant Reservoir (Overflow Tank):
- Material: Typically translucent or white plastic.
- Location: Usually mounted to the side of the engine bay, near the radiator or fender well. Connected to the radiator neck by a small rubber hose.
- Cap: Often a simple plastic screw-on or snap-on cap, sometimes colored (e.g., black, yellow, blue), frequently featuring a warning symbol about hot coolant/steam.
- Markings: Clearly visible “Min” (Minimum/Low) and “Max” (Maximum/Full) lines molded into the plastic indicate the proper cold coolant level range.
- Purpose: Holds excess coolant that expands when hot and returns it to the radiator as it cools. It’s the primary point for checking levels and topping up.
- Radiator Cap:
- Material: Almost always metal, often with plastic grips on top.
- Location: Directly on top of the radiator itself, or sometimes on a metal housing connected to the upper radiator hose.
- Cap: A larger, more complex cap designed to hold pressure (typically 13-18 psi). It has spring mechanisms and rubber seals. It will always have a prominent warning label advising against opening when hot due to high pressure and temperature.
- Markings: No Min/Max level indicators. May show pressure rating.
- Purpose: Seals the cooling system, allowing it to pressurize, which raises the boiling point of the coolant. It also allows excess pressure/coolant to escape to the reservoir when hot and draws coolant back from the reservoir when cooling. You typically do not add coolant here.
Mistakenly opening a hot radiator cap can cause severe burns from escaping steam and boiling coolant. The coolant reservoir cap, while still requiring caution (open slowly if the engine is even slightly warm), is generally much safer to access for topping up fluid when the engine is cool.
Reading the Markings: ‘Min’ and ‘Max’ Levels
The ‘Min’ (or ‘Low’) and ‘Max’ (or ‘Full’) lines on the coolant reservoir indicate the correct operating range for the coolant level when the engine is completely cold. The fluid level should ideally sit somewhere between these two marks for the cooling system to function efficiently and safely. These markings account for the expansion and contraction of the coolant as the engine heats up and cools down.
Checking the level is simple: ensure the car is parked on level ground and the engine hasn’t been running for at least a few hours (ideally overnight) to be completely cool. Locate the translucent reservoir and observe where the coolant level sits relative to the ‘Min’ and ‘Max’ lines molded into the plastic.
If the level is below the ‘Min’ mark, you need to add coolant. If the level is significantly above the ‘Max’ mark (especially when cold), it might indicate an overfill or a potential issue preventing coolant from being drawn back into the radiator, though slight variations are normal. Keeping the level within the designated range ensures there’s enough coolant to circulate and absorb heat, plus sufficient space in the reservoir to accommodate thermal expansion without overflowing.

How Do You Safely Add Antifreeze to Your Car?
To safely add antifreeze, first and foremost, ensure the engine is completely cool and turned off. Never attempt to open the cooling system when the engine is hot or even warm. Slowly twist the coolant reservoir cap counter-clockwise (often about half a turn) to release any residual pressure – you might hear a faint hiss. Once pressure is released, continue unscrewing and remove the cap completely. Using a clean funnel, pour the correct type and mixture of antifreeze/coolant into the reservoir, stopping when the level reaches the ‘Max’ or ‘Full’ line. Avoid overfilling. Finally, securely screw the reservoir cap back on until it’s tight.
Adding coolant is a relatively simple maintenance task, but following the safety steps is non-negotiable. The cooling system operates under pressure when hot, and the coolant can reach temperatures well above boiling point. Opening it prematurely can lead to projectile caps and severe burns from scalding liquid and steam. Always allow ample time for the engine to cool down – touching the radiator hoses is a good (but cautious) check; they should feel cool to the touch.
Beyond safety, using the correct type and mixture of antifreeze is vital, as detailed below. Pouring slowly using a funnel prevents spills, as antifreeze can be corrosive to paint and is toxic. Ensure the cap is fully secured afterward to maintain system pressure and prevent leaks. This straightforward procedure, done correctly, helps keep your engine protected.
Safety First: Why You MUST Wait for the Engine to Cool
Waiting for the engine to cool down completely before checking or adding antifreeze isn’t just a suggestion; it’s an absolute safety imperative. The primary reason is the high pressure and extreme temperature within the cooling system when the engine is operational or has recently been turned off. Coolant can easily exceed 220°F (104°C), and the system is pressurized (typically 13-18 psi) to raise the boiling point even further.
Attempting to open the radiator cap or even the reservoir cap on a hot system can have dangerous consequences:
* Severe Burns: The sudden release of pressure can forcefully eject the cap and spray scalding hot coolant and steam over a wide area, causing severe thermal burns on contact with skin.
* Projectile Hazard: The cap itself can become a projectile under pressure, potentially causing injury.
* Inaccurate Level Reading: Coolant expands when hot, so checking the level in the reservoir while the engine is warm will give a false high reading. Accurate assessment requires checking when cold.
Tip: As a rule of thumb, wait at least 30 minutes after driving, and ideally several hours or overnight, before opening any part of the cooling system. Always touch the upper radiator hose cautiously; if it’s hot, the system is still too hot to open safely. Use a rag to cover the cap as you slowly loosen it, turning your face away as an extra precaution.
Choosing the Right Type of Antifreeze (IAT, OAT, HOAT)
Always use the antifreeze type specified in your vehicle’s owner’s manual (e.g., IAT, OAT, HOAT). Using the wrong type or mixing incompatible types can seriously harm your cooling system, leading to corrosion, reduced cooling efficiency, and potential component failure. The color of the antifreeze is not a reliable indicator of its type anymore, as manufacturers use various dyes.
Coolant technology has evolved, resulting in several main types:
* IAT (Inorganic Additive Technology): The traditional green coolant common in older vehicles (pre-mid-1990s). Contains silicates and phosphates for corrosion protection but has a shorter lifespan (typically 2 years/30,000 miles).
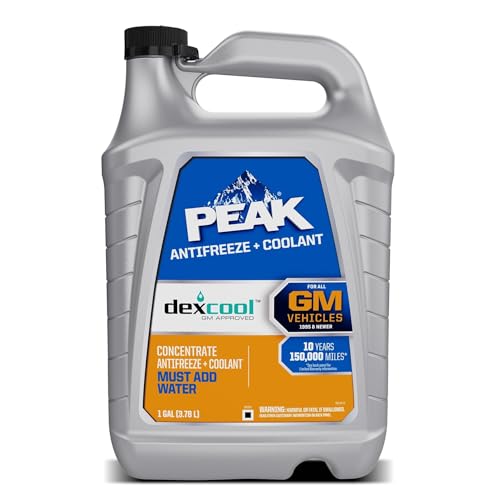
* OAT (Organic Acid Technology): Often orange, yellow, red, or purple. Uses organic acids for longer-lasting corrosion protection, typically found in GM vehicles (Dex-Cool is a common example) and some European/Asian models. Lifespan is usually 5 years/150,000 miles. Generally not compatible with IAT.
* HOAT (Hybrid Organic Acid Technology): A hybrid mix, often dyed yellow, gold, turquoise, pink, or purple. Contains organic acids plus silicates (European versions) or nitrites (some Asian/US versions) for enhanced protection. Found in many Chrysler, Ford, Mercedes-Benz, BMW, and other vehicles. Lifespan is typically 5 years/150,000 miles. Compatibility varies; check the manual!
* P-HOAT (Phosphated HOAT): Often pink or blue. Common in many Asian manufacturer vehicles (Toyota, Honda, Nissan, Hyundai, Kia). Uses phosphates instead of silicates along with organic acids.
Mixing incompatible types (like IAT and OAT) can cause the additives to react negatively, potentially leading to:
* Gelling/Sludge: The mixture can thicken or precipitate, clogging the radiator and heater core.
* Reduced Corrosion Protection: The chemical balance is upset, compromising the ability to protect internal components.
* Water Pump Damage: Abrasive precipitates can damage water pump seals.
Bottom Line: Your owner’s manual is the definitive guide. If unsure, check the manual, consult your dealership, or look for antifreeze specifically labeled as compatible with your vehicle’s make, model, and year. Don’t guess based on color!
Pre-Mixed vs. Concentrated: Getting the 50/50 Mix Right
When purchasing antifreeze, you’ll typically find two options: pre-mixed (ready-to-use) or concentrated. You can use pre-mixed 50/50 antifreeze directly from the bottle or mix concentrated antifreeze with distilled water (never tap water) in a strict 50/50 ratio. Achieving the correct mixture is critical for optimal freezing and boiling point protection, as well as corrosion inhibition.
- Pre-Mixed (50/50):
- Pros: Convenient, eliminates guesswork, ensures the correct water type (already mixed with deionized/distilled water). Ideal for topping up small amounts.
- Cons: More expensive per unit of antifreeze, takes up more storage space.
- Concentrated:
- Pros: More economical, less storage space required. Allows for custom ratios in extremely cold climates (though 50/50 is standard for most conditions).
- Cons: Requires careful mixing with the correct type of water. Risk of incorrect ratio if not measured properly.
Why Distilled Water? Tap water contains minerals (like calcium and magnesium) and potentially chlorine, which can:
* React negatively with coolant additives.
* Cause scale buildup inside the cooling system, reducing efficiency.
* Accelerate corrosion.
Mixing Procedure (if using concentrate):
1. Use a clean, dedicated container (not one used for oil or other fluids).
2. Measure equal parts of concentrated antifreeze and distilled water (e.g., 1 gallon of concentrate + 1 gallon of distilled water).
3. Mix thoroughly before adding to the vehicle.
For most drivers, especially for simple top-ups, the convenience of pre-mixed 50/50 coolant outweighs the slight cost saving of concentrate. However, if doing a full system flush and refill, concentrate might be more economical, provided you mix it correctly with distilled water.
What Should You Do After Adding Antifreeze?
After adding antifreeze to the correct level in the reservoir, **secure the reservoir cap tightly, start the engine, and let it run for several minutes (10-15 mins) with the heater control set to the highest heat setting and the fan on low. This vital step circulates the newly added coolant throughout the system, including the heater core, and helps purge any trapped air pockets. Once the engine has run and cooled down completely again, re-check the coolant level in the reservoir and top up if needed. Finally, perform a visual inspection under the hood and under the car for any signs of leaks.
Just pouring in coolant isn’t the final step. Ensuring it circulates properly and that the system is free of air is crucial for efficient cooling. Air trapped in the system can cause erratic temperature fluctuations, poor heater performance, and even localized overheating if it forms a large bubble preventing coolant flow. Running the engine with the heater on helps push coolant through the entire circuit.
Checking the level again after a heat cycle and subsequent cool-down is important because any purged air will be replaced by coolant drawn from the reservoir, potentially lowering the level slightly below the ‘Max’ mark. Spotting leaks early, especially after disturbing the system by adding fluid, can prevent major problems down the road. These post-fill checks ensure the job is done correctly and safely.
Running the Engine and Checking Levels Again
After topping up the coolant reservoir, running the engine serves two main purposes: circulating the new fluid and bleeding out trapped air. Start the engine and let it idle. Turn your vehicle’s heater control to the maximum heat setting and the fan speed to low or medium. This opens the valve to the heater core, ensuring the coolant circulates through that circuit as well, which is often a place where air gets trapped.
Allow the engine to run for approximately 10 to 15 minutes, or until it reaches normal operating temperature (you’ll see the temperature gauge on your dashboard stabilize). Keep an eye on the temperature gauge to ensure it doesn’t climb into the red zone (overheat). You might hear gurgling sounds from the dashboard area as air works its way out.
Crucially, turn the engine off and let it cool down completely (this may take several hours) before checking the level again. As the coolant circulates and air escapes, the level in the coolant reservoir might drop. Once cool, re-open the reservoir cap (slowly, releasing pressure first) and add more of the correct 50/50 coolant mixture if the level has fallen below the ‘Max’ line. Repeat this heat cycle/cool-down/re-check process if you added a significant amount of coolant or suspect major air pockets.
Inspecting for Leaks Under the Hood
Leaks are a common reason for low coolant levels. After adding antifreeze and running the engine, it’s wise to perform a thorough visual inspection for any signs of escaping fluid. Do this both immediately after running the engine (look for active drips or steam) and again after it has cooled (check for puddles or residue).
Use a flashlight to carefully examine these key areas:
* Hoses: Check all radiator hoses (large upper and lower ones), heater hoses (usually smaller, going towards the passenger compartment firewall), and any bypass hoses. Look for cracks, bulges, softness, or dampness, especially around the connection clamps.
* Radiator: Inspect the radiator core (fins) for wet spots or damage. Check the seams where the plastic end tanks (if applicable) meet the metal core.
* Coolant Reservoir: Ensure the cap is tight and check the tank itself and its connecting hose for cracks or leaks.
* Water Pump: Locate the water pump (often driven by a belt at the front of the engine). Look for drips or coolant residue around its pulley shaft or from a small ‘weep hole’ designed to indicate seal failure.
* Thermostat Housing: Find where the upper radiator hose connects to the engine; the thermostat is usually housed here. Check the gasket area for leaks.
* Heater Core: While harder to see (located inside the dashboard), check the passenger side floor carpet for dampness or a sticky feel, which could indicate a leak here. A persistent sweet smell inside the cabin is another clue.
* Under the Car: Look for any puddles or drips on the ground after the car has been parked. Note the color (green, orange, pink, etc.) to confirm it’s coolant.

A distinct, sweet smell is also characteristic of ethylene glycol antifreeze. If you find any leaks, address them promptly, as even small leaks can lead to low coolant levels, overheating, and potential engine damage.
Where Does the Coolant Go When the Car is Running?
When the car runs, coolant circulates constantly in a specific path: it’s drawn from the bottom of the radiator (now cooled) by the water pump, pushed through passages in the engine block and cylinder head (absorbing heat), flows past the thermostat (if hot enough), enters the top of the radiator (where heat is released to the air), and flows back down to the bottom, ready for the cycle to repeat. Simultaneously, some hot coolant is diverted through the heater core (located inside the dashboard) to provide warmth to the cabin when the heater is turned on. The coolant reservoir acts as an expansion chamber and reserve supply, connected to the radiator neck.
This continuous circulation is the heart of the cooling system. The water pump, usually belt-driven, acts as the pump, forcing the fluid movement. As the coolant travels through the engine’s specially designed water jackets (the internal passages), it picks up the intense heat generated by fuel combustion.
The thermostat acts like a gatekeeper. When the engine is cold, it remains closed, blocking flow to the radiator and allowing the engine to warm up quickly. Once the coolant reaches a specific temperature (typically 180-205°F), the thermostat opens, allowing the hot coolant to flow into the radiator. Here, the large surface area of fins allows air (either from vehicle movement or a fan) to pass through and dissipate the heat from the coolant. The cooled liquid then collects at the bottom of the radiator to be drawn back into the engine by the water pump. The heater core is like a mini-radiator; when you turn on the heat, hot coolant flows through it, and the car’s blower fan pushes air across it to warm the passenger compartment. This elegant system ensures the engine stays within its ideal temperature range, whether idling in traffic or cruising on the highway.
FAQs About Adding Antifreeze
Got more questions about where the antifreeze goes in the car or how to handle it? Here are answers to some common queries:
Do you just pour antifreeze straight in?
Generally, yes, if you are using pre-mixed 50/50 antifreeze. Pour it directly into the coolant reservoir (when the engine is cold) up to the ‘Max’ line. If using concentrated antifreeze, you MUST mix it 50/50 with distilled water first in a separate container before pouring it into the reservoir.
Where is the coolant going if my car keeps losing it?
If your coolant level repeatedly drops, you likely have a leak somewhere in the cooling system. Common culprits include cracked hoses, a leaking radiator, a failing water pump seal, a loose clamp, a faulty radiator cap, or even a leaking head gasket (which is more serious). Inspect carefully for drips, puddles, steam, or a sweet antifreeze smell.
Does the car need to be running when adding coolant?
No, absolutely not. For safety, the engine must be completely cool and turned OFF before you open the reservoir cap and add coolant. Adding coolant to a hot, running engine is dangerous due to high pressure and temperature. You only run the engine after adding coolant and securing the cap, to circulate the fluid and bleed air.
Can I add coolant to the radiator instead of the reservoir?
On most modern cars, you should add coolant only to the reservoir (overflow tank). The radiator cap is primarily for sealing the pressurized system. While some older cars or specific procedures (like bleeding after a flush) might involve the radiator cap, routine topping up is done via the reservoir when the engine is cold.
What happens if I put the wrong type of antifreeze in my car?
Using the wrong type or mixing incompatible types (like IAT and OAT) can be detrimental. It can cause the coolant to gel or form sludge, clogging the radiator and heater core. It can also reduce or eliminate corrosion protection, leading to damage to the engine, radiator, and water pump. Always use the type specified in your owner’s manual.
Can I just add water instead of antifreeze?
No, you should not use only water. While water is a component of coolant, straight water lacks essential properties: it freezes at 32°F (0°C), boils at 212°F (100°C) (too low for engine temps), and contains no corrosion inhibitors. In an emergency to get to safety, adding a small amount of water might be necessary, but the system should be properly flushed and refilled with the correct 50/50 mix as soon as possible. Use distilled water if you must add water.
How often should I check my antifreeze level?
It’s good practice to check your coolant level at least twice a year (e.g., before summer and winter) and before any long road trips. Check it more often if you notice any signs of leaks or if your temperature gauge starts reading higher than normal. Always check when the engine is cold.
What do the different colors of antifreeze mean?
Originally, colors signified different types (green for IAT, orange for OAT), but color is no longer a reliable indicator. Manufacturers now use various dyes (red, pink, blue, yellow, purple, green, orange) for different formulations, even within the same technology (e.g., different HOAT types can have different colors). Always rely on the owner’s manual specification, not the color.
How do I know if I have air in my cooling system?
Signs of air in the system include: an erratic or high-reading temperature gauge, poor heater performance (blowing cold or lukewarm air when set to hot), or hearing gurgling sounds from the dashboard area (heater core) or engine bay. Running the engine with the heater on after a refill helps bleed air out. Stubborn air pockets may require a specific bleeding procedure.
What should I do if I spill antifreeze?
Clean up spills immediately. Ethylene glycol is toxic. Wear gloves. Use rags, paper towels, or absorbent material (like cat litter) to soak it up. Wash the area thoroughly with soap and water, as antifreeze can damage paint if left sitting. Dispose of the contaminated materials responsibly according to local regulations (often treated as hazardous waste). Keep pets and children away from the spill area.
Summary: Key Takeaways for Adding Antifreeze
Navigating basic car maintenance like checking and adding antifreeze doesn’t have to be daunting. Understanding where the antifreeze goes in the car and following the correct procedures ensures your engine stays protected from extreme temperatures and internal corrosion. Remember these crucial points:
- The Right Spot: Antifreeze/coolant is added to the coolant reservoir (overflow tank) – the translucent plastic container near the radiator, marked with ‘Min’ and ‘Max’ lines.
- Safety First: ALWAYS ensure the engine is completely cool before opening the reservoir or radiator cap to avoid dangerous pressure release and burns.
- Correct Type Matters: Use only the antifreeze type specified in your vehicle’s owner’s manual (IAT, OAT, HOAT, etc.). Do NOT rely on color alone. Mixing incompatible types can cause significant damage.
- Proper Mixture: Use either pre-mixed 50/50 coolant or mix concentrated coolant precisely 50/50 with distilled water.
- Check the Level: Maintain the coolant level between the ‘Min’ and ‘Max’ marks on the reservoir when the engine is cold.
- After Adding: Secure the cap, run the engine with the heater on high for 10-15 minutes to circulate fluid and purge air, let it cool completely, recheck the level, and inspect for leaks.
By following these guidelines, you can confidently manage your car’s coolant level, contributing significantly to its overall health and longevity. Have you checked your coolant level recently? Feel free to share your experiences or ask further questions in the comments below!