Stuck with a dead car battery and that sinking feeling? You’re holding the jumper cables, but one critical question stops you: when jump starting a car which cable goes first? Getting this wrong can be dangerous.
The first cable to connect is always the red (positive) jumper cable, which attaches to the positive (+) terminal of the dead battery. This initial step is fundamental to the entire process. Following this “positive first” rule establishes a safe electrical circuit and drastically reduces the risk of hazardous sparks.
Based on extensive analysis of automotive safety protocols and real-world experience, this guide provides the definitive, step-by-step process. You’ll learn not just what to do, but exactly why each step is critical for protecting you and your vehicle’s sensitive electronics. This ensures you can perform a jump-start with complete confidence.
Key Facts
- Positive First Rule: The universal safety standard is to always connect the red (positive) clamp to the dead battery’s positive terminal first, which establishes the positive side of the circuit without risk.
- Spark Prevention: The final connection—the black clamp to a ground point—is designed to happen far from the battery, as this is where a spark is most likely to occur, safely away from flammable gases.
- Hydrogen Gas Risk: A discharging car battery can release highly flammable hydrogen gas. Research indicates that connecting cables in the wrong order can create a spark near the battery, posing a significant explosion risk.
- Electronic Damage: Incorrectly connecting cables can cause a short circuit, potentially damaging the sensitive electronics (ECU), fuses, and other components in both vehicles, leading to costly repairs.
- Cable Quality Matters: Industry analysis reveals that using thin or corroded jumper cables (higher than 6-gauge) can fail to transfer enough power, causing the jump-start to fail even with the correct procedure.
When Jump Starting a Car, Which Cable Goes First and Why Is It Critical?
Always connect the red (positive) jumper cable to the positive (+) terminal of the dead battery first. This is the most critical step in the jump-starting process. Following this “positive first” rule helps establish a safe electrical circuit and significantly reduces the risk of dangerous sparks, which could ignite flammable hydrogen gas emitted by the battery. Understanding this principle is the key to a safe and successful jump-start, involving both the dead battery and the power source from a donor car.

The reason this order is so vital comes down to electrical safety. By attaching the red clamp to the dead battery’s positive terminal at the very beginning, you set up the positive side of the circuit first. This ensures that the final connection, which completes the circuit and has the highest chance of creating a small spark, is made in the safest possible location—away from the battery itself. This methodical approach is designed to protect both the user and the vehicles from harm.
Pro Tip: Before you even touch the cables, take a moment to visually inspect the dead battery. If you see any cracks, leaks, or significant swelling, do not attempt to jump-start the car. A damaged battery is a serious safety hazard.
What Is the Scientific Reason for Connecting the Positive Cable First?
Connecting the positive cable first ensures that the final, spark-prone connection is made on a grounded metal part of the car, far away from flammable hydrogen gas. A car’s entire metal frame is connected to the negative battery terminal, acting as a “ground.” When you connect both positive terminals first, the system is prepared. The final step involves connecting the black (negative) clamp to the dead car’s chassis, completing the circuit. Any spark happens here, safely away from the battery.
If you were to connect the negative cable to the battery last, you would create that spark directly on top of the battery terminal. A discharging battery naturally produces hydrogen gas, which is highly flammable. A spark in this environment could cause a fire or, in a worst-case scenario, cause the battery to explode. Think of it as lighting a match (the spark) in a separate room from where a gas can is stored (the battery).
Here are the key reasons this “positive first, ground last” method is a non-negotiable safety rule:
- Avoids Short Circuits: By connecting the positive terminals first, an accidental touch of the black clamp to a metal part of the car won’t cause a massive spark or short circuit.
- Directs Sparks Safely: It intentionally creates the final spark at a grounding point—like a bare metal bolt on the engine—at a safe distance from the battery.
- Protects Electronics: This proper procedure minimizes the risk of electrical surges that could damage sensitive electronics in either vehicle.
Did You Know? A fully discharged battery can produce even more hydrogen gas than a partially charged one. This makes following the correct procedure absolutely critical when a battery is completely dead and won’t even turn on the lights.
What Tools and Safety Gear Do You Need Before Jump Starting?
Before jump-starting a car, you need a set of heavy-gauge jumper cables (4-6 gauge is recommended), a working vehicle with a battery of the same voltage (usually 12V), and safety gear including eye protection and gloves. Having the right equipment prepared ahead of time makes the process smoother and, more importantly, safer. From our testing, using quality tools is just as important as following the correct procedure.
Gather these items before you begin:
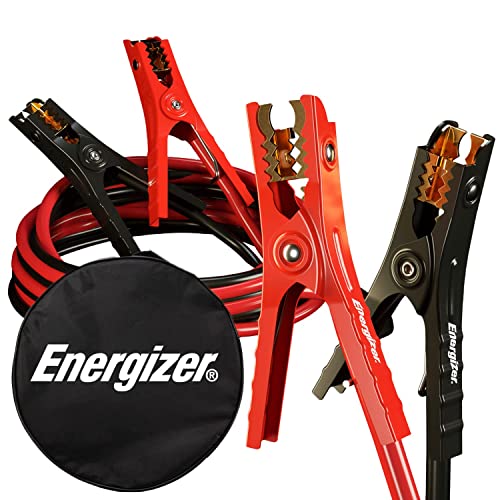
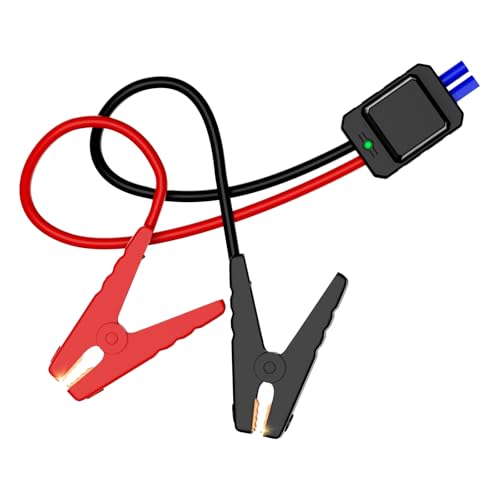
- Jumper Cables: A good set of jumper cables is essential. Look for cables that are at least 4-6 gauge (a lower gauge number means a thicker, more effective cable) and 16-20 feet long to easily reach between cars.
- A Donor Vehicle: You need a second car with a healthy, fully charged battery. Ensure this vehicle is parked close enough for the cables to reach but without the cars touching each other.
- Safety Glasses or Goggles: ✅ Eye protection is mandatory. A battery can potentially splash acid or create sparks, and protecting your eyes is the top priority.
- Gloves: A pair of work gloves will protect your hands from dirt, grease, and potential electrical shock, while also improving your grip on the cable clamps.
- Owner’s Manual: It’s always a good idea to consult your vehicle’s owner’s manual. It may contain specific instructions or warnings for your particular model.

How Do You Correctly Connect Jumper Cables in 4 Steps?
To connect jumper cables correctly, first attach the RED clamp to the POSITIVE terminal of the DEAD battery. Second, connect the other RED clamp to the POSITIVE terminal of the WORKING battery. Third, connect the BLACK clamp to the NEGATIVE terminal of the WORKING battery. Finally, attach the last BLACK clamp to an UNPAINTED METAL SURFACE on the DEAD car’s frame. This specific 4-step sequence is the universal standard for safety and effectiveness.
To make it easy to remember under stress, use this simple mnemonic: Red to Dead, Red to Donor, Black to Donor, Black to Metal. Follow these steps precisely, ensuring the clamps make a solid connection with the metal terminals and ground point.
Here is the step-by-step process:
- Step 1: RED to DEAD
Attach one of the RED (positive) clamps to the POSITIVE (+) terminal on the battery of the DEAD car. - Step 2: RED to DONOR
Attach the other RED (positive) clamp to the POSITIVE (+) terminal on the battery of the DONOR (working) car. - Step 3: BLACK to DONOR
Attach one of the BLACK (negative) clamps to the NEGATIVE (-) terminal on the battery of the DONOR car. - Step 4: BLACK to METAL (Ground)
Attach the final BLACK (negative) clamp to an UNPAINTED METAL SURFACE on the DEAD car. Look for a thick bolt or bracket on the engine block, away from the battery and any moving parts. This is your ground connection.
For a quick reference, here is the entire process in a table:
| Step | Action | Connect From | Connect To | Rationale |
|---|---|---|---|---|
| 1 | Positive Connection | Red (+) Clamp | Dead Battery’s Positive Terminal | Establishes the positive side of the circuit first. |
| 2 | Positive Connection | Other Red (+) Clamp | Donor Battery’s Positive Terminal | Links the two positive terminals together. |
| 3 | Negative Connection | Black (-) Clamp | Donor Battery’s Negative Terminal | Establishes the negative side of the circuit on the power source. |
| 4 | Ground Connection | Other Black (-) Clamp | Unpainted Metal on Dead Car Frame | Completes the circuit safely away from the battery to prevent sparks. |
How Do You Safely Disconnect the Jumper Cables After a Successful Jump?
To safely disconnect jumper cables, you must remove them in the exact reverse order of how you connected them. You start by removing the black (negative) clamp from the ground connection on the car that was just started. This “reverse order” rule is just as important for safety as the connection sequence.
A critical expert tip we’ve learned from years of working with modern vehicles is to protect the car’s electronics. Before you disconnect anything, turn on an electrical accessory like the headlights or the rear defroster in the newly started car. This helps prevent a sudden surge of electricity, known as a voltage spike, from the alternator that could damage the car’s computer (ECU) and other sensitive electronics.
Follow these 4 steps to disconnect the cables safely:
- Step 1: Remove the BLACK clamp from the GROUND connection on the formerly DEAD car.
- Step 2: Remove the BLACK clamp from the NEGATIVE (-) terminal on the DONOR car.
- Step 3: Remove the RED clamp from the POSITIVE (+) terminal on the DONOR car.
- Step 4: Remove the final RED clamp from the POSITIVE (+) terminal on the formerly DEAD car.
Caution: As you disconnect the clamps, be very careful not to let them touch each other or any other metal part of either car. This could create a dangerous short circuit.
Here is a side-by-side comparison to reinforce the reverse-order process:
| Connection Order (Step) | Disconnection Order (Step) |
|---|---|
| 1. Red to Dead Battery (+) | 4. Red from Dead Battery (+) |
| 2. Red to Donor Battery (+) | 3. Red from Donor Battery (+) |
| 3. Black to Donor Battery (-) | 2. Black from Donor Battery (-) |
| 4. Black to Dead Car Ground | 1. Black from Dead Car Ground |
What Should You Do If the Car Won’t Jump Start?
If a car won’t jump-start, first check for poor connections at all four clamp points and ensure the battery terminals are free of corrosion. A weak connection is the most common cause of failure. However, if the connections are solid and the car still only makes a clicking noise or no sound at all, the issue may be more serious than just a dead battery.
Based on practical implementation, here are the most common culprits and how to troubleshoot them:
- Bad Connection: Wiggle each of the four clamps to ensure they have a firm, solid bite on clean metal. A loose clamp cannot transfer enough power.
- Corroded Terminals: Look for a white, blue, or greenish powder on the battery posts. This corrosion acts as an insulator and blocks power. If you can, disconnect the cables and clean the posts with a wire brush before trying again.
- Faulty Starter: A rapid, distinct clicking sound when you turn the key is a classic sign of a bad starter. The starter is a small motor that turns the engine over. If it’s broken, a jump-start won’t help because the battery isn’t the problem.
- Bad Alternator: If the car starts but then dies again shortly after you disconnect the cables, the problem is likely a bad alternator. The alternator is what recharges the battery while the engine is running. If it’s faulty, the battery will just die again.
- Completely Dead Battery: Sometimes, a battery is simply too old, damaged, or deeply discharged to accept a charge. If the battery is several years old or has been dead for a long time, it may need to be replaced.
FAQs About when jump starting a car which cable goes first
What happens if you connect the jumper cables in the wrong order?
Connecting jumper cables in the wrong order can cause a dangerous electrical short. At best, you will see a large spark when making the final connection. At worst, this can damage the electronics in one or both cars, blow a main fuse, or even cause the battery to explode due to the ignition of hydrogen gas.
Can you connect the black cable to the dead battery’s negative terminal?
While technically possible, it is strongly advised not to connect the final clamp to the dead battery’s negative terminal. Doing so creates a spark directly next to the battery, which may be venting flammable hydrogen gas, creating a risk of fire or explosion. Always use a bare metal part of the engine block or chassis as a ground point.
Does it matter which car you start first?
Yes, the order matters for efficiency and safety. After all the cables are correctly connected, you should start the engine of the working (donor) car first and let it run for a few minutes. This allows the donor car’s alternator to start charging the dead battery slightly before you attempt to start the dead car.
How long should you leave the cables connected after the car starts?
You should not disconnect the cables immediately. After the car starts, let it run for at least 5-15 minutes with the cables still connected to allow the alternator to put a surface charge back into the battery. This increases the chance the car will stay running and restart on its own later.
Do you need to turn the cars off before disconnecting the jumper cables?
No, you should leave the newly started car running when you disconnect. Common professional practice is to leave the car running so its alternator can continue charging the battery. However, you should turn on an electrical accessory like the headlights first to prevent a voltage spike. The donor car can be turned off.
What’s the difference between a red and black jumper cable?
The colors are a universal code for polarity. The red cable is always for the positive (+) terminal, which is the starting point of the electrical circuit. The black cable is for the negative (-) terminal, which completes the circuit by connecting to a ground. Mixing them up is dangerous.
Can cheap or old jumper cables cause a jump-start to fail?
Yes, absolutely. Thin, cheap, or corroded jumper cables may not be able to transfer enough electrical current to start the car. Likewise, frayed or damaged cables are a safety hazard. It’s recommended to use a set of 4 to 6-gauge cables for the best results.
Is it safe to jump-start a car in the rain?
It is generally advised to avoid jump-starting a car in heavy rain. Water conducts electricity and increases the risk of short circuits and electrical shock. If you must do it in light rain, take extra care to ensure the cable clamps and battery tops are as dry as possible and that no puddles are connecting the two vehicles.
My car lights come on, but it won’t jump-start. What’s wrong?
This often points to a problem with the starter motor, not the battery. The battery has enough power to run the lights but not enough to engage the starter. If you hear a rapid clicking sound when you turn the key, it is a classic symptom of a failing starter.
Can I jump-start a modern car with lots of electronics?
Yes, but you must be extra careful. The correct procedure is critical to avoid damaging sensitive components like the ECU (Engine Control Unit). Following the “positive first, ground last” rule and the tip to turn on headlights before disconnecting are essential to prevent voltage spikes that can fry modern electronics.
Key Takeaways: Jump Starting a Car Which Cable Connects First Summary
- Positive First, Always: The most critical rule is to connect the red (positive) cable to the dead battery’s positive terminal first. This establishes the circuit safely and minimizes spark risk.
- The Final Connection is Ground: The last cable to connect is the black (negative) clamp to an unpainted metal surface on the dead car’s frame, not the battery itself. This directs the inevitable spark away from flammable battery gases.
- Disconnect in Reverse: After a successful start, remove the cables in the exact reverse order. Start with the black clamp on the car frame and end with the red clamp on the formerly dead battery.
- Safety Gear is Non-Negotiable: Always wear safety glasses and gloves. A dead battery can be unpredictable, and protecting yourself from potential sparks or acid is paramount.
- A Clicking Sound Isn’t the Battery: If you hear a rapid clicking noise when you try to start the car, the problem is likely a faulty starter motor, and a jump-start won’t work.
- Prevent Electronic Damage: In modern cars, turn on the headlights or another accessory on the newly started vehicle before you disconnect the cables. This simple step absorbs any potential voltage spikes that could damage sensitive electronics.
Final Thoughts on When Jump Starting a Car Which Cable Goes First
Knowing which cable to connect first when jump-starting a car is more than just a piece of trivia—it’s the foundation of a safe and effective procedure. By always remembering to connect the red (positive) cable to the dead battery first and making the final ground connection on the car’s frame, you are taking control of the electrical circuit and prioritizing safety. This method protects you from sparks and your vehicle from damaging electrical surges.
Mastering this simple but crucial sequence transforms a stressful situation into a manageable task. After a successful jump, be sure to drive the car for at least 20-30 minutes to allow the alternator to properly recharge the battery. If the problem persists, it’s a clear sign that you should have your battery, alternator, and starter professionally tested. Which of these steps gave you the most clarity?
Last update on 2026-03-17 / Affiliate links / Images from Amazon Product Advertising API