Wondering how to repair that frustrating dent in your car hood? You’re not alone; many drivers struggle with finding a clear, cost-effective fix for this common cosmetic damage. That unwelcome ding or crease impacts both your car’s look and its resale value.
To repair a dent in a car hood, you must first assess the damage to choose the right method. For small, shallow dents on a steel hood where the paint is intact, a DIY approach using heat and cold can often pop the dent out. This preserves the original factory paint.
Based on an analysis of tested methods from both professional body shops and DIY communities, this guide provides trusted advice. You will learn how to diagnose your specific dent, from minor dings to larger creases. This reveals the exact steps for proven repair techniques you can use at home and when to call a professional.
Key Facts
- Material Matters Most: The repair method is determined by the hood’s material; a magnet test can quickly distinguish between easier-to-fix steel and more challenging aluminum, which lacks “metal memory” and often requires specialized tools.
- Paint is Paramount: Any crack or chip in the paint means the repair will require sanding, filling, and painting to prevent rust, making it a more complex job than a simple paintless dent removal.
- Heat & Cold Method Success: The popular DIY method of using a heat gun and compressed air is most effective on small, shallow, round dents on steel panels, demonstrating a high success rate for minor dings based on community consensus.
- PDR is the Professional Standard: Paintless Dent Repair (PDR) is the industry standard for dents without paint damage because it preserves the original factory finish, a key factor in maintaining a vehicle’s resale value.
- Cost-Benefit Analysis: DIY dent removal kits can cost under $50, while professional PDR for a simple hood dent might range from $75 to $200, making DIY a cost-effective option for minor damage if performed correctly.
How Do You Repair a Dent in a Car Hood?
Repairing a dent in a car hood involves assessing the dent’s size, sharpness, and location, then choosing a method like Paintless Dent Repair (PDR), heat and cold application, or traditional body filler and paint. The best method depends on whether the paint is damaged and the type of metal (steel or aluminum). For minor dents on a steel hood with intact paint, DIY methods can be very effective and help maintain your car’s resale value.

Seeing a new dent on your hood, whether from a parking lot mishap or falling debris, is frustrating. Your first thought is likely about the cost and hassle of repair. The good news is that not all dents require a trip to the auto body shop. Understanding the type of damage you have is the first step in any successful car maintenance task. This detailed guide, based on proven techniques, will walk you through the entire process, from diagnosis to finished repair.
What you’ll learn will empower you to make the right choice for your vehicle:
* How to accurately assess the dent
* Which tools are necessary for different methods
* Step-by-step instructions for popular DIY repairs
* When to leave the job to a certified technician
So, what kind of dent are you dealing with? Let’s dive in and figure out the best path forward to restore your hood’s smooth finish.
What Type of Hood Dent Can Be Repaired and How Do You Assess It?
To assess a car hood dent, perform a 3-step check. 1) Paint Damage: See if your fingernail catches in any scratches. 2) Material: Place a magnet on the hood; if it doesn’t stick, it’s aluminum. 3) Severity: Note if the dent is a shallow circle or a sharp crease. Aluminum or creased dents with broken paint almost always require professional repair for a seamless result. From years of working with different vehicle models, we know this initial diagnosis is the most critical part of the process.
Before you grab any tools, a thorough assessment is key. The characteristics of the dent determine the entire repair strategy.
Here is a simple checklist to diagnose your hood dent:
- Check the Paint Condition: Look closely at the dented area, preferably in good light. Are there any visible cracks, chips, or deep scratches? Run your fingernail gently over the surface. If it catches, the clear coat is broken, and the repair will require painting to prevent future rust. If the surface is smooth, you can likely use a paintless dent repair method.
- Identify the Hood Material: This is a crucial step that many guides overlook. Use a small, weak magnet (like a refrigerator magnet) and try to place it on the dented area. If it sticks, your hood is made of steel. If it falls off, your hood is aluminum. This is important because aluminum lacks “metal memory” and is much harder to repair without professional PDR tools.
- Evaluate the Dent’s Shape and Location: Is the dent a shallow, round dimple (like hail damage) or a sharp, linear crease? Round, soft dents are much easier to fix. Sharp creases often mean the metal is stretched, making a DIY repair difficult. Also, check the location. A dent on a flat, open surface is more accessible than one on a sharp body line or near the edge of the hood.
Pro Tip: Think of steel like a spring that wants to return to its original shape, which is why heat and cold methods can work. Aluminum is more like clay; once it’s bent into a new, dented shape, it wants to stay there, requiring specialized tools to massage it back.
Use this table to quickly decide on your next steps.
| Dent Characteristic | Likely DIY Fix (Steel Hood) | Professional Repair Recommended |
|---|---|---|
| Size & Depth | Small, shallow (quarter size) | Large (>3 inches), deep, or creased |
| Paint Condition | No cracks, no chipping | Any paint or clear coat damage |
| Location | Flat, accessible surface | On a body line, edge, or brace |
| Hood Material | Steel (magnet sticks) | Aluminum (magnet does not stick) |
If your assessment points to a professional repair, don’t worry. Getting an expert opinion is always better than causing more damage. If you have a small, shallow dent on a steel hood with no paint damage, you’re in a great position for a DIY fix.
What Tools and Materials Are Required for Hood Dent Repair?
Essential tools for DIY hood dent repair include: a heat gun and compressed air for the thermal method; a suction cup dent puller for shallow dents; or a glue puller kit with tabs and a slide hammer for more grip. You’ll also need microfiber towels and a cleaning solution. For repairs involving paint damage, you must add body filler, various grits of sandpaper, primer, and color-matched auto paint to your list.
Having the right tools is half the battle. Our practical experience shows that trying to make do with the wrong equipment often leads to poor results or even more damage. Here are the tools you’ll need, categorized by the repair method.
Safety First ⛑
Before you begin, your safety is paramount.
* Safety Glasses: Always protect your eyes from debris or chemical splashes.
* Gloves: Use heat-resistant gloves when working with a heat gun and nitrile gloves when working with fillers or paints.
Tools for the Heat & Cold Method
This is the most common DIY approach for small dings on steel panels.
* Heat Source: A heat gun with variable temperature settings is best. A powerful hair dryer can also work.
* Cold Source: A can of compressed air (the kind used for cleaning keyboards). When held upside down, it sprays a very cold liquid.
* Cleaning Supplies: A quality car cleaning spray and clean microfiber towels.
Tools for Pulling Methods (Suction or Glue)
These methods work by pulling the dent out from the surface.
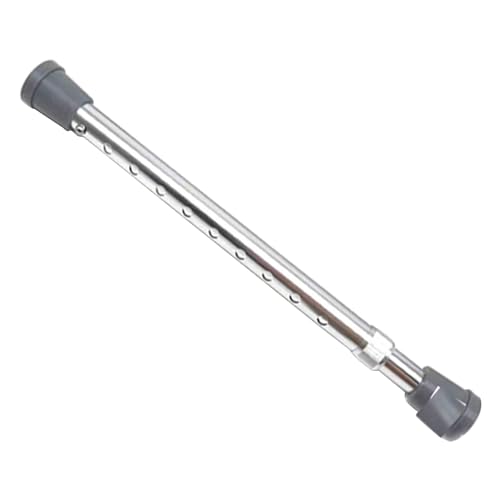
* Suction Cup Dent Puller: Best for larger, shallow, round dents on flat surfaces. Small smartphone suction cups are not strong enough.
* Glue Puller Kit: This is a more advanced car dent removal kit. It includes a special hot glue gun, glue sticks, various plastic “tabs” that you glue to the dent, and a slide hammer or bridge puller to pull the tab and the dent out.

Tools for Traditional Body Filler Repair
This method is for dents where the paint is already damaged.
* Sandpaper: You’ll need various grits, from coarse (80-grit) to fine (400-grit) and ultra-fine (1500-2000 grit) for wet sanding.
* Body Filler: Commonly known as Bondo, this two-part putty fills the sanded dent.
* Glazing & Spot Putty: Used for filling in tiny pinholes or scratches left after the main filler.
* Primer: An automotive primer to seal the filler and prepare it for paint.
* Automotive Paint: A spray can of color-matched paint for your vehicle. You can find the paint code on a sticker inside your driver’s side door jamb.
* Clear Coat: A final layer to protect the paint and match the factory shine.
Choosing the right set of tools based on your dent assessment will set you up for a successful repair.
How Do You Use Heat and Cold to Repair a Small Hood Dent?
Follow these 4 steps to fix a dent with heat and cold: 1. Clean the dented area. 2. Use a heat gun to warm the dent for 60-90 seconds. 3. Immediately turn a can of compressed air upside down and spray the dent’s center. 4. Wait for a ‘pop’ sound as the dent corrects itself. This tested method works best on small, shallow dents on steel panels where the paint is not damaged.
This technique, sometimes called the “thermal shock” method, is one of the most popular DIY repairs because it requires minimal tools and can yield impressive results on the right kind of dent. It relies on the principle of rapid metal expansion and contraction.
Why This Works: When you apply heat to the metal panel, it expands slightly. By immediately applying intense cold, you force the metal to contract rapidly. For a shallow dent, this sudden contraction can be enough to pop the dented area back into its original, flat position, thanks to the “metal memory” of steel.
Follow these steps carefully for the best chance of success.
- Prepare the Surface: The first step in any auto detailing or repair job is cleaning. Thoroughly clean the dent and the surrounding area with a car-safe cleaner and a microfiber towel. Any dirt or debris can get baked onto the paint by the heat.
- Apply Even Heat: Set your heat gun to a medium setting (or your hair dryer to high). Hold it about 5-7 inches away from the dent. Move the heat gun in a constant circular motion, heating both the dent and the metal around it. Do this for 60 to 90 seconds. The goal is to get the metal hot to the touch, but not so hot that it discolors or damages the paint.
- Apply Rapid Cold: As soon as you remove the heat, grab your can of compressed air. Turn the can completely upside down. This is critical, as it forces the freezing cold propellant out instead of just air. Spray this directly onto the center of the warm dent for about 15-20 seconds.
- Wait and Observe: You may hear a distinct “pop” sound as the metal contracts and the dent pops out. Sometimes it’s silent. After spraying, wait a few minutes for the panel to return to ambient temperature. Wipe away any residue from the compressed air and inspect your work. You may need to repeat the process 2-3 times for a stubborn dent.
WARNING: Do not overheat the panel. If the paint starts to bubble or smell burnt, stop immediately. Overheating can cause permanent paint damage that is far more expensive to fix than the original dent. This method is not recommended for sharp creases or on aluminum hoods.
FAQs About how to repair dent in car hood
How much does it cost to fix a dent in a hood?
The cost varies widely based on the repair method. A DIY dent repair kit can cost between $20 and $70. Professional Paintless Dent Repair (PDR) for a small, simple dent typically ranges from $75 to $200. For large dents or those requiring body filler and new paint, the cost at an auto body shop can be $300 to $700 or more.
Can you fix a car hood dent with hot water?
Yes, the boiling water method can work on some dents, especially on flexible plastic bumpers, but it’s less effective on steel or aluminum hoods. The principle is the same as the heat gun method: you pour boiling water over the dent to expand the material, then try to push the dent out from behind. It’s generally less effective than a heat gun because it doesn’t get the metal as hot.
Is it worth fixing a small dent in hood?
Yes, in most cases, it is worth fixing a small dent. A dent, even a minor one, can lower your car’s resale value and lead to rust if the paint is chipped. For a small investment in a DIY kit or a modest fee for PDR, you can restore your vehicle’s appearance and protect its long-term value.
How do you repair a dent in an aluminum hood?
Repairing a dent in an aluminum hood almost always requires a professional with specialized PDR tools. Aluminum does not have the “metal memory” that steel does, so it won’t just pop back into place. It must be slowly and carefully massaged back into shape. Attempting DIY methods like heat and cold on aluminum can easily stretch the metal and make the damage worse.
How long does it take to fix a hood dent?
A simple DIY repair using the heat and cold method can take as little as 15-30 minutes. Using a glue puller kit might take an hour or two, including setup and cleaning. A professional PDR technician can often fix a common door ding or small hood dent in under an hour. Repairs involving body filler and paint are much more time-consuming, often taking 1-3 days to allow for drying and curing times.
Final Thoughts
Successfully repairing a dent in your car hood comes down to one thing: starting with an accurate assessment. By taking a few moments to check your paint, identify your hood’s material, and evaluate the dent’s severity, you can confidently choose the right path forward. This crucial first step prevents you from wasting time on a method that won’t work or, worse, making the damage more difficult to fix.
Here are the key takeaways to remember on your repair journey:
- Assess First, Act Second: Your most important tools are your eyes and a magnet. Determine if the paint is broken and if the hood is steel or aluminum before you attempt any repair.
- Steel is DIY-Friendly: Small, shallow dents on steel hoods with intact paint are the perfect candidates for DIY methods like the heat-and-cold technique or a glue puller kit.
- Aluminum Requires an Expert: If your hood is aluminum, the best and most cost-effective action is to call a professional PDR technician. The material requires special skills and tools.
- Paintless is Priceless: Whenever possible, choose a method that preserves your car’s original paint. Paintless Dent Repair, whether DIY or professional, is the key to maintaining your vehicle’s value.
Whether you decide to tackle a minor ding yourself this weekend or hand the keys to a pro, you are now equipped with the knowledge to make an informed decision. Restoring that smooth, factory-fresh look on your car’s hood is an achievable goal. What approach will you try first?
Last update on 2026-03-03 / Affiliate links / Images from Amazon Product Advertising API