Is that old, faded bumper sticker ruining your car’s clean look? You want it gone, but the fear of a costly paint scratch stops you.
Removing car stickers is a common challenge for vehicle owners. The main problem is separating the sticker and its stubborn adhesive from the delicate car paint without causing scratches, fading, or other permanent damage.
The safest way to remove a sticker from your car is to gently heat it with a hair dryer to soften the adhesive, peel it off at a low angle, and clean any leftover residue with a paint-safe solvent. This guide will walk you through every step, from preparation to restoring your paint’s final shine. You’ll learn the professional methods to get the job done right.
Key Facts
- Least Aggressive Method First: Professional detailers always start with the gentlest method, like low heat, to minimize any risk to the paint, which is a core principle from the International Detailing Association (IDA).
- High Cost of Mistakes: According to automotive repair cost databases, repairing a single deep scratch in a car’s clear coat from improper sticker removal can cost anywhere from $150 to over $1,000.
- The Cause of “Ghosting”: The faint sticker outline left behind is due to UV degradation. Paint & Coatings Industry research confirms that the paint under the sticker was shielded while the surrounding paint slowly faded from sun exposure.
- Heat is Scientific: Adhesives Technology Handbooks show that most pressure-sensitive adhesives on car decals lose significant strength when heated above 140°F (60°C), making them much easier to peel.
- Tool Hardness Matters: A plastic razor blade is a critical tool because it’s harder than sticker residue but softer than your car’s clear coat (which has a hardness of about 3-4H), allowing you to scrape safely without scratching.
What Is The Safest Way To Prepare Your Car For Sticker Removal?
The safest way to prepare your car is to work on a clean, dry, and cool surface out of direct sunlight. Before you even think about peeling, gathering the right paint-safe tools and preparing the vehicle’s surface is the most critical step. This preparation is non-negotiable because it eliminates the number one cause of scratches: grinding existing dirt and grit into your paint while you work. Taking a few minutes to set up properly ensures a smooth, damage-free process.

What Are The Essential Tools and Materials You’ll Need?
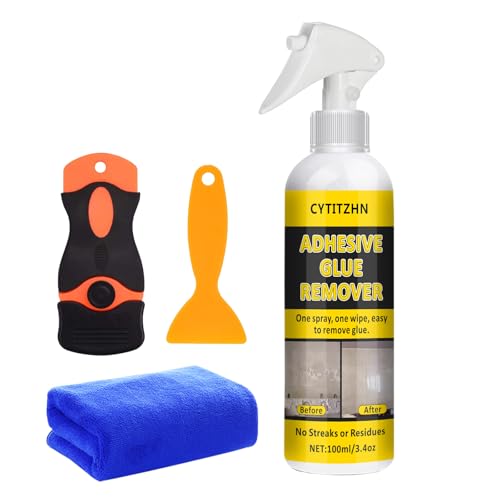
Having the right toolkit makes the job easier and, more importantly, safer for your car’s finish. Using household items not meant for automotive paint is a recipe for disaster. Here is your essential sticker removal toolkit:
- Heat Source: A standard hair dryer on a low or medium setting is the perfect tool for the job.
- Plastic Razor Blades: These are essential for lifting sticker edges and scraping residue without scratching your paint. Never use a metal blade.
- Automotive Adhesive Remover: A quality solvent specifically labeled “clear coat safe” or “automotive-safe” is designed to dissolve glue without harming paint.
- Microfiber Towels: You will need several clean, soft towels for washing, drying, and applying solvents.
- Car Soap and Water: For the initial and final cleaning steps.
- Car Wax or Sealant: This is the crucial final step to protect the paint after you’re finished.

How Do You Properly Prepare The Car’s Surface?
Proper surface preparation takes only a few minutes but prevents hours of regret. Think of it as setting the stage for a flawless performance. Follow these three simple steps before you begin.
- Wash and Dry the Area: Use car soap and water to thoroughly clean the sticker and the surrounding panel. This removes any abrasive dirt, sand, or grit that could act like sandpaper and scratch your clear coat during the removal process. Dry it completely with a clean microfiber towel.
- Move to the Shade: Always work on a surface that is cool to the touch. Direct sunlight can heat the car’s panel, causing solvents to evaporate before they can work and potentially making the heat from your hair dryer too intense, which can damage the paint.
- Final Inspection: Give the area a final wipe with a microfiber towel to ensure it is completely free of dust or contaminants before you apply any heat or tools.
How Do You Remove a Sticker Using Heat (The Safest Method)?
The safest and most effective method to remove a car sticker is by using controlled heat from a hair dryer to soften the pressure-sensitive adhesive, allowing the sticker to be peeled away with minimal force and residue. This technique works on almost all types of decals, from vinyl bumper stickers to old paper ones, because it targets the glue’s bond directly without relying on harsh chemicals or aggressive scraping. By weakening the adhesive first, you let the sticker do most of the work for you.
Here is the step-by-step process:
- Clean and Prepare: Ensure the surface is washed, dried, and cool to the touch, as outlined in the preparation steps above.
- Apply Gentle Heat: Turn a hair dryer to its medium setting and hold it 5-7 inches away from the sticker. Move the hair dryer continuously in a sweeping motion to heat the entire sticker evenly. Do this for about 30-60 seconds. The sticker should feel warm to the touch, not hot.
- Lift an Edge: Once the sticker is warm, use your fingernail or a plastic razor blade to carefully lift one corner. You just need to create a small “tab” that you can grip.
- Peel Slowly and Deliberately: Grip the lifted edge and begin peeling the sticker back on itself at a very low, sharp angle (less than 45 degrees). Do not pull straight up. Pulling back on itself puts the stress on the adhesive bond, encouraging it to release cleanly. Use slow, steady pressure. If you feel resistance, apply more heat for a few seconds and continue.
Step 1: How Do You Apply Heat Correctly and Evenly?
The key is to apply moderate, even heat without concentrating on one spot. Set your hair dryer to a medium heat setting. Hold it about 5-7 inches from the car’s surface and keep it moving constantly, as if you were spray painting the area. The goal is to warm the entire sticker and the adhesive underneath it. After about a minute, the surface should be warm to the touch, similar to a car hood that’s been sitting in the sun.
Expert Warning: Never use a heat gun unless you are a professional. Heat guns can reach temperatures that will quickly burn, blister, and permanently damage car paint. A hair dryer provides more than enough heat for this job safely.
Step 2: What Is The Best Technique For Peeling The Sticker?
The best technique is to peel the sticker back on itself at a sub-45-degree angle using slow, consistent pressure. Imagine you are trying to fold the sticker back over itself as you peel. This low angle is a pro tip that focuses the peeling force directly at the edge of the adhesive line, which is far more effective at breaking the bond than pulling the sticker straight up and away from the car.
For old, brittle stickers that crack and break into small pieces, patience is your most important tool. You will need to repeat the process of heating a small section and then carefully scraping that piece off with your plastic razor blade.
How Do You Remove Stubborn Adhesive Residue From Car Paint?
To remove sticker residue safely, apply a paint-safe automotive adhesive remover or 70% isopropyl alcohol to a microfiber towel, let it sit on the residue for 30-60 seconds to dissolve the glue, then gently wipe it away in small circles. The job isn’t finished when the sticker is gone; tackling the leftover sticky residue is a separate but equally important step. The key is to use a solvent that is strong enough to break down the adhesive but gentle enough not to harm your car’s clear coat.
Here’s the safest way to clean up that sticky mess:
- Always Spot Test First: Before applying any chemical to your paint, test it in an inconspicuous area like a door jamb. Apply a small amount and wait a few minutes to ensure there is no discoloration or damage.
- Apply Solvent to Your Towel: Never spray an adhesive remover directly onto your car’s paint. Spray it onto a folded, clean microfiber towel. This gives you complete control and prevents the chemical from running and potentially staining other areas.
- Let the Solvent Dwell: Press the soaked portion of the towel onto the adhesive residue and hold it there for 30-60 seconds. This gives the solvent time to penetrate and break down the glue’s chemical structure.
- Wipe Gently: Using small, circular motions, gently wipe the residue away. You should feel it start to break up and roll off. Do not apply heavy pressure or scrub aggressively.
- Repeat as Needed: For thick, stubborn residue, you may need to repeat the process. Apply more solvent to a clean section of the towel and wipe again until the surface is smooth and no longer tacky.
- Neutralize the Area: Once all residue is gone, wash the area with car soap and water to remove any remaining solvent.
Pro Tip: For extremely stubborn residue, place a small piece of plastic wrap over the solvent-soaked towel. This prevents the solvent from evaporating, allowing it to work on the adhesive for a longer period.
What Are The Pros And Cons Of Different Removal Methods?
Choosing the right method involves balancing safety, effectiveness, and the tools you have available, with the hair dryer method being the safest starting point for any job. While heat is the recommended primary method, other options exist for residue removal or special cases. Understanding the trade-offs helps you make the best decision for your car and your confidence level. This table breaks down the most common approaches.
| Method | Safety Risk | Effectiveness | Best For… | Key Consideration |
|---|---|---|---|---|
| Hair Dryer (Heat) | Low | High | All vinyl & paper stickers, especially older ones. | The safest starting point for any job. |
| Isopropyl Alcohol | Low | Medium | Light, gummy, fresh adhesive residue. | May require multiple applications for stubborn glue. |
| Adhesive Remover | Medium | High | Thick, stubborn, hardened residue. | Must be automotive-safe & spot-tested. |
| Steam Cleaner | Medium | High | Delicate paint; removing large graphics. | Requires specific equipment; risk of overheating. |
| White Vinegar | Very Low | Low | Very light residue; for those avoiding chemicals. | Not effective on strong or old adhesives. |
What Are The Critical Mistakes To Avoid That Can Ruin Your Paint?
The most critical mistake is using a metal razor blade, which will instantly cause deep, permanent scratches in your car’s paint and clear coat. Knowing what not to do is just as important as knowing what to do. Avoiding these common pitfalls will save you from a costly trip to the body shop.
- ❌ NEVER Use a Metal Razor Blade: This cannot be overstated. A metal blade will cut through your clear coat and paint instantly. Only use plastic razor blades or scrapers designed for automotive use.
- ❌ AVOID Harsh Chemicals: Never use acetone, lacquer thinner, brake cleaner, or aggressive household degreasers like general-purpose Goo Gone on your paint. These can soften, dull, or even strip your clear coat.
- ❌ DON’T Overheat the Surface: A hair dryer is safe, but a heat gun can easily burn your paint. If you see any bubbling, discoloration, or smoke, you have applied too much heat.
- ❌ NEVER Work on a Hot or Dirty Surface: Working in direct sunlight or on a hot panel can cause unpredictable chemical reactions. Working on a dirty car grinds abrasive grit into the paint.
- ❌ DON’T Rush the Process: Patience is a tool. Pulling a sticker too fast or scraping aggressively is a leading cause of accidental damage. Take your time.
How Do You Fix Sticker “Ghosting” and Restore The Paint’s Shine?
To fix sticker ghosting, use a light polishing compound on a foam applicator pad to gently level the clear coat, removing the faint outline and restoring a uniform finish. This “ghost image” is the single biggest giveaway that a sticker was once there. It’s caused by years of sun exposure slowly fading the paint around the sticker, while the paint underneath remained protected and vibrant. Simply waxing over it won’t fix the problem; you need to gently correct the paint surface itself.
This is the final step that separates a good result from a professional one.
- Ensure the Surface is Perfectly Clean: After removing all residue, wash and dry the area one last time to ensure there are no leftover solvents.
- Apply Polishing Compound: Place a small, pea-sized amount of a light-cut polishing compound onto a foam applicator pad.
- Polish the Area: Working in a small, 2×2 foot section, gently rub the polish into the paint using overlapping circular or straight-line motions. Use light to moderate pressure. You are not scrubbing; you are letting the fine abrasives in the polish do the work of leveling the clear coat.
- Wipe and Inspect: After a few passes, wipe the polish residue away with a clean microfiber towel. Inspect the area in good light to see if the ghost outline has disappeared. If it’s still faintly visible, repeat the process.
- Protect Your Work: This is a crucial final step. Polishing removes any old wax or sealant. You must apply a fresh coat of high-quality car wax or a synthetic paint sealant to the area. This protects the newly exposed clear coat from UV rays, dirt, and water, and brings out a brilliant shine.
FAQs About how to remove stickers from car without damaging paint
Can I use Goo Gone or WD-40 on my car’s paint?
It’s not recommended. While they can dissolve adhesive, some Goo Gone formulas can be too harsh for automotive clear coats, and WD-40 leaves an oily residue that’s difficult to remove and attracts dust. Always opt for a product specifically labeled “automotive-safe” for the best and safest results.
Will removing a sticker leave a permanent outline on my paint?
It can, and this is called “ghosting.” This happens because the paint under the sticker was protected from the sun’s UV rays while the surrounding paint slowly faded. This faint outline can be removed by using a light polishing compound to gently even out the top layer of the clear coat.
Is it ever safe to use a metal razor blade on my car?
NEVER on paint. A metal razor blade will instantly and deeply scratch your car’s clear coat and paint, requiring expensive professional repair. It is only safe to use a metal blade on glass windows, but even then, a plastic blade is a safer choice to avoid damaging window trim.
What’s the best way to remove old, sun-baked stickers that crack apart?
Patience is key. For old, brittle stickers, the best method is to gently heat the area to soften the remaining material and adhesive. Then, use a plastic razor blade to carefully scrape away the small pieces. It will be a slow process, but rushing can lead to scratches. Once the pieces are gone, tackle the remaining adhesive with a solvent.
How do I remove a dealer emblem or badge?
Use dental floss or fishing line. These emblems use thick foam tape. Gently heat the emblem with a hair dryer, then slide a piece of dental floss or fishing line behind it and use a “sawing” motion to cut through the foam adhesive. The remaining foam residue can then be removed with an adhesive remover.
Key Takeaways: Removing Car Stickers Safely
- Preparation is Non-Negotiable: Always start by washing and drying the area on a cool surface. Working on a dirty car is the easiest way to scratch your paint.
- Heat is Your Best Friend: A simple hair dryer is the safest and most effective tool for softening sticker adhesive, making peeling vastly easier and cleaner.
- Plastic Tools Only: Never use a metal razor blade, scraper, or knife on your paint. Only use plastic tools designed for automotive work to prevent deep, costly scratches.
- Always Spot Test Chemicals: Before using any adhesive remover on a visible area, test it on a hidden spot (like a door jamb) to ensure it’s safe for your specific paint job.
- Address The Residue Separately: The job isn’t done when the sticker is off. Use a dedicated automotive-safe solvent on a microfiber towel to safely remove all sticky residue.
- Finish The Job Like a Pro: To fix any faint “ghosting,” use a light polishing compound. Afterward, always apply a coat of wax or sealant to protect the newly exposed paint from the elements.
Removing an unwanted sticker from your car doesn’t have to be a stressful experience. By following the core professional mantra—Clean, Heat, Peel, Clean, Polish, and Protect—you have everything you need to achieve a flawless finish. The most important tools are patience and a safety-first mindset. Take your time, use the right materials, and you’ll restore your vehicle’s clean, sticker-free appearance without a single scratch.
Last update on 2026-03-08 / Affiliate links / Images from Amazon Product Advertising API