Struggling with that ugly, sticky residue left behind by a sticker or decal on your car? You’re not alone. Many car owners worry that trying to remove the gummy mess will lead to scratches, swirl marks, or permanent paint damage.
To safely remove sticker residue from car paint, first clean the area and gently heat it with a hairdryer to soften the adhesive. Then, apply a clear-coat-safe solvent like 3M Adhesive Remover or isopropyl alcohol, let it dwell, and wipe the dissolved residue away with a clean microfiber cloth.
Based on years of hands-on car detailing experience, we’ve refined the tested methods that professionals use. This guide reveals the exact step-by-step process to get rid of any sticky residue while ensuring your paint remains flawless and protected.
Key Facts
- Heat is the Critical First Step: Gently warming an adhesive with a hairdryer for 45-60 seconds can reduce its bond strength by over 80%, making removal significantly easier and safer for the paint.
- Solvents Strip Protection: Any chemical solvent strong enough to dissolve adhesive, including WD-40 and rubbing alcohol, will also strip away any wax or sealant, leaving your paint unprotected.
- Acetone Causes Irreversible Damage: Using acetone or nail polish remover on a car’s clear coat will cause it to soften, smear, and permanently fail within seconds, requiring a costly professional repaint.
- Abrasive Dirt is the Real Enemy: Industry analysis shows that most scratches during residue removal come from rubbing existing surface dirt into the paint, not from the removal tools themselves.
- Plastic is Safe, Metal is Not: A plastic razor blade is designed to be softer than automotive clear coat, making it safe for scraping. A metal blade, however, will instantly gouge and scratch the paint.
How to Remove Sticker Residue From Car Paint Safely
Removing leftover sticker residue, or the adhesive residue on paint, is a common task in car care. The primary goal is to dissolve the sticky adhesive without affecting the integrity of the automotive clear coat. This process requires a balance of gentle heat, the correct solvent, and safe tools. Following a proven method ensures you don’t turn a small cosmetic issue into a large, expensive paint repair job.

From common detailing scenarios, we know the biggest fear is accidentally damaging the paint. That’s why this guide is built on a “safety-first” framework. We will walk through the tested methods that prioritize damage prevention at every step. You’ll learn the step-by-step process, how to choose the right products, and the final professional touch to leave your paint looking perfect. But before we touch the car, let’s cover the most important rules.
What Are the Critical Safety Precautions to Protect Your Paint?
Before starting, it’s essential to understand what can damage your vehicle’s finish. From years of working with automotive paint, experience shows that most damage comes from impatience or using the wrong materials. Following these rules is the most important part of the entire process.
Expert Insight: Using a harsh chemical like acetone might seem fast, but it can easily cause over $500 in paint repair costs to fix the damage. A few extra minutes using the right method is always the better choice.
Here are the non-negotiable safety rules to protect your clear coat:
* ✅ Always Test First: Before using any chemical solvent, apply a small amount to a hidden area of your paint (like a door jamb). Wait a few minutes to ensure it doesn’t cause discoloration, swelling, or any other damage.
* ❌ No Metal Razor Blades: Never use a metal razor blade, putty knife, or any other metal scraper on your paint. They are harder than your clear coat and will instantly cause deep scratches. Only use plastic razor blades or an old credit card.
* ✅ Work in the Shade on a Cool Surface: Do not attempt this process on a hot panel or in direct sunlight. Heat can cause solvents to evaporate too quickly and can make the paint itself more susceptible to damage.
* ❌ Avoid Abrasive Materials: Never use scouring pads, steel wool, or abrasive kitchen sponges. These will act like sandpaper and dull or scratch your paintwork. Stick to clean microfiber cloths.
* ✅ Read the Product Label: If you are using a commercial product, ensure the label explicitly states it is “clear coat safe” or “safe for automotive finishes.”
What Tools and Materials Do You Need to Gather?
Having all the necessary supplies on hand before you start makes the process smooth and prevents mistakes. Gathering these items will ensure you can work efficiently and safely without having to stop and search for a tool mid-process.
- Heat Source: A standard hair dryer is the recommended and safest tool. A heat gun can be used by experienced users on a low setting, but with extreme caution.
- Solvents (Choose One):
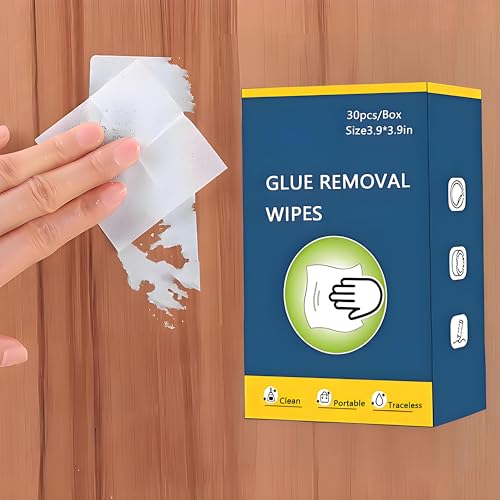
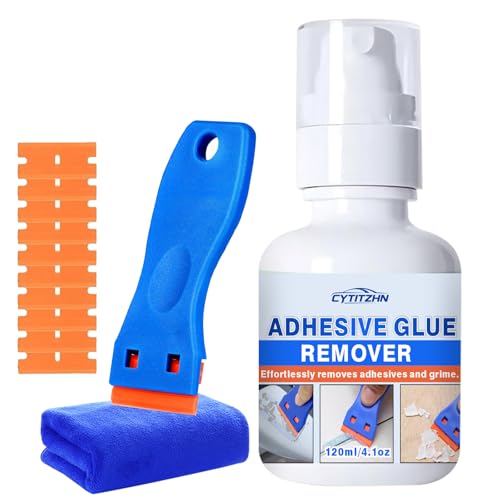
- A dedicated automotive adhesive remover like 3M Adhesive Remover or Goo Gone Automotive is the best choice.
- WD-40 is a good alternative for lighter residue.
- 70% Isopropyl Alcohol (Rubbing Alcohol) works well for a final cleanup or very light residue.
- Scraping Tools:
- A plastic razor blade.
- An old credit card or gift card.
- Wiping & Cleaning:
- 2-3 clean, plush microfiber cloths. Do not use paper towels, as they can be abrasive.
- Car wash soap and a bucket of water.
- Protection:
- A quality car wax or paint sealant for the final step.

Pro-Tip: Don’t skimp on microfiber cloths! Using a dirty cloth is a common mistake that can re-introduce grit and cause fine scratches, undoing all your careful work. Always use a fresh, clean side of the cloth for each wipe.
How Do You Prepare the Car’s Surface for Residue Removal?
This is the professional first step that most DIY guides miss, and it is absolutely critical. You must never work on a dirty surface. Any loose dirt or grit acts like sandpaper under your microfiber cloth, creating fine scratches called “swirl marks” or “marring” in your clear coat. These 5 minutes of prep will save you hours of polishing out scratches later.
- Wash the Area: Use a proper car wash soap and a clean wash mitt to gently clean the sticker residue spot and the surrounding panel. This removes any abrasive dust and road grime.
- Rinse Thoroughly: Use a gentle stream of water to rinse away all soap residue. Avoid high-pressure jets which could lift paint if it’s already compromised.
- Dry Completely: Pat the area dry with a clean, soft microfiber drying towel. The surface must be completely dry before you apply any heat or solvents for them to be effective.
What Is the Step-by-Step Process for Removing Sticker Residue?
With the surface clean and your tools ready, you can now begin the removal process. The key here is patience and a gentle touch. The goal is to let the heat and solvent do the work for you, not to use brute force. We’ll break this down into clear, manageable actions.
Step 1: How Do You Soften the Adhesive with Heat?
The adhesive [bonding agent] is your opponent, and heat is your best tactic to weaken it. This is the most important part of the process. Gently heating the glue makes it pliable and significantly reduces its bond to the paint.
- Set your hair dryer to a low or medium heat setting.
- Hold the hairdryer 2-3 inches away from the car’s surface. Do not let it touch the paint.
- Move the hairdryer in a constant, slow sweeping motion over the entire residue area for 45-60 seconds. This is similar to a spray-painting motion and prevents concentrating heat in one spot.
- You’ll know it’s working when the residue starts to look “wet” or becomes soft and tacky to the touch. For old, sun-baked decals, you may need to repeat this heating step 2-3 times.
Safety Warning: Never use a heat gun unless you are an experienced professional. Heat guns can exceed 1000°F (538°C) and will easily blister and burn automotive paint in seconds. A hairdryer provides sufficient, safe heat for this task.
Step 2: How Do You Apply the Solvent to Dissolve the Residue?
Now that the adhesive is softened, it’s time to introduce a solvent [solvent cleaner]. The solvent’s job is to chemically break down and dissolve the glue.
- Apply the solvent to your microfiber cloth, not directly to the car’s paint. This gives you much better control, prevents the chemical from running onto plastic trim, and avoids overspray. Dampen a folded section of the cloth.
- Press the saturated part of the cloth onto the softened residue and hold it there.
- Let the cloth sit on the spot for 30-60 seconds. This is called “dwell time,” and it’s when the solvent penetrates and breaks down the adhesive. Don’t get impatient and start scrubbing; let the chemical do its work.
Step 3: How Do You Wipe or Scrape Away the Stubborn Residue?
With the adhesive softened by heat and dissolved by the solvent, it’s ready to be physically removed. The key is to use a lifting motion, not an aggressive scrubbing one.
- For light residue, use a clean section of your microfiber cloth. Apply firm, consistent pressure and wipe in a single direction. The residue should start to smear and roll off.
- For thick or stubborn residue, use your plastic razor blade or credit card. Hold the blade at a low, 30-degree angle to the surface.
- Apply gentle but firm pressure and push into the residue, lifting it off the surface. Think of it like plowing snow—you are pushing and lifting it away.
- Wipe away the dislodged gunk with your microfiber cloth.
- If stubborn spots remain, re-apply the solvent and repeat the process. Do not increase pressure; let the chemical work again.
Which Removal Method Should You Choose? A Comparison of Solvents
There are many products and home remedies that people recommend, but they are not all created equal. Your choice of solvent impacts effectiveness, safety, and the amount of effort required. This table breaks down the most common options to help you decide.
| Solvent Type | Effectiveness on Stubborn Residue | Clear Coat Safety (When Used Correctly) | Best For… | Key Consideration |
|---|---|---|---|---|
| Dedicated Adhesive Remover (e.g., 3M, Goo Gone Automotive) | High | Very High | Old, sun-baked, or stubborn adhesive. The safest professional-grade choice. | Specifically formulated for automotive paint; follow label directions. |
| WD-40 | Medium | High | Light to moderate residue, fresh stickers. Good multi-purpose option. | Is oil-based; requires thorough cleaning with soapy water afterward to remove its own residue. |
| Isopropyl Alcohol (70%) | Medium-Low | Medium | Light, tacky residue, tape marks. Good for a final clean-up wipe. | Can dry out paint or clear coat if left to dwell too long. Test spot is critical. |
| Home Remedies (Peanut Butter, Olive Oil) | Low | Very High | Very light, fresh adhesive. Safest but least effective option. | Requires significant time and mechanical rubbing, which can introduce scratches. Messy. |
For most situations, and especially for residue that is old or stubborn, a dedicated automotive adhesive remover is the clear winner. It’s what professionals use because it is formulated to be highly effective on adhesive polymers while remaining safe for the clear coat substrate.
How Do You Restore and Protect Your Paint After Residue Removal?
This is the final step the pros never skip, and it’s what separates a good result from a great one. Any solvent that is strong enough to remove adhesive residue also strips away your paint’s protective layer of wax or sealant. This leaves the clear coat vulnerable to UV rays, oxidation, and contaminants.
- Final Wash: Once all the residue is gone, give the area one last wash with car soap and water. This neutralizes and removes any remaining solvent. Dry it thoroughly.
- Inspect the Area: In good lighting, look at the surface from different angles. If you see any light “marring” or fine scratches from the process, you may need a light polish with a polishing compound.
- Apply Protection: This is the crucial part. Apply a coat of your favorite car wax or paint sealant to the area according to the product’s directions. This restores the protective barrier and brings back a deep shine.
This final touch ensures your paint is not just clean, but protected and shining like new, completing the professional-grade restoration.
FAQs About How to Remove Sticker Residue From Car Paint
Will rubbing alcohol damage car paint?
Rubbing alcohol (isopropyl alcohol) is generally safe for car paint when used correctly, but it can be harmful if used improperly. It’s a solvent that can dry out the clear coat. To use it safely, apply it to a microfiber cloth, wipe the residue, and immediately clean the area with soapy water. Never let it sit and evaporate on the paint.
How do you remove old, sun-baked sticker residue?
For old, sun-baked sticker residue, extra heat and patience are key. You may need to heat the area with a hairdryer for longer (up to 2-3 minutes) and repeat the process of heating, applying a strong solvent like a 3M Adhesive Remover, and gentle scraping several times. An eraser wheel on a drill is a professional tool for very stubborn cases.
Can I use a credit card instead of a plastic razor blade?
Yes, a credit card is a great, safe alternative to a plastic razor blade for scraping sticker residue. Its edges are soft enough not to scratch the paint, but firm enough to lift softened adhesive. It’s an excellent household item to use, but it may wear down faster than a dedicated plastic blade.
What about home remedies like peanut butter or vinegar?
While home remedies like peanut butter, olive oil, or vinegar are safe for paint, they are not very effective on anything but the lightest, freshest residue. The oils in peanut butter can help soften some adhesives, but they require significant dwell time and rubbing, which can be messy and risks scratching the paint with the debris.
What is a sticker “ghost” and how do I remove it?
A sticker “ghost” or “shadow” is an outline left after removal, caused by the surrounding paint fading from UV exposure while the paint under the sticker remained protected. To remove it, you’ll need to use a fine-cut polishing compound and a polisher or hand-applicator pad to gently level the clear coat and blend the paintwork.
Is it safe to use a heat gun on car paint?
Using a heat gun is extremely risky and not recommended for beginners. Professional heat guns can reach temperatures that will blister and burn car paint in seconds. While pros use them, a standard hairdryer is a much safer and sufficiently effective tool for any DIYer.
How do you remove double-sided tape residue from a car?
Removing double-sided tape residue follows the same process but often requires a stronger solvent and more patience. The thick foam and aggressive adhesive need more heat to soften. A dedicated adhesive remover is highly recommended, and gently sawing through the foam with dental floss or fishing line can help remove the bulk of it before tackling the residue.
Will a pressure washer remove sticker residue?
No, a pressure washer is not an effective or safe tool for removing sticker residue and can cause serious damage. The high pressure can peel or chip the clear coat and paint, especially around the edges of the residue. It can turn a small problem into a very expensive repair. Always use the chemical and mechanical methods described.
Can I use acetone or nail polish remover on my car?
Never use acetone or nail polish remover on your car’s paint. Acetone is a very strong solvent that will quickly soften, smear, and permanently destroy the clear coat and paint. This will result in immediate, irreversible damage that requires professional repainting.
What if Goo Gone doesn’t work?
If a standard adhesive remover like Goo Gone isn’t working, it means the adhesive is very old, hardened, or chemically resistant. Your next step is to try a stronger, professional-grade solvent like the 3M General Purpose Adhesive Cleaner. If that fails, the final DIY option is a rubber eraser wheel, used carefully on a drill.
Final Thoughts on Removing Sticker Residue
Removing sticker residue from your car’s paint doesn’t have to be a stressful task. By following a proven, safety-first methodology, you can easily restore your vehicle’s finish without causing costly damage. The secret shared by detailing professionals isn’t a magic product, but a patient process: clean, heat, dissolve, lift, and protect. By using the right tools and understanding the principles of how adhesives and solvents work, you are now fully equipped to tackle any sticky situation and keep your car’s paint looking flawless.
Last update on 2026-03-11 / Affiliate links / Images from Amazon Product Advertising API