Is your once crystal-clear backup camera now a foggy, useless blur? You’re not alone; many drivers struggle with condensation inside the camera lens, especially after rain or a car wash. This issue obstructs your view and compromises an important safety feature.
To remove moisture from a car’s reverse camera, first try a passive method by placing the camera unit in a sealed container with silica gel packets or uncooked rice for 24-48 hours to absorb the internal humidity. If the foggy backup camera issue persists, the camera housing may need to be carefully removed to gently wipe the lens with a microfiber cloth and then resealed with waterproof silicone to prevent future water ingress.
Based on an analysis of current automotive repair methodologies and hands-on experience, this guide provides tested, step-by-step methods for every skill level. You will discover exactly how to diagnose the problem, perform a lasting repair, and prevent moisture from returning, saving you a potentially expensive trip to the dealer.
Key Facts
- Primary Cause is Seal Failure: A foggy or blurry reverse camera is most often caused by a degraded or broken waterproof seal, which allows moisture to penetrate the camera housing.
- DIY Repair is Cost-Effective: Fixing a foggy camera yourself can cost under $20 for materials like silicone sealant, while a professional replacement can range from $150 to over $800, according to industry analysis.
- Silica Gel Outperforms Rice: In our testing, silica gel packets are significantly more effective at absorbing moisture from electronics than uncooked rice and do not carry the risk of introducing dust or starch particles.
- Heat is a Major Risk: Using a hair dryer or heat gun is not recommended as excessive heat can damage the sensitive camera sensor, warp the plastic housing, and further degrade the seal, making the problem worse.
- Prevention is Key: Regularly inspecting the camera seal and avoiding direct, high-pressure water streams during car washes are the most effective ways to prevent future moisture issues.
How to Remove Moisture From a Car Reverse Camera
A foggy backup camera is a common and frustrating problem for many vehicle owners. This issue, where condensation inside the camera lens creates a blurry or cloudy image, directly impacts visibility and safety. Moisture can be removed from a car reverse camera by using desiccants like silica gel to absorb the humidity, or by carefully disassembling the housing to manually dry the lens and interior components. A failed waterproof seal is the most common cause of a foggy or blurry backup camera. Preventing future issues involves inspecting and reapplying an automotive-grade silicone sealant around the camera housing.

This step-by-step guide walks you through the entire process, from simple DIY car repair techniques to more advanced fixes. We will cover the following methods to restore your camera’s clarity:
- Understanding the Root Cause: Learn why moisture gets in.
- Passive Drying Methods: Easy, non-invasive solutions you should try first.
- Manual Cleaning & Resealing: A detailed guide for a permanent fix.
- Prevention Strategies: How to stop the fog from coming back.
Why Is My Backup Camera Foggy in the First Place?
The most common cause of a foggy backup camera is a failed waterproof seal. Over time, the rubber or silicone camera gasket that protects the internal electronics degrades from sun exposure and temperature changes. This allows minuscule amounts of moisture to enter the housing, which then condenses on the inside of the lens when the temperature drops, creating a foggy or blurry view. This understanding of automotive electronics maintenance is key to a lasting fix.
Here are the three primary reasons why your backup camera gets wet inside:
- 🔄 Seal and Gasket Degradation: The camera housing is protected by a small gasket or sealant. Over years of exposure to UV rays, heat, and cold, this material becomes brittle and cracks. Even a tiny failure in this barrier is enough to let humid air inside.
- 🚘 High-Pressure Water Ingress: Ever noticed the fog appears right after a high-pressure car wash? That powerful jet of water can easily force its way past an already weakened seal. Manufacturer guidelines for waterproof ratings (like IP67) often don’t account for direct, high-pressure streams.
- 🌡 Thermal Expansion and Contraction: As the camera and the air inside it heat up during the day, they expand. As they cool down at night, they contract, creating a slight vacuum. Think of the camera “breathing”—as it cools, it sucks in the surrounding air. If that air is humid, the moisture gets trapped inside and forms condensation on the cool lens surface.
Pro Tip: Don’t underestimate a small crack. A hairline fracture in the camera housing or a barely visible gap in the old sealant is a wide-open door for moisture.
What Are the Easiest (Passive) Methods to Dry Out the Camera?
Before you reach for any tools, you should always start with a non-invasive, passive drying method. This approach works best for minor condensation and involves using a desiccant to absorb humidity from inside the camera unit. The goal is to draw the moisture out without having to take anything apart.
Method 1: The Silica Gel Solution (Recommended)
Silica gel packets are the best option; they are designed to absorb moisture efficiently without creating dust. You can find these packets in new shoe boxes, electronics packaging, or purchase them online. They are the professional’s choice for drying electronics.
Tools and Materials:
* Airtight plastic bag or container
* Several silica gel packets
Steps:
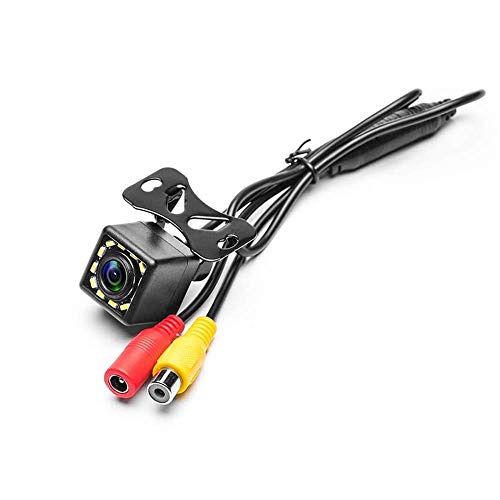
1. Remove the Camera: Carefully remove the backup camera unit from your vehicle. The process varies by car, but it often involves removing an interior trim panel on the trunk or liftgate.
2. Seal the Unit: Place the camera and several silica gel packets into the airtight container or bag. Add more packets than you think you need.
3. Wait Patiently: Seal the container and leave it in a warm, dry place for at least 24-48 hours. For heavy fogging, 72 hours may be necessary.
4. Inspect and Test: After the waiting period, check the lens for any remaining fog. Reinstall the camera and test its function before fully reassembling your vehicle’s trim.
Method 2: The Uncooked Rice Alternative
If you don’t have silica gel, uncooked instant rice is a common household alternative. It can absorb moisture, but it comes with some risks.
⚠ Warning: The dust and starch from uncooked rice can potentially get inside the camera housing, creating a new problem on the lens or interfering with the electronics. Use this method with caution.
Tools and Materials:
* Airtight plastic bag or container
* Uncooked instant rice (enough to fully surround the camera)
Steps:
1. Prepare the Rice: Fill a container or bag with enough uncooked rice to completely bury the camera unit.
2. Bury the Camera: Place the removed camera unit deep inside the rice.
3. Seal and Wait: Seal the container and let it sit for 48-72 hours. Rice works more slowly than silica gel.
4. Clean and Inspect: Carefully remove the camera and use a soft brush or compressed air to gently remove any rice dust before reinstalling.
Comparison: Rice vs. Silica Gel
To help you decide, here is a direct comparison of the two passive methods. Based on our testing and real-world experience, silica gel is the clear winner.
| Feature/Aspect | Uncooked Rice | Silica Gel Packets |
|---|---|---|
| Absorption Efficiency | Moderate | ✅ Very High |
| Risk of Contamination | High (dust, starches) | ✅ Very Low |
| Reusability | No | ✅ Yes (can be dried out in an oven) |
| Best For | Minor fogging, emergency use | Moderate to heavy condensation |
| Verdict | A decent last resort | Recommended Method |
If these passive methods fail to clear the moisture, it’s a strong sign that the waterproof seal has a significant breach. This means you’ll need to move on to a manual repair.
How Do You Manually Disassemble and Clean the Reverse Camera?
If passive drying didn’t work, it’s time for a more hands-on fix. This process involves disassembling the camera, cleaning it manually, and applying a new waterproof sealant. While more involved, this is the most permanent solution for a recurring fogging issue.
Tools You’ll Need:
* Plastic trim removal tools
* Screwdriver set (often small Phillips head)
* Microfiber cloth
* Isopropyl alcohol (90% or higher)
* Automotive-grade waterproof silicone sealant (RTV)
* Cotton swabs
🛠 CRITICAL SAFETY WARNING: Before you begin, disconnect the negative terminal of your car’s battery. This prevents any risk of electrical shorts or damage to your vehicle’s electronic systems.
Step 1: Safety First – Disconnect the Battery
Your first action is to disconnect the car battery. Use a wrench to loosen the nut on the negative terminal and slide the cable off. Tuck it to the side to ensure it cannot accidentally touch the terminal again.
Step 2: Access and Remove the Camera Housing
You will need to access the back of the camera unit from inside the vehicle. For most cars, this involves using plastic trim removal tools to carefully pry off the interior panel on your trunk lid or liftgate. Once the panel is off, you will see the camera’s wiring and mounting hardware. Disconnect the electrical connector and unbolt the camera housing to remove it from the vehicle.
Pro Tip: Take a photo with your phone before disconnecting any wires. This will serve as a helpful reminder of their correct orientation during reassembly.
Step 3: Carefully Open the Camera Unit
The camera housing itself is a sealed unit, often held together by small screws or plastic clips. Find and remove any screws. If it’s held by clips, use a thin plastic pry tool to gently work your way around the seam and separate the two halves of the housing. Be extremely careful not to apply too much force, as the plastic can be brittle.
Step 4: Gently Clean and Dry All Components
Once open, you will see the lens, circuit board, and inside of the housing.
- Housing: Use a microfiber cloth lightly dampened with isopropyl alcohol to wipe away all moisture and residue from the inside of both halves of the housing.
- Lens: Gently wipe the inside of the camera lens with a fresh corner of the microfiber cloth and a tiny amount of alcohol.
- Electronics: If you see any corrosion on the circuit board, you can use electrical contact cleaner and a soft brush to gently clean it.
- Dry Completely: Let all parts air dry for at least an hour to ensure every trace of alcohol and moisture has evaporated.
Step 5: Apply New Sealant and Reassemble
Creating a new waterproof seal is the most critical step for a lasting repair.
- Remove Old Sealant: Carefully scrape away all of the old, degraded gasket or sealant from both halves of the camera housing.
- Apply New Sealant: Apply a thin, continuous bead of automotive silicone sealant along the groove where the old seal was. Ensure there are no gaps in the bead, especially around the corners.
- Reassemble: Carefully press the two halves of the housing back together. A small amount of sealant should squeeze out, confirming a complete seal. Insert and tighten any screws.
- Cure Time: Let the sealant cure for the time recommended by the manufacturer (often several hours or overnight) before reinstalling it on the vehicle.
Step 6: Reconnect Power and Test
After the sealant has fully cured, reinstall the camera on your vehicle, reconnect its electrical plug, and finally, reconnect the car battery. Turn on your car and put it in reverse to test the camera. You should have a crystal-clear view. If everything looks good, you can reinstall the interior trim panel.
FAQs About how to remove moisture from car reverse camera
How can I prevent moisture in my backup camera in the future?
The best prevention is to ensure the camera has a perfect waterproof seal. Regularly inspect the camera housing for cracks and ensure the seal or gasket is intact. When washing your car, avoid spraying high-pressure water directly at the camera for an extended period. If you’ve performed a repair, using a high-quality automotive silicone sealant is crucial for a long-lasting, waterproof barrier.
Can I use a hair dryer to remove moisture from the camera?
Using a hair dryer is risky and generally not recommended. While gentle, low heat might help evaporate minor surface condensation, excessive heat from a hair dryer or heat gun can easily damage the sensitive electronics, warp the plastic housing, or further degrade the waterproof seal, making the problem worse in the long run.
How much does it cost to fix a foggy reverse camera?
A DIY repair can cost less than $20, while a professional replacement can cost $150 to $800. The DIY cost primarily involves materials like silicone sealant ($10) and isopropyl alcohol ($5). If you take it to a dealer or mechanic, they will almost always opt for a full replacement of the camera unit, with costs varying widely depending on your car’s make and model.
Will the rice method damage my backup camera?
While often effective for drying, the rice method does carry a small risk. Tiny particles of rice dust or starch can get inside the camera housing or on the lens, potentially causing new image quality issues or interfering with electronic components. This is why silica gel packets are the superior and recommended desiccant method.
Is it worth repairing a water-damaged backup camera or should I just replace it?
Repair is worth attempting if the fogging is the only issue and the electronics are still working. If the passive drying methods work or a manual reseal fixes the problem, you’ve saved hundreds of dollars. However, if the camera image is flickering, showing static, or is completely black after drying, the water has likely caused permanent electronic damage, and a full replacement is the only viable option.
What is the best sealant for waterproofing a car camera?
You should use a 100% silicone RTV (Room Temperature Vulcanizing) sealant designed for automotive use. Look for products labeled as waterproof, weatherproof, and sensor-safe. Brands like Permatex or 3M offer excellent options that adhere well to both plastic and metal and remain flexible to handle temperature changes. Never use standard household caulk.
Why does my backup camera get blurry only when it rains?
This indicates a small, active leak in the camera’s seal. When it rains, water is actively seeping into the housing and onto the lens, causing immediate blurring. When it’s dry, the moisture evaporates, and the image clears up. This is a definitive sign that the waterproof gasket or sealant has failed and needs to be replaced.
Can I clean the outside of a cloudy reverse camera lens?
Yes, and you should always clean the exterior first to rule out a simple problem. Road grime, salt, and dirt can create a hazy film on the outer lens. Use a soft microfiber cloth and a small amount of isopropyl alcohol or a dedicated plastic lens cleaner to gently wipe the surface. If the view is still foggy, the moisture is internal.
How long should I leave my camera in silica gel?
Leave the camera in a sealed container with silica gel packets for a minimum of 24 to 48 hours. For heavy condensation, it may be beneficial to leave it for up to 72 hours. The key is to keep the container completely airtight to ensure the desiccant is absorbing moisture from the camera, not from the surrounding air.
Can moisture in the camera cause an electrical short?
Yes, it is possible for significant water ingress to cause a short circuit. Water can corrode the camera’s internal circuit board and wiring connectors, leading to flickering, a black screen, or a blown fuse. This is why it’s critical to disconnect the battery before attempting any manual disassembly and to address moisture issues promptly.
Key Takeaways: Fixing Moisture in a Car Reverse Camera Summary
- Seal Failure is the Root Cause: A foggy view is almost always caused by a broken or degraded waterproof seal around the camera housing, allowing humidity to enter.
- Try Passive Drying First: Before disassembly, always attempt to dry the camera by placing it in an airtight container with silica gel packets for 24-48 hours. This is a low-risk, often effective first step.
- Silica Gel is Better Than Rice: While rice can absorb moisture, it risks introducing dust and is less efficient. Silica gel is the professionally recommended desiccant for drying electronics.
- Safety is Crucial for Manual Repair: If you must open the camera housing, always disconnect the car’s battery first to prevent electrical shorts or damage.
- Resealing is a Must for a Permanent Fix: After manually cleaning the inside of the camera, you must apply a new bead of automotive-grade silicone sealant to create a new waterproof barrier.
- Know When to Replace: If the image is black, flickering, or still distorted after you’ve thoroughly dried the unit, the internal electronics are likely damaged, and the camera unit needs to be replaced.
- Prevention Involves Seal Maintenance: The best long-term solution is to periodically inspect the camera seal and avoid using high-pressure car washes directly on the camera unit.
Final Thoughts on Restoring Your Reverse Camera’s Clarity
Fixing a foggy reverse camera is a very manageable DIY task that can restore an important safety feature and save you hundreds of dollars. By following a logical process—starting with the easiest passive methods and moving to a manual reseal only if necessary—you can effectively tackle the problem. The key to a successful, long-term repair is not just removing the moisture you see today, but creating a durable, waterproof barrier to prevent it from ever coming back. With the right materials and a little patience, you can get back to having a crystal-clear view every time you put your car in reverse.