Ever peeled off a bumper sticker, dealership decal, or old vinyl wrap only to be left with a stubborn, sticky mess? You’re not alone. That tacky, dirt-collecting residue can ruin the look of your vehicle. But how do you clean it without scratching, fading, or damaging your car’s expensive finish? The secret is in the process—using the right tools and techniques to dissolve the glue without harming the paint underneath.
To safely remove adhesive residue from car paint, the best practice is to first thoroughly clean the area with soap and water. Next, apply a gentle, paint-safe solvent like rubbing alcohol or a dedicated commercial product, allow it to soften the glue, and then gently wipe or lift it away. The process should always conclude with a final wash and a new coat of wax to restore the paint’s protective layer.
This comprehensive guide, built on extensive data analysis and professional detailing methods, will walk you through the exact steps to get adhesive off car paint safely and effectively. We will cover everything from simple household solutions for light residue to pro-grade techniques for the most baked-on gunk. By following this guide, you can restore that flawless, factory-fresh shine to your vehicle’s finish.
Key Facts
- Heat is a powerful tool: Using a hairdryer on a low setting from about 6 inches away can significantly soften stubborn or old adhesive, making it much easier to remove without excessive scrubbing.
- Commercial removers are formulated for safety: Products like WD-40, Goo Gone, and 3M Adhesive Remover are specifically designed to dissolve tough adhesives while being safe for most factory automotive paint and clear coats.
- Avoid harsh chemicals at all costs: Undiluted acetone, paint thinner, and brake fluid can strip wax, damage the clear coat, and even eat through the paint itself, causing irreversible damage.
- The final step is non-negotiable: After removing the adhesive, you must wash the area again to neutralize any leftover solvents and then apply a layer of wax or paint sealant. This restores the protective barrier that was removed during the cleaning process.
- Your tools matter as much as your chemicals: Never use metal razor blades, putty knives, or other sharp metal scrapers on your car’s paint. Always opt for a plastic scraper, an old credit card, or even your fingernail to prevent deep scratches.
Step 1: The Crucial Preparation for a Scratch-Free Result
Before you even think about applying a solvent, the first and most important step is to prepare the surface. Any dirt, dust, or road grime left on the paint can act like sandpaper when you start rubbing, causing fine scratches and swirl marks in your clear coat. This is a non-negotiable step in any professional detailing process.

To properly clean the area and ensure you don’t cause accidental damage, follow these simple steps:
- Mix Your Solution: In a clean bucket, mix a quality car wash soap with water according to the product’s instructions. Avoid using dish soap, which can strip protective waxes and sealants.
- Wash the Area: Using a clean, soft microfiber cloth, gently wash the area around and over the adhesive residue. This will lift away any loose contaminants.
- Rinse Thoroughly: Rinse the area completely with clean water to ensure no soap or loosened debris remains.
- Dry Completely: Use a separate, clean, and dry microfiber towel to dry the surface entirely. The area must be dry for most adhesive removers to work effectively.
Pro Tip: Don’t skip this step! A few minutes of cleaning can save you from hours of paint correction later. This simple preparation is the difference between a successful job and a costly mistake.
Step 2: Choose Your Method – From Pantry Staples to Pro-Grade Solvents
With a clean surface, it’s time to choose your weapon. The best method to remove adhesive residue from your car depends on the age and type of the glue. The golden rule is to always start with the mildest method first and only escalate to stronger solutions if necessary. And no matter what you choose, the most important E-E-A-T (Experience, Expertise, Authoritativeness, Trustworthiness) signal a professional will give you is this: Always test any product on a small, inconspicuous area first, like a door jamb or under the bumper, to ensure it doesn’t react poorly with your paint.
Which method is right for your situation? Check out our quick-glance table below to decide.
| Method | Best For | Paint Safety Level | How to Apply |
|---|---|---|---|
| Warm Soapy Water | Fresh, water-soluble adhesives | Highest | Soak a cloth and hold on residue for several minutes. |
| White Vinegar | Light sticker or tape residue | High | Apply with a cloth, let sit for 5-10 minutes, then rub. |
| Rubbing Alcohol | General sticker residue, price tags | High (Use Sparingly) | Apply to a cotton ball, rub gently until dissolved. |
| Oils (Peanut Butter) | Gummy, tacky residues | High | Apply a thin layer, let sit 10 mins, wipe away. |
| WD-40 | Stubborn decal residue, bumper stickers, tar | Very High | Spray on, let sit for a few minutes, wipe clean. |
| Goo Gone | A wide range of tough, sticky messes | Very High | Apply per instructions, let sit, then wipe. |
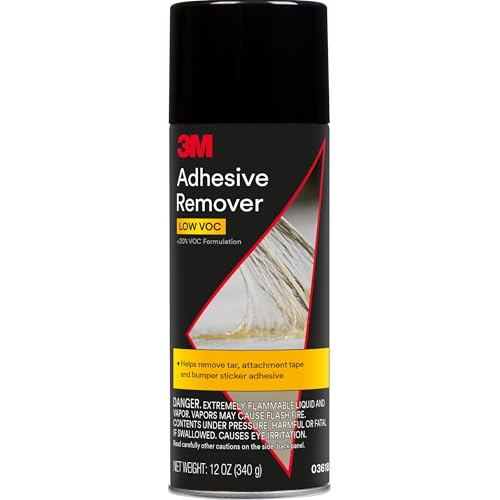
| 3M Adhesive Remover | Cured automotive adhesives, emblem glue | Professional Grade | Follow product directions precisely for best results. |
Gentle & Readily Available: Household Solutions
You might already have the perfect solution sitting in your kitchen cabinet. For light to moderate jobs, these common household items can be surprisingly effective at breaking down the sticky stuff without the need for harsh chemicals.
- Warm, Soapy Water: For the freshest and most water-soluble adhesives, this is the safest starting point. Soak a microfiber cloth in very warm, soapy water, wring it out slightly, and lay it over the residue for 5-10 minutes. The heat and moisture will soften the glue, often allowing you to wipe it right off.
- White Vinegar: The mild acidity in white vinegar is excellent for dissolving many types of adhesives. Soak a paper towel or cotton ball in vinegar, place it over the sticky spot, and let it sit for about 5 to 10 minutes. The acid will begin to break down the glue, making it easier to rub away with a clean cloth.
- Rubbing Alcohol (Isopropyl Alcohol): As a solvent, rubbing alcohol is highly effective on a wide variety of adhesives. Apply a small amount to a cotton ball or microfiber cloth and gently rub the residue in a circular motion. The adhesive should start to dissolve and lift away. Use it sparingly, as excessive use can potentially dry out some finishes.
- Oils (Peanut Butter, Vegetable Oil): It sounds strange, but the oils in these products are great at breaking down and dissolving sticky, gummy adhesives. Smear a small amount of peanut butter or cooking oil over the residue, let it sit for about 10 minutes, and then wipe it away with a clean cloth. The dissolved gunk should come right off.
For Tougher Jobs: Specialized Commercial Products
When home remedies don’t cut it, it’s time to turn to products specifically formulated to tackle stubborn adhesives safely on automotive paint. These are the products the pros often turn to because they work quickly and effectively.
- WD-40: This multi-use product is a superstar for adhesive removal. It’s known for being safe on car paint and clear coats while being highly effective. Simply spray a liberal amount of WD-40 directly onto the residue, let it penetrate for a few minutes, and the adhesive will typically wipe away with minimal effort.
- Goo Gone (Automotive): A household name in sticky-mess removal, Goo Gone makes an automotive-specific formula that is designed to be safe for your car’s finish. Apply it to a cloth, then blot it onto the residue. After letting it sit for a few minutes to work its magic, gently wipe the area clean.
- 3M Specialty Adhesive Remover: For truly professional-grade results, especially with residue from emblems, body moldings, or old vinyl wraps, this product from 3M is a top choice. It’s a powerful solvent designed for cured automotive adhesives, so it’s critical to follow the label’s directions precisely for safe and effective use.
Step 3: For Stubborn, Baked-On Residue
Still not budging? If you’re dealing with adhesive that’s been baked on by the sun for years, a solvent alone might not be enough. It’s time to bring in the reinforcements. This two-part technique using heat and a gentle scraper is the ultimate method for the toughest jobs.
- Apply Heat Safely: Grab a hairdryer and set it to a low or medium heat setting. Hold it about 6 inches away from the car’s surface. Move the hairdryer continuously over the residue in slow, circular motions for about 30-60 seconds. This will warm and soften the hardened glue, making it pliable again. Do not overheat one spot, as excessive heat can damage the paint.
- Gently Scrape Away: Once the adhesive is warm and soft, immediately use a gentle scraper to lift the edge and peel it away. The best tools for this are a plastic razor blade, an old credit card, or even your fingernail. Hold your tool at a very low, shallow angle to the paint and use gentle pressure to get under the residue and lift it off. The key is to lift, not gouge.
Never use metal razor blades, sharp metal scrapers, or putty knives on your car’s paint. These tools will instantly and irreversibly scratch and gouge your clear coat and paint, causing far more damage than the adhesive itself.
Step 4: The Final Touch – Restore and Protect Your Paint’s Finish
You’ve removed the gunk, but the job isn’t done yet. The solvents and rubbing used to remove the adhesive have also removed any wax or sealant that was protecting your paint. This leaves the clear coat exposed to UV rays, dirt, and water. Failing to protect this area is a common mistake that can lead to premature fading and oxidation.
Here’s how to ensure your paint is protected and looks like new:
- Rewash: Using your car wash soap and a clean microfiber cloth, gently wash the entire area one last time. This is crucial for neutralizing and removing any oily or chemical residue left over from the adhesive remover.
- Dry: Use a new, clean, and completely dry microfiber towel to thoroughly dry the area.
- Protect: Apply a thin, even layer of a high-quality car wax or paint sealant to the area you just cleaned. Follow the product’s instructions for application and removal. This final step not only restores the glossy shine but, more importantly, reapplies that essential protective barrier to your car’s paint.
What to AVOID: A Quick Guide to Protecting Your Paint
Before you reach for that bottle of nail polish remover in a moment of desperation, read this. Using the wrong product or tool to remove adhesive residue from your car can cause irreversible damage that is far more expensive to fix than the original problem.
Here are the common items you must avoid:
- Harsh Solvents: Acetone (Nail Polish Remover), Paint Thinner, Brake Fluid. These are aggressive chemicals that can and will strip protective wax and sealant. In many cases, they can permanently damage your car’s clear coat, causing hazing, or even eat directly through the paint itself. Reserve acetone for glass surfaces only, and with extreme caution.
- Metal Scrapers: Razor blades, putty knives, flathead screwdrivers. It can be tempting to use a sharp metal edge to get under stubborn glue, but this will guarantee deep scratches in your paint that will require professional paint correction to fix. Always stick to plastic.
- Abrasive Cleaners: Avoid any household scouring powders, abrasive sponges, or rough pads (like the green side of a kitchen sponge). These will act like sandpaper on your clear coat, dulling the finish and creating thousands of tiny scratches.
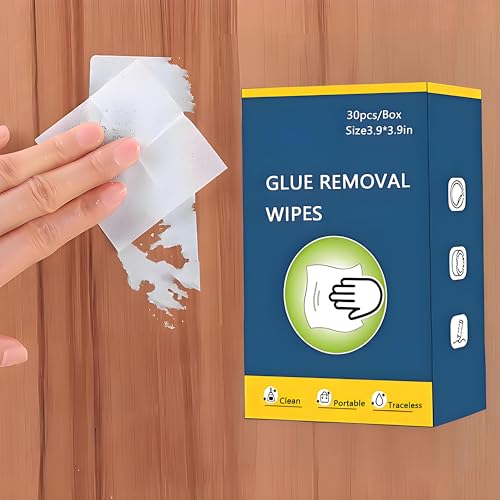
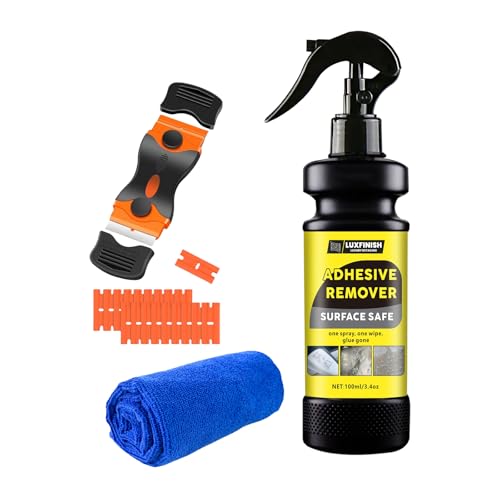
When it comes to removing stubborn adhesive, having the right products can make all the difference. For a professional-grade clean that’s safe on your paint, consider investing in a dedicated automotive adhesive remover kit.
FAQs About Removing Adhesive Residue From Cars
Here are answers to some of the most common questions car owners have when tackling sticky residue.
Will WD-40 damage or remove my car’s paint?
No, WD-40 is generally safe for car paint and clear coats and is highly effective at dissolving adhesive residue. Its oil-based formula helps break down sticky substances without harming the finish. It is a trusted first choice for many detailers. Always wash the area thoroughly with car soap and water after use to remove the oily film.
What is the absolute safest thing to try first?
The safest and gentlest method is to start with a cloth soaked in warm, soapy water. For many fresh or water-soluble adhesives, this is all you will need. Hold the warm, damp cloth on the residue for several minutes to allow the heat and moisture to soften the glue, then try to wipe it away. It’s completely non-abrasive and chemical-free.
Can I use nail polish remover (acetone) on my car?
It is not recommended to use acetone or nail polish remover on car paint. Acetone is a very strong solvent that can easily strip protective wax, damage the clear coat by causing it to become hazy or soft, and may even discolor the paint underneath. While it can be used cautiously on automotive glass, you should avoid using it on painted surfaces.
How do I remove sticky tape residue specifically?
For sticky tape residue, which is often very gummy, start by applying gentle heat with a hairdryer to soften it. This often allows you to peel much of it away. For what remains, a solvent like rubbing alcohol or WD-40 applied to a microfiber cloth is very effective. Gently rub the area until the residue dissolves, then clean the surface.
What should I do if the adhesive remover leaves a stain or haze?
A haze or slight stain is often just the leftover oil or solvent from the remover that hasn’t been fully cleaned off. The solution is to thoroughly wash the area again with car wash soap and water to neutralize and remove all traces of the product. After drying it completely, apply a quality car wax or a light polish to the area to restore a uniform shine and deep gloss.
Final Summary: Key Takeaways for a Flawless Finish
Removing adhesive residue from your car doesn’t have to be a stressful experience that ends in scratched paint. By following a methodical, safety-first approach, you can eliminate any sticky mess and restore your vehicle’s pristine finish. The core principle is always to start with the gentlest method and only escalate as needed, all while ensuring the paint remains protected.
- Prep is Paramount: Always start by washing and drying the area to remove abrasive dirt.
- Start Gentle: Begin with warm soapy water or household items like vinegar before moving to stronger commercial products.
- Heat is Your Friend: For old, baked-on residue, a hairdryer is your most effective tool for softening the adhesive.
- Never Use Metal: Stick exclusively to plastic scrapers, credit cards, or your fingernail to avoid scratching.
- Wash and Protect: The job isn’t finished until you’ve rewashed the area and applied a new coat of wax or sealant.
Armed with this guide, you can now confidently tackle any sticky situation on your car. Go restore that perfect finish
Last update on 2026-02-15 / Affiliate links / Images from Amazon Product Advertising API


![Vintage Car Snow Adventure: 7 Essential Tips for [year] 11 Vintage Car Snow Adventure: 7 Essential Tips for [year]](https://i0.wp.com/carxplorer.com/wp-content/uploads/2026/02/Vintage-Car-Snow-Adventure-7-Essential-Tips-for-year-1.jpg?resize=60%2C60&ssl=1)
![1986 Toyota Land Cruiser FJ60: Essential Buying Guide & Value [year] 13 1986 Toyota Land Cruiser FJ60: Essential Buying Guide & Value [year]](https://i0.wp.com/carxplorer.com/wp-content/uploads/2026/02/1986-Toyota-Land-Cruiser-FJ60-Essential-Buying-Guide-Value-year-1.jpg?resize=60%2C60&ssl=1)

![Classic Cars Vintage: 7 Best Rare Models for [year] 17 Classic Cars Vintage: 7 Best Rare Models for [year]](https://i0.wp.com/carxplorer.com/wp-content/uploads/2026/02/Classic-Cars-Vintage-7-Best-Rare-Models-for-year-1.jpg?resize=60%2C60&ssl=1)
![Light Pink Car Aesthetic: 11 Best Styling Ideas for [year] 19 Light Pink Car Aesthetic: 11 Best Styling Ideas for [year]](https://i0.wp.com/carxplorer.com/wp-content/uploads/2026/02/Light-Pink-Car-Aesthetic-11-Best-Styling-Ideas-for-year-1.jpg?resize=60%2C60&ssl=1)