Those chalky, stubborn circles on your car’s paint and glass are more than just an eyesore. They’re a sign of a relentless battle against an invisible enemy: hard water. Have you ever washed your car on a sunny day, only to find it covered in polka dots once it dries? Or maybe you’ve noticed your car’s finish looks dull and cloudy, no matter how much you clean it. You’re not just dealing with dirt; you’re fighting mineral deposits that can permanently damage your vehicle’s finish if left unchecked.
To get rid of hard water stains on a car, you must dissolve the mineral deposits. Start with the least aggressive method, like a 50/50 white vinegar and water solution. For tougher spots, use a dedicated chemical water spot remover, and for physically etched stains, mechanical polishing is required.
This guide is your complete battle plan. Leveraging a deep analysis of professional detailing methods and the science behind the stains, we’ll walk you through the exact steps to diagnose the severity of your water spots, safely remove them without damaging your paint, and finally, protect your car so they don’t come back. We’ll cover everything from simple DIY solutions for fresh spots to the advanced techniques needed to remove stubborn, etched-in stains for good.
Key Facts
- The Culprit is Invisible: Hard water stains are caused by minerals, primarily calcium and magnesium, that are left behind after water evaporates from your car’s surface.
- Not All Spots are Equal: Stains range from simple surface deposits (Type 1) that can be easily washed off to severe “crater” etchings (Type 4) that have physically eaten into the paint.
- Sunlight is the Enemy: Washing a car in direct sunlight or allowing water to dry on a hot surface can bake these minerals into the paint, dramatically increasing the difficulty of removal and leading to etching.
- Prevention is Protection: Applying a protective layer like wax, a sealant, or a ceramic coating creates a hydrophobic (water-repelling) barrier, which is one of the most effective ways to prevent new spots from forming.
- The “Least Aggressive First” Rule: Professionals always start with the mildest cleaning solution that could work and only escalate to more powerful chemicals or mechanical polishing if necessary to avoid causing unnecessary wear on the paint.
First, Understand What You’re Fighting: The Types of Hard Water Stains
Before treating, identify your stain type: Fresh deposits (Type 1) are on the surface, while etchings (Type 3 & 4) are physically engraved into the paint and require more aggressive methods. To effectively learn how to get rid of hard water stains on car, you first need to become a detective. Not all water spots are created equal, and using the wrong method for the type of stain you have can be ineffective at best and damaging at worst.

Hard water itself contains a high concentration of dissolved minerals like calcium and magnesium. When a droplet of this water sits on your car’s paint or glass and evaporates, those minerals get left behind, creating the chalky residue you see. This can happen from a rogue sprinkler, unfiltered car wash water, or even just washing your car in the sun.
As professional detailers know, properly categorizing these mineral stains is the key to choosing the right removal strategy. Think of it as a diagnosis before the treatment. Here’s a breakdown of the different types of water spots you might encounter, from the simple to the severe.
| Stain Type | Description | Common Cause |
|---|---|---|
| Type 1: Fresh Deposits | These are light, surface-level mineral stains. They look like dusty outlines of water drops and can often be wiped away easily. | Water drying on the surface after a recent wash or light rain. |
| Type 2: Bonded Deposits | The minerals have started to chemically bond with the car’s surface, often due to being baked in by the sun. They won’t come off with a simple wash. | Sprinklers hitting the car on a hot day; washing in direct sunlight. |
| Type 3: Imprint Rings | These are physical etchings in the paint that trace the outline of the water droplet. You can sometimes feel a slight edge with your fingernail. | Bonded deposits left on the surface for an extended period. |
| Type 4: “Crater” Etchings | The most severe form. Corrosive elements in the water (like acid rain) have eaten into the paint, creating a small pit or crater. | Acid rain or highly corrosive water left untreated for a long time. |
| Type 5-8: Other Stains | These include specialized spots from acid rain, alkaline rain (from wildfire ash), or moisture getting trapped under the clear coat. | Environmental factors or moisture trapped under car covers. |
Look closely at the spots on your car. Do they look like simple smudges on the surface, or can you see a faint ring etched into the paint? Understanding the difference between a bonded contaminant (something stuck on the paint) and an etching (something in the paint) is the most critical part of this process. Now, let’s move on to the safe removal process.
Step 1: Essential Preparation for Safe Stain Removal
Always start by washing the car thoroughly in a cool, shaded area to remove surface contaminants and prevent scratching during spot removal. Jumping straight into stain removal without proper prep is one of the biggest mistakes you can make. Trying to rub out a water spot on a dirty, hot panel is a recipe for creating a bigger problem: fine scratches and swirls in your paint.
Think of this step as setting up a clean and safe operating room. You need to remove any loose dirt, dust, and grit so that when you start focusing on the water stains, you’re not grinding those particles into your car’s clear coat. Following these professional best practices ensures your efforts are both safe and effective.
Here’s what you need to do:
- Find Shade and Check the Temperature: Park your car out of direct sunlight. The paint or glass surface should be cool to the touch. This is a non-negotiable rule. Working on a hot surface will cause any cleaning product to evaporate almost instantly, leaving behind its own residue and potentially baking the minerals even deeper into the finish.
- Rinse Thoroughly: Before a single wash mitt touches the paint, give the entire vehicle a powerful rinse with a hose. Your goal is to knock off as much loose dirt and grime as possible. Pay extra attention to heavily soiled areas like the lower body panels and wheel wells.
- Wash with a Quality Shampoo: Use a pH-balanced car wash shampoo and a clean, high-quality wash mitt. A pH-balanced soap is designed to be gentle on your car’s existing wax or sealant while still being effective at cleaning. Wash the car from the top down, rinsing your mitt frequently in a separate bucket of clean water to avoid cross-contamination.
- Final Rinse: After washing, give the car another complete rinse to ensure all the soap is gone. Now you have a perfectly clean, cool surface, and you can clearly see the hard water stains you need to target.
Pro Tip: Touching the hood should feel cool. If it’s warm, wait. Trying to work on a hot panel will cause your cleaning products to evaporate instantly, making the problem worse.
Step 2: The Least Aggressive Methods for Fresh Stains (Type 1)
For light stains, a 50/50 mix of white vinegar and distilled water is the most effective starting point. Spray, wait 5 minutes, wipe, and rinse thoroughly. Now that your car is clean and prepped, it’s time to follow the golden rule of detailing: always start with the least aggressive method first. For fresh, Type 1 mineral deposits that haven’t had a chance to bake in and etch the paint, a simple, budget-friendly DIY solution is often all you need to get rid of hard water stains on car surfaces.
This approach is perfect for spots left over after a recent wash or from an overnight sprinkler attack. The mild acidity of household vinegar is excellent at neutralizing and dissolving the alkaline mineral deposits.
Here’s what you’ll need and how to do it:
- Supplies:
- An empty spray bottle
- Distilled white vinegar
- Distilled water (preferred, as it contains no minerals of its own)
- Several clean, plush microfiber towels
- The Vinegar Solution Method:
- Mix the Solution: Fill your spray bottle with equal parts white distilled vinegar and distilled water. A 50/50 ratio is the perfect starting point.
- Spray the Affected Area: Working on one panel at a time, spray the solution directly onto the hard water spots. Make sure the area is fully saturated.
- Let It Dwell: Allow the solution to sit on the surface for about 3 to 5 minutes. This “dwell time” is crucial; it gives the acid in the vinegar time to break down the mineral deposits. Do not let it dry on the surface.
- Wipe Gently: Take a clean microfiber towel, lightly dampen it with the same vinegar solution, and gently wipe the area. You should see the spots disappear.
- Rinse Immediately and Thoroughly: This is a critical step. You must rinse the area with plenty of clean water to neutralize the vinegar and wash away any loosened minerals.
- Dry the Area: Use a separate, dry microfiber towel to completely dry the panel. This prevents new water spots from forming from the rinse water.
A Note on Baking Soda: While some suggest a baking soda paste for glass, be extremely cautious about using it on your car’s paint. Baking soda is an abrasive and can easily cause fine scratches in the clear coat if you’re not careful. For paint, the vinegar method is a much safer first step.
Quick Fact: The mild acid in vinegar is what helps it dissolve the alkaline mineral deposits like calcium and magnesium that cause hard water stains.
Step 3: Escalating to a Targeted Approach for Stubborn Spots (Type 2 & 3)
When vinegar fails, use a dedicated chemical Water Spot Remover. For gritty-feeling surfaces, a Clay Bar is the next step to physically remove bonded minerals. If you’ve tried the vinegar solution and those stubborn spots are still staring back at you, it means you’re likely dealing with Type 2 or even light Type 3 stains. These are bonded mineral deposits that have started to chemically “stick” to the surface, and they require a more targeted approach.
At this stage, we move from a general-purpose cleaner to specialized detailing products designed specifically for this problem. There are two excellent tools in the arsenal here: chemical removers and mechanical decontaminants (the clay bar). It is crucial to use products specifically designed for automotive use to avoid damaging the paint or clear coat.

Feel the surface with your fingertips (inside a plastic bag for more sensitivity). If it feels gritty after washing, those are bonded contaminants that a clay bar is perfect for removing.
3a. Using a Chemical Water Spot Remover
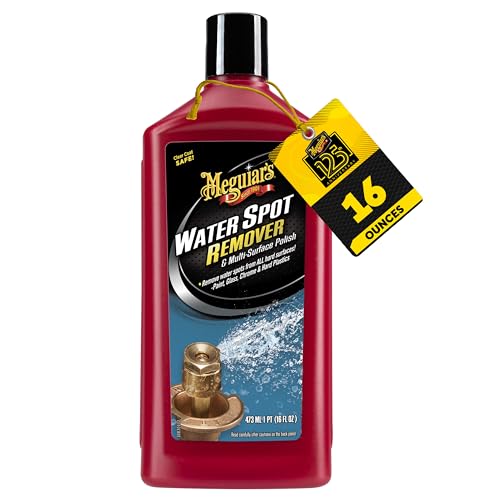
Apply chemical removers to a cool, small section at a time, gently work the product in, and rinse before it can dry. A dedicated automotive water spot remover is the next logical step. These products contain a specific blend of mild acids and cleaning agents formulated to rapidly dissolve mineral deposits without being overly harsh on your car’s finish. They are significantly more effective than a simple vinegar solution on bonded stains.
Think of this step like using a targeted medicine – apply it only where needed and follow the directions precisely for the best results.
- Perform a Test Spot: Before applying the product to a large, visible area, always perform a test spot in an inconspicuous area (like a low door jamb or the bottom of a rocker panel) to ensure it doesn’t react negatively with your paint. This is a critical professional step for safety.
- Apply to an Applicator: Instead of spraying directly on the paint, apply a small amount of the water spot remover to a soft foam or microfiber applicator pad.
- Work in Small Sections: Gently rub the product onto a small 2’x2′ section where the stains are present. Use light pressure and overlapping motions.
- Do Not Let It Dry: Just like with the vinegar solution, it is vital that you do not allow the chemical remover to dry on the surface.
- Wipe and Rinse: After a minute or as directed by the product’s instructions, wipe the area with a clean microfiber towel and immediately rinse the panel thoroughly with water.
- Inspect and Repeat if Necessary: Dry the area and inspect your work. If some faint spots remain, you can repeat the process.
3b. Using a Clay Bar for Embedded Minerals
Always use ample lubricant (like a detailing spray) and light pressure when using a clay bar to lift mineral spots without scratching the paint. If a chemical remover gets you 90% of the way there but you can still feel a gritty texture on the paint, it’s time for a clay bar. A detailing clay bar is a tool that mechanically shears off above-surface bonded contaminants—including stubborn mineral deposits. It won’t remove etchings, but it will leave your paint feeling incredibly smooth.
The most important rule of using a clay bar is lubrication. Without it, the clay will stick and mar the paint.
- Prepare the Clay: Take a small piece of the clay bar and flatten it into a pancake about the size of your palm.
- Lubricate the Surface: Generously spray a clay lubricant (a dedicated detailing spray or even a quality glass cleaner can work) onto a small 2’x2′ working area. The surface should be very wet.
- Glide the Clay: Place the flattened clay on the lubricated surface and gently glide it back and forth with your fingertips. Use very little pressure. You will feel and hear the clay “grabbing” the contaminants at first.
- Continue Until Smooth: Keep gliding the clay until it moves freely and silently across the surface. That’s the signal that all the contaminants have been removed. As you work, you’ll literally feel the surface change from rough to glass-smooth under the clay bar. That’s how you know it’s working.
- Inspect and Fold the Clay: Periodically check the clay’s surface. When it looks dirty, fold it in half and re-flatten it to expose a clean side.
- Wipe and Dry: Once a section is done, wipe away the lubricant residue with a clean microfiber towel and move to the next section, always remembering to keep the surface wet with lubricant.
Step 4: Polishing to Remove Etchings and Severe Stains (Type 3, 4, & 5)
For etched stains that are physically in the paint, mechanical polishing is required to level the surface and restore a smooth finish. If you’ve washed, used a chemical remover, and clayed the surface, but you can still see the faint outline of water spots, then you are dealing with etchings. These are Type 3, 4, or 5 stains that are physically in the clear coat. No amount of chemical cleaning will remove them because they are no longer something on the surface.
To fix this, you need to use mechanical abrasion. This process uses a specialized automotive polish or compound, which contains microscopic abrasives, to carefully level the clear coat around the etching until the surface is uniform again. This is the most advanced technique and the ultimate solution for when water spots won’t come off.
Analogy: Think of an etching as a tiny valley in your car’s clear coat. Polishing doesn’t fill the valley; it carefully levels the surrounding ‘mountains’ down to the same depth, making the surface smooth again.
As with all detailing, the principle is to use the least aggressive method first. This means starting with a fine polish before moving to a more aggressive compound if needed. This can be done by hand for small, isolated spots or with a machine for more widespread issues.
For shallow etchings, hand application can be effective.
- Apply a small amount of a fine polish or paint cleaner to a microfiber applicator pad.
- Work in a small, 1’x1′ section using circular or straight-line motions with moderate pressure.
- Keep working the product until it becomes nearly clear.
- Wipe off the residue with a clean microfiber towel and inspect the area under good lighting.
- The etching should be diminished or gone. You may need to repeat the process 2-3 times.
For more severe or widespread etching, a machine polisher is far more effective and efficient. A dual-action polisher is a user-friendly tool that is safe for beginners and professionals alike.
- Apply 3-4 pea-sized drops of polish to the appropriate foam pad on the polisher.
- Start with a light polishing or finishing pad, which is less aggressive.
- Work in a 2’x2′ section, spreading the polish on a low-speed setting before increasing the speed to work the product.
- Move the machine in a slow, overlapping cross-hatch pattern (up-and-down, then side-to-side).
- After a few passes, wipe away the residue and inspect. If the etching remains, you can step up to a more aggressive pad and polish combination or a compound for deeper defects like Type 4 “crater” etchings.
Step 5: Protect Your Work and Prevent Future Water Spots
The best prevention is twofold: always dry your car completely after it gets wet and apply a protective layer like wax or a ceramic coating to make water bead off. You’ve done the hard work of removing the stains; now take these simple steps to make sure you don’t have to do it again anytime soon. Getting rid of existing hard water stains is only half the battle. Without a proper protection and prevention strategy, they will inevitably return. The goal is to make your car’s surface so slick and water-repellent that water can’t sit flat and evaporate.
This final step is arguably the most important for long-term success. It involves creating a hydrophobic barrier on your paint and adopting a few key habits.
Here is the ultimate strategy to prevent water spots on car finishes:
- Apply a Protective Layer: This is your number one defense. After you’ve removed all the spots and the paint is pristine, you must apply a layer of protection.
- Wax: The traditional option. Easy to apply and provides good protection and shine for a few weeks to a few months.
- Sealant: A synthetic polymer-based protectant. Generally lasts longer than wax (typically 4-6 months) and provides excellent durability.
- Ceramic Coating: The ultimate in long-term protection. As many professional detailers recommend, a ceramic coating creates a semi-permanent, glass-like shell over your paint that is extremely hydrophobic and chemical resistant. A single application can last for months or even years, making it incredibly difficult for water spots to form or bond.
- Always Dry Your Car Thoroughly: This is the most fundamental habit to adopt. Never, ever let your car air dry after washing it. Use high-quality, plush microfiber drying towels to absorb every last drop of water before minerals have a chance to be left behind.
- Use a Quick Detailer Spray: Between washes, using a quick detailer spray can act as a drying aid and a sacrificial barrier. It adds slickness, boosts the existing protection, and makes it easier to safely wipe away light dust or fresh water drops.
- Avoid the Culprits: If possible, try to park away from sprinklers. Avoid washing your car in direct, hot sunlight. If your car gets hit by rain, try to dry it off once the rain stops, especially if you know you have hard water in your area.
To make these steps even easier, having the right products on hand is key. Here are some top-rated kits that include everything you need to tackle water spots.


FAQs About Removing Hard Water Stains on a Car
Are hard water spots on cars permanent?
No, but they can become etchings that require polishing to remove. True “permanence” is rare and usually means the clear coat has failed. Hard water spots themselves are not permanent, but if left untreated, they can cause permanent damage. Surface mineral deposits can be washed off, but these minerals can slowly eat into the surface, creating etchings or “imprint rings.” These physical defects require more aggressive methods like polishing to level the surface. In the most extreme cases, “crater etchings” can go through the clear coat entirely, which may require professional paint correction.
How do detailers remove water spots?
Detailers follow the same process: assess the stain type, start with chemical cleaners, and use machine polishing for any etchings that remain. Professionals use a systematic, “least aggressive first” approach, which is exactly what this guide teaches. Their process involves:
* Assessment: First, they determine the severity, identifying if the spots are on the surface (Type 1-2) or etched into the paint (Type 3+).
* Chemical Decontamination: They use a professional-grade acidic water spot remover to dissolve the mineral deposits.
* Mechanical Decontamination: If needed, they use a clay bar to remove any remaining bonded contaminants.
* Paint Correction: For any remaining etchings, they use a machine polisher with the appropriate combination of compound and polish to level the clear coat and restore a perfect finish.
Will WD-40 remove hard water spots?
No, do not use WD-40 for water spots. It is not designed to dissolve minerals and can harm your car’s finish. Use vinegar or a dedicated automotive product instead. It’s critical to avoid using non-automotive products on your car’s paint. WD-40 is a water-displacing solvent and lubricant, not a mineral remover. It is oil-based and will leave behind a greasy residue that attracts more dust and dirt. Worse, this residue can interfere with the proper bonding of waxes, sealants, or any protective coating you try to apply later. Stick to products formulated for the job.
Final Summary: Key Steps to a Spot-Free Finish
You now have the complete, professional-grade strategy to get rid of hard water stains on your car and keep them away for good. The key is to remember the systematic approach: diagnose the problem, treat it with the appropriate level of aggression, and protect the finish to prevent it from happening again. By following this process, you can solve even the most stubborn water spot issues.
Let’s recap the core strategy:
- Diagnose First: Identify the type of water spot you’re dealing with. Is it a fresh surface deposit or a physically etched ring in the paint? This determines your entire plan of attack.
- Follow the Steps Sequentially: Always start with the least aggressive method. Begin with a thorough wash and a vinegar solution. Only escalate to chemical removers, clay bars, and finally, polishing if the previous step fails.
- Protection is Everything: Once the surface is clean and perfect, lock in that finish. Applying a quality wax, sealant, or long-lasting ceramic coating is the most effective way to prevent future headaches.
Take these professional-grade steps and confidently restore your car’s brilliant, spot-free shine
Last update on 2026-03-04 / Affiliate links / Images from Amazon Product Advertising API


![LISEN Bike Phone Holder Review: Worth It in [year]?](https://i0.wp.com/carxplorer.com/wp-content/uploads/2026/03/LISEN-Bike-Phone-Holder-Review-Worth-It-in-year-1.jpg?resize=60%2C60&ssl=1 "LISEN Bike Phone Holder Review: Worth It in [year]? 10")


