Struggling with how to get mold out of leather car seats? You’re right to be concerned about damaging the expensive material while trying to remove that unpleasant musty odor and unsightly growth. It’s a common problem that requires a careful approach.
To safely remove mold from leather car seats, you must first vacuum all loose spores with a HEPA filter vacuum, then clean the area with a pH-safe solution like diluted white vinegar, and finally condition the leather to restore moisture. The key is to kill the fungal spores without drying out or damaging the leather. A thorough drying process is crucial to prevent the mold from returning.
Based on tested and proven methods from professional auto detailers, this guide provides the exact step-by-step process to restore your vehicle’s interior. You’ll discover how to safely eliminate mold, understand its causes, and implement strategies to ensure it never comes back, all while preserving your leather’s finish and your car’s value.
Key Facts
- Moisture is the Root Cause: Mold growth on leather seats is almost always caused by excess moisture from spills, leaks, or high humidity, creating the perfect environment for spores to thrive.
- Health Risks are Real: Mold in the enclosed space of a car can be dangerous, potentially triggering allergic reactions, respiratory issues, and other health problems, according to research on indoor air quality.
- Vinegar Is an Effective DIY Solution: A 1:1 solution of white vinegar and water acts as a natural and effective cleaner that kills mold spores due to its mild acidity.
- Harsh Chemicals Cause Damage: Cleaners like bleach or rubbing alcohol should never be used on leather as they strip its natural oils and protective finish, leading to cracking and discoloration.
- Conditioning is Not Optional: The cleaning process removes essential oils from the leather; applying a quality leather conditioner afterward is a critical step to prevent cracking and protect the material.
How Do You Get Mold Out of Leather Car Seats? A Step-by-Step Guide
The key to getting mold out of leather car seats is a systematic approach that involves assessment, careful cleaning, thorough drying, and protective conditioning. From our experience, simply wiping the mold away is not enough. You must address both the visible fungal growth and the invisible spores without using harsh chemicals that can ruin the leather. Following a tested method ensures you not only clean the seats but also protect your investment and prevent future growth. This professional-level process restores the appearance, removes odors, and preserves the resale value of your vehicle.

To successfully tackle this issue, we will break down the process into a clear, manageable framework. This ensures you address the problem completely, from understanding its cause to making sure it never returns. Here is the overview of our step-by-step guide:
* Understand the Cause & Risks: First, we’ll explore why mold appeared and the potential health hazards it poses.
* Gather Your Supplies: Next, we’ll create a complete checklist of the safe and effective tools you’ll need.
* Follow the 7-Step Cleaning Method: This is the core of the guide, detailing the safest way to clean, dry, and restore your leather.
* Choose Your Cleaner: We’ll compare a DIY vinegar solution to commercial products so you can make an informed choice.
* Implement Prevention Strategies: Finally, we’ll cover the essential steps to keep your car interior dry and permanently mold-free.
Why Is Mold Growing on My Leather Car Seats and Is It Dangerous?
Mold grows on leather car seats primarily because of excess moisture combined with a food source like dust or skin oils. The interior of a car provides the perfect conditions for the “mold triangle”: mold spores (which are always present in the air), a food source (organic material on the leather), and moisture. When a car’s interior becomes damp, these spores activate and begin to grow. Yes, mold in a car can be dangerous, potentially causing allergic reactions, respiratory issues, and other health problems, especially from prolonged exposure in an enclosed space.
The moisture required for mold growth can come from several common sources:
* Leaky Seals: Worn-out window seals, door gaskets, or sunroof drains can allow rainwater to seep into the cabin.
* Spills: A spilled drink or wet clothing that isn’t cleaned up and dried quickly can provide enough moisture for mold to start.
* A/C System Issues: A clogged evaporator drain can cause water to back up and leak into the passenger-side footwell.
* High Humidity: Simply leaving windows open overnight in a humid climate or storing the car in a damp garage can introduce enough moisture into the air.
Understanding these causes is the first step toward effective prevention. By identifying and fixing the source of the moisture, you can ensure that once you clean the mold, it won’t have the chance to come back.
What Should You Gather Before Cleaning the Mold?
Before you begin, gathering the right tools and safety gear is essential for a safe and effective cleaning process. Having everything on hand prevents you from having to stop midway and reduces the risk of cross-contamination. Our experience in professional auto detailing shows that preparation is just as important as the cleaning itself. We’ve organized the list into three key categories.
Safety Equipment
Your health is the top priority. Airborne mold spores can cause respiratory issues, so never skip this gear.
* N95 Respirator Mask: This is crucial for filtering out microscopic mold spores and preventing you from inhaling them.
* Nitrile Gloves: Protects your hands from contact with the mold and cleaning solutions.
Cleaning Tools
These tools are chosen to be effective on mold yet gentle on your leather.
* HEPA Filter Vacuum: A vacuum with a HEPA (High-Efficiency Particulate Air) filter is vital. It traps tiny mold spores instead of just blowing them back into the car’s air.
* Soft-Bristled Brush: A small detailing brush is perfect for gently agitating mold in seams and textured leather without scratching it.
* Microfiber Cloths: You will need several clean cloths to avoid re-applying mold to the seats.
* Spray Bottle: For mixing and applying your cleaning solution in a controlled manner.
Solutions & Conditioners
These are the agents that will kill the mold and restore your leather.
* Distilled White Vinegar: The active ingredient for killing mold spores.
* Distilled Water: Use this for diluting the vinegar. It’s better than tap water because it contains no minerals that could leave spots on your leather.
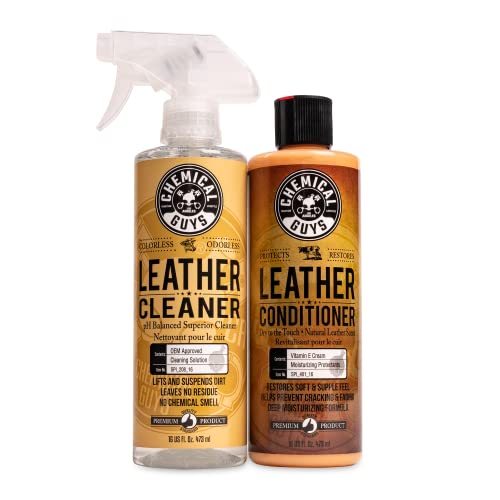
* Quality Leather Conditioner: This is a non-negotiable final step to restore moisture and protect the leather.
Pro-Tip: Properly dispose of any cloths used for cleaning the mold. Seal them in a plastic bag before throwing them away to prevent spreading spores elsewhere.
What Is the Safest 7-Step Method to Clean Mold from Leather?
The safest and most effective method involves a meticulous 7-step process that cleans, neutralizes, dries, and conditions the leather. This approach, used by professional detailers, ensures you remove the mold at its source without causing harm to the delicate material. Each step is designed to build on the last, leading to a fully restored and protected seat.
Step 1: How Do You Prepare the Vehicle and Ensure Safety?
Before you do anything else, the first step is to ventilate the car and put on your protective gear. Mold spores are easily disturbed and can become airborne, so creating a safe working environment is non-negotiable.
Open all the car doors and let the vehicle air out for at least 15 minutes, preferably in a shaded, well-ventilated area like an open garage. This helps to disperse any concentrated airborne spores. Then, put on your N95 mask and nitrile gloves. This prevents you from inhaling harmful spores and protects your skin from direct contact.
Step 2: How Do You Remove Loose Mold Spores?
You must remove as much of the surface mold as possible before applying any liquid. Adding moisture to a large patch of live mold can turn it into a slimy mess and spread it further into the leather’s pores.
First, use a soft-bristled brush to gently agitate and lift the dry, visible mold from the surface. Be gentle to avoid scratching the leather. Immediately after brushing an area, use a vacuum cleaner equipped with a HEPA filter to thoroughly vacuum the entire seat. Pay special attention to seams, crevices, and stitching where spores love to hide. A HEPA vacuum is critical because it traps the spores, while a standard vacuum can exhaust them back into the air.
Step 3: What Is the Best DIY Mold-Killing Solution to Mix?
The most effective, leather-safe DIY solution is a simple mixture of distilled white vinegar and distilled water. The mild acidity of the vinegar is what kills the mold spores, while the distilled water serves as a neutral carrier that prevents mineral spots.
In a clean spray bottle, combine one part distilled white vinegar with one part distilled water.
1 Part Distilled White Vinegar + 1 Part Distilled Water
For example, mix 1 cup of vinegar with 1 cup of water. Shake the bottle well to ensure the solution is thoroughly mixed. This creates a perfectly balanced cleaner that is strong enough to be effective but gentle enough for most types of finished automotive leather.
Step 4: How Should You Apply the Solution and Clean the Mold?
The correct technique is to apply the solution to your cloth, not directly to the seat, to avoid oversaturation. Leather is porous, and soaking it can lead to staining and damage that is worse than the mold itself.
Common Mistake: Never spray any cleaning solution directly onto leather. This can cause the liquid to absorb unevenly, resulting in dark spots and water stains.
- Test First: Always test your cleaning solution on a small, hidden area of the leather (like the underside of the seat) to ensure it doesn’t cause any discoloration.
- Spray the Cloth: Lightly spray your vinegar solution onto a clean microfiber cloth until it is damp, but not dripping wet.
- Wipe Gently: Gently wipe the mold-affected areas using small, circular motions. As the cloth picks up the mold, fold it to a clean section to avoid spreading the contamination.
- Use a Brush for Seams: For mold in seams or on textured surfaces, spray the solution onto your soft-bristled brush and gently scrub the area.
Step 5: How Do You Remove Cleaning Residue?
After cleaning with vinegar, it is vital to wipe the area with plain distilled water to neutralize any acidic residue. This is an expert step many guides miss. Leaving vinegar on the leather can slowly dry it out over time.
Take a fresh, clean microfiber cloth and dampen it slightly with only distilled water. Gently wipe down the entire area that you just cleaned. This step removes any remaining vinegar, helps balance the leather’s surface pH, and also reduces any lingering vinegar smell. It’s like rinsing your hands after washing them with soap—it completes the cleaning process.
Step 6: How Do You Dry The Leather Seats Thoroughly?
You must ensure the leather is 100% dry, as any remaining moisture will invite the mold to return immediately. This step cannot be rushed.
First, use a separate, dry microfiber towel to gently blot any visible moisture from the surface. Do not rub, as this can push moisture into the pores. Then, allow the seats to air-dry completely. The best methods for this are:
* Leave the car doors open in a shaded, dry area for several hours.
* Place a portable fan inside the car to increase air circulation.
* Run the vehicle’s air conditioning on a high fan setting with the windows closed, as the A/C system is a powerful dehumidifier.
Warning: Never use a hairdryer or heat gun to speed up the process. High heat can cause the leather to shrink, crack, and become permanently brittle.
Step 7: Why and How Should You Condition The Leather After Cleaning?
You must condition the leather after cleaning to replenish the natural oils that were stripped away by the cleaning process. This is the final and most critical step for restoring your leather’s health, softness, and appearance. Conditioning prevents the leather from drying out and cracking, and it also adds a protective barrier against future moisture and stains.
Once you are certain the leather is completely dry, follow these steps:
1. Apply a nickel-sized amount of a quality leather conditioner to a microfiber applicator pad.
2. Work the conditioner into the leather using gentle, overlapping circular motions. Ensure you cover the entire seat evenly.
3. Let the conditioner absorb for the time recommended by the product manufacturer (usually 15-30 minutes).
4. Using a final clean, dry microfiber cloth, gently buff the entire seat to remove any excess product, leaving a soft, non-greasy finish.
Which Mold Cleaner Is Better: A DIY Vinegar Solution or a Commercial Product?
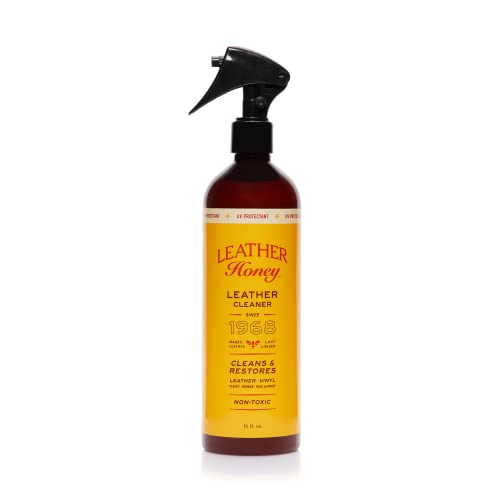
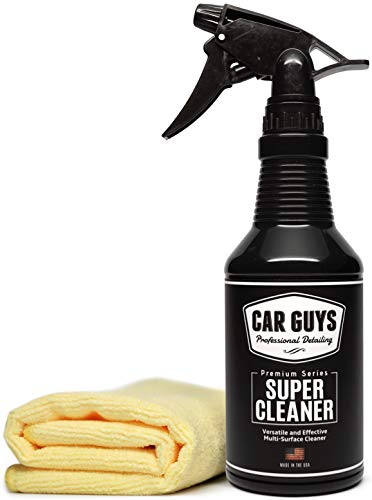
For light surface mold, a DIY vinegar solution is effective and inexpensive; for heavy mold or for guaranteed safety on high-end leather, a dedicated commercial product is the better choice. Both options can work, but the decision depends on the severity of your mold problem, your budget, and your comfort level. A commercial cleaner is specifically formulated to have a perfect pH balance for leather and often contains fungicides and conditioning agents for a more complete treatment.
Here is a direct comparison to help you decide:
| Feature/Aspect | DIY Vinegar Solution | Commercial Leather/Mold Cleaner |
|---|---|---|
| Effectiveness | Good for surface mold and mildew | Excellent for surface & deeper mold; often includes fungicides |
| Safety for Leather | Generally safe, but acidity can dry leather if not neutralized | Formulated to be pH balanced; less risk of drying out leather |
| Cost | Very low (uses household items) | Moderate |
| Convenience | Requires mixing | Ready to use out of the bottle |
| Odor | Strong vinegar smell that dissipates | Usually has a neutral or pleasant leather scent |
| Best For | Light mold, budget-conscious users | Heavy mold, stubborn stains, luxury cars, convenience seekers |

Our Verdict: For most minor cases, starting with the DIY vinegar method is a smart, cost-effective first step. If the mold is extensive, the stain is stubborn, or you simply want the peace of mind that comes with a professionally formulated product, investing in a quality commercial cleaner is well worth it.
How Can You Prevent Mold from Returning to Your Leather Car Seats?
To prevent mold from returning, you must consistently control the moisture level inside your car. Cleaning the mold is only half the battle; creating an environment where it can’t grow back is the long-term solution. The key is to keep your car’s interior clean and, most importantly, dry.
Here are the most effective strategies to prevent mold growth:
* 💧 Control Humidity: Use a renewable car dehumidifier bag or silica gel packs. These passively absorb moisture from the air. Place them under seats or in door pockets.
* 🌡 Run the A/C System: Your car’s air conditioner is a powerful dehumidifier. Run it for at least 10 minutes every week, even in cooler weather, to pull moisture out of the cabin air.
* 🗑️ Clean Spills Immediately: Do not let spills of any kind sit. Blot them up immediately and ensure the area is completely dry.
* 🔍 Check for Leaks: Periodically inspect your window seals, door gaskets, and sunroof drains for signs of wear or cracking that could let water in.
* 🚗 Ensure Good Ventilation: Avoid leaving damp items like gym clothes, wet towels, or umbrellas in your car for extended periods. If the car feels damp, crack the windows slightly while parked in a secure area to let it air out.
FAQs About How to Get Mold Out of Leather Car Seats
How do you get mold smell out of leather car seats?
To remove the mold smell, you must first eliminate the source by cleaning the mold itself. After cleaning with a vinegar solution, the vinegar scent will temporarily mask it. For persistent musty odors, place an open box of baking soda or a bowl of activated charcoal in the car overnight to absorb the smell. Ensure the car is completely dry.
Does rubbing alcohol damage leather car seats?
Yes, rubbing alcohol can be very damaging to leather as it is a harsh solvent. It strips the leather of its natural oils and protective finish, leading to severe drying, cracking, and discoloration. While it can kill mold, it’s not recommended for use on leather seats. A diluted vinegar solution is a much safer alternative.
Can you use a steam cleaner on leather car seats?
No, you should not use a steam cleaner on most leather car seats. The combination of high heat and excessive moisture can be catastrophic for leather. It can cause the material to shrink, warp, and become oversaturated, leading to more mold growth deep within the cushion and permanently damaging the leather’s finish.
How do you remove black mold stains from leather car seats?
Black mold stains can be difficult as they may dye the leather. After killing and cleaning the surface mold with the vinegar method, some staining may remain. You can try a dedicated commercial mold stain remover for leather. If the stain is deeply set, it may require professional restoration or re-dyeing by a leather repair specialist.
Is it better to replace or clean moldy seats?
For most surface mold, cleaning is far more effective and affordable than replacing the seats. Replacement should only be considered in extreme cases, such as after a major flood where the seat’s internal foam cushioning is completely saturated and cannot be salvaged, or if the mold has physically destroyed the leather itself.
Does sunlight kill mold on car seats?
Sunlight’s UV rays can kill some mold, but it’s not a complete solution and can damage your leather. While parking in the sun can help dry out moisture, prolonged exposure to direct sunlight will fade, dry out, and crack leather seats. It’s better to dry the car in a shaded, well-ventilated area and rely on a proper cleaning solution to kill the mold.
How do you clean mold from perforated leather seats?
Cleaning perforated leather requires extra care to avoid pushing mold and moisture into the holes. Never spray liquid directly on the seat. Apply your cleaning solution to a microfiber cloth or a soft brush, and gently agitate the surface. Use a vacuum to pull debris out of the perforations. Ensure the drying phase is very thorough to prevent trapping moisture.
Can mold in my car make me sick?
Yes, mold in your car can absolutely make you sick. A car is a small, enclosed space, which can lead to a high concentration of airborne mold spores. Exposure can cause allergic reactions, asthma attacks, respiratory infections, headaches, and other symptoms, making it a serious health concern that should be addressed immediately.
What is the difference between mold and mildew?
Mildew is a specific type of mold that is in its early stages. It typically appears as a flat, powdery growth that is white or gray. Mold is the later stage and can be fuzzy or slimy, appearing in various colors like black, green, or blue. For cleaning purposes, the same methods described here will work for both.
How often should I condition my leather car seats to prevent problems?
You should condition your leather seats every 3 to 6 months as part of your regular maintenance. Regular conditioning keeps the leather hydrated and supple, preventing cracks that can harbor dirt and moisture. It also reinforces the protective topcoat, making it harder for mold to take hold. In very hot, dry, or humid climates, you may need to condition more frequently.
Key Takeaways: How to Get Mold Out of Leather Car Seats Summary
- Safety and Preparation Are Crucial: Always begin by ventilating the car and wearing an N95 mask and gloves. The first step to a safe and effective cleaning is to protect yourself from inhaling harmful mold spores.
- Vinegar Solution is the Go-To DIY Method: A solution of equal parts distilled white vinegar and distilled water is the most recommended homemade cleaner. It effectively kills mold spores without the harsh, damaging effects of alcohol or bleach.
- The Technique Matters More Than Strength: Always apply cleaner to a cloth, not the seat, and test on a hidden area first. Gentle wiping is key to avoid soaking the leather, which can cause more damage and moisture issues.
- Drying is a Non-Negotiable Step: Mold thrives on moisture. After cleaning, the leather must be dried completely using air circulation, fans, or the car’s A/C system. Rushing this step will almost guarantee the mold returns.
- Conditioning Restores and Protects: Cleaning strips natural oils from leather. Applying a leather conditioner after the seat is fully dry is essential to replenish moisture, prevent cracking, and create a protective barrier.
- Prevention is About Moisture Control: The long-term solution is to keep your car’s interior dry. Use dehumidifiers, run the A/C regularly, fix leaks promptly, and clean up spills immediately to prevent mold growth.
Final Thoughts on Restoring Your Leather Car Seats
Discovering mold on your leather car seats can be disheartening, but it is a problem you can solve. By following this systematic, professional-grade method, you are empowered to not only remove the existing mold but also to protect the health of your passengers and the value of your vehicle. The process focuses on safety, effectiveness, and long-term prevention.
Remember that the core principles are simple: kill the spores, don’t damage the leather, and eliminate moisture. Now that you have a complete roadmap, you can confidently restore your car’s interior to a clean, safe, and pleasant state. Taking the time to do it right will provide lasting results and peace of mind.
Last update on 2026-02-26 / Affiliate links / Images from Amazon Product Advertising API