That sinking feeling of seeing a sticky, gooey wad of chewing gum ground into your car seat is a uniquely frustrating experience. The immediate questions that race through your mind—how do I get this out? Will I make it worse? Will this ruin my upholstery?—can be stressful. Trying to scrape or pull it off often leads to a bigger, stringier mess, leaving you wondering if the stain is permanent.
The best way to get gum out of a car seat is to first identify the material (fabric or leather) and then choose a method. For all seat types, freezing the gum with ice until it’s brittle and then scraping it off is the safest approach. Alternatively, solvents like vinegar on fabric or rubbing alcohol on leather can dissolve the gum’s adhesive properties, but a patch test is crucial.
This comprehensive guide, built on a thorough analysis of proven methods and material safety data, will walk you through the exact steps to safely and completely remove that sticky mess. We’ll cover the universally effective freezing technique, specific solvent-based solutions for different upholstery types, and the critical final cleaning steps to make the spot disappear completely. Say goodbye to that gum-induced headache and hello to a pristine car interior.
Key Facts
- The Freezing Method is Universally Safest: Data from multiple sources confirms that hardening gum with ice is the most recommended technique because it poses the least risk of damage to both fabric and leather upholstery.
- Material Dictates Timing: When freezing gum, the duration matters. For fabric seats, 5-10 minutes is typically sufficient, whereas leather seats, being less porous, require a longer application of 15-20 minutes to make the gum fully brittle.
- Vinegar is for Fabric Only: While the natural acid in white vinegar is excellent for dissolving gum on fabric and vinyl, it should be avoided on leather as it can strip the material of its natural oils, leading to dryness and cracking.
- Oils Dissolve, but Can Stain: The natural oils in substances like peanut butter effectively break down the gum’s sticky structure. However, this method carries a significant risk of leaving an oil stain on fabric seats, which requires immediate follow-up cleaning.
- Conditioning Leather is Non-Negotiable: After using any solvent like rubbing alcohol to remove gum from leather, it is essential to follow up with a dedicated leather cleaner and conditioner to restore moisture and prevent the material from becoming brittle.
First Things First: Assess Your Car Seat & The Gum Mess
Before you grab the ice cubes or vinegar, the single most important step is to identify your car seat’s material. The best method for how to get gum out of a car seat depends entirely on whether you’re dealing with fabric, leather, or vinyl upholstery. Each material reacts differently to cleaning agents, and using the wrong one can turn a small, sticky problem into a large, permanent one. This professional “pre-flight check” is your best defense against accidental damage.

Here’s a quick breakdown to guide you:
- Fabric Seats: These are typically woven materials like cloth, microfiber, or nylon. They are more porous and absorbent, which can make the gum stick deep within the fibers, but they are also more tolerant of a wider range of cleaners.
- Leather Seats: Genuine leather is a natural material that contains oils to keep it supple. It’s less porous than fabric, so gum often sits on the surface. However, it’s highly sensitive to acidic or drying agents (like vinegar or alcohol) that can cause discoloration or cracking.
- Vinyl Seats: This synthetic material mimics the look of leather but is more durable and less sensitive. It can generally withstand the same cleaning methods as fabric seats.
To be absolutely sure, always perform a spot test with any cleaning solution on an inconspicuous area, like the underside of the seat or a hidden flap, before applying it to the main stain. A quick look now can save a costly headache later. Ready to identify your seat type?
| Material | Sensitivity to Solvents | Key Consideration |
|---|---|---|
| Fabric | Low to Medium | Prone to oil stains from methods like peanut butter. |
| Leather | High | Requires oil-based removers and post-treatment conditioning. |
| Vinyl | Low | Generally resilient but still benefits from a patch test. |
Method 1: The Freezing Technique (Works on All Seat Types)
This method hardens the gum until it’s brittle, allowing you to safely scrape it off without using chemicals. It is the top recommended method for both fabric and leather seats. It’s the go-to first attempt for any gum disaster because it’s effective, safe, and uses items you likely already have at home. The principle is simple: extreme cold makes the gum lose its elasticity and adhesion, transforming it from a sticky menace into a solid that can be chipped away.
This is widely considered a best practice by automotive detailers for its effectiveness and non-damaging nature.
Here is the step-by-step process:
- Gather Your Tools: You’ll need a source of cold (ice cubes in a sealed bag or a freezer pack) and a dull scraping tool (a plastic credit card, a butter knife, or a plastic putty knife).
- Apply Cold Directly: Press the bag of ice or freezer pack firmly onto the entire gum wad. Ensure you cover all of it.
- Wait for it to Harden: For fabric seats, hold the ice on for about 5-10 minutes. For leather seats, which are denser, allow for 15-20 minutes. The gum should feel completely hard and inflexible to the touch.
- Scrape Gently: Once the chewing gum is frozen solid, use your dull scraper to gently chip and pry it off. Keep the tool as flat against the seat surface as possible to avoid snagging fabric or scratching leather.
- Lift the Residue: For any tiny, stubborn pieces left behind, use a piece of strong tape (duct tape works best) to dab at the area. Press the tape down firmly and pull it up quickly to lift the remaining fragments.
Pro Tip: No ice? A can of compressed air held upside down provides a super-chilling effect to harden the gum instantly. Just be sure to use it in a well-ventilated area and protect your skin from the freezing spray.

Step 1: Harden the Gum
Apply sealed ice to the gum for 5-20 minutes until it is completely hard and brittle. The goal here is to change the physical state of the gum. When warm, its polymers are pliable and sticky. By rapidly dropping its temperature, you make those polymers rigid, breaking their bond with the car seat fibers.
To do this effectively, you have a few options:
- Ice Cubes: The most common tool. Place several ice cubes in a zip-top plastic bag. It’s crucial to ensure the bag is sealed tightly to prevent any water from leaking out and creating a water stain on your upholstery.
- Freezer Pack: A reusable freezer pack or gel pack works perfectly and eliminates the risk of water leakage.
- Compressed Air: As mentioned in the pro tip, turning a can of computer duster upside down and spraying the liquid propellant directly onto the gum will freeze it almost instantly.
Quick Fact: The goal isn’t just to make the gum cold, but to make it so brittle that it shatters and releases its grip on the fibers. That’s why waiting until it’s rock-solid is the key to success.
Step 2: Scrape and Remove
Use a dull, flat tool to gently chip away the hardened gum, then use duct tape to lift any remaining small pieces. With the gum properly frozen, the removal process should be straightforward. Patience is key here! Work in small sections rather than trying to pry the whole piece off at once.
- Scrape the Bulk: Take your chosen dull scraper—a credit card, plastic putty knife, or the back of a butter knife are all excellent choices. Angle it low and flat against the seat and use short, firm motions to chip away at the edges of the frozen gum. It should start to crack and break off in chunks. Continue until the majority of the gum is gone.
- Blot the Remnants: For the tiny specks left behind, duct tape or scotch tape is your best friend. Tear off a small piece, press the sticky side firmly onto the residue, and then rip it off quickly. The remaining gum fragments will adhere to the tape. Repeat this process until the area is clean.
What not to use:
* ❌ Sharp knives or razor blades (can easily cut fabric or leather)
* ❌ Metal scrapers with sharp edges (can scratch and permanently damage the seat)
* ❌ Abrasive pads or steel wool (will destroy the upholstery’s texture)

Method 2: Dissolving Gum with Common Solvents
For gum that won’t freeze off, use a solvent to break down its stickiness. Choose the right solvent based on your seat material to avoid damage. Sometimes, gum gets worked so deeply into fabric fibers that the freezing method can’t lift it all. In these cases, a solvent—a liquid that dissolves other substances—is your next best option. These methods work by breaking down the gum’s sticky polymers and oils, causing it to lose its grip.
IMPORTANT: Always test any solvent on an inconspicuous area of the seat first to check for discoloration. This “patch test” is a non-negotiable step to ensure you don’t create a worse stain than the one you’re trying to remove.
Here’s a comparison of common household solvents to help you choose the right one for your situation:
| Solvent | Best For | Pros | Cons |
|---|---|---|---|
| White Vinegar | Fabric, Vinyl | Inexpensive, non-toxic | Can dry out and damage leather |
| Peanut Butter | Leather, Fabric | Effective, conditions leather | Can leave oil stains on fabric |
| Adhesive Remover | All Materials | Very powerful, fast-acting | Can be harsh, requires good ventilation |
| Rubbing Alcohol | Leather, Vinyl | Dissolves gum quickly | Dries out leather, requires conditioning |
Using White Vinegar (Best for Fabric)
Warm white vinegar’s acid effectively dissolves gum on fabric; apply with a cloth, let it sit, then scrub gently with a toothbrush. This is a classic household method for a reason—the gentle acidity in white vinegar works wonders at breaking down sticky, stubborn messes on fabric upholstery. Warming the vinegar slightly helps it penetrate the gum faster and work more efficiently.
Here’s how to do it:
- Warm the Vinegar: Gently warm a small amount of white vinegar in a microwave-safe bowl. It should be warm, not boiling.
- Apply to the Gum: Soak a clean cloth or paper towel in the warm vinegar and press it directly onto the gum stain.
- Let it Soak: Leave the cloth on the gum for a few minutes to allow the acid to soften and dissolve the adhesive.
- Gently Agitate: Remove the cloth and use a soft-bristled toothbrush to gently scrub the gum in a circular motion. You should see the gum start to break apart and lift from the fibers.
- Wipe Clean: Use a clean, damp cloth to wipe away the loosened gum and vinegar residue.
Avoid using on leather as it can dry out the material.
Using Peanut Butter (Effective on Leather & Fabric)
Apply smooth peanut butter to the gum; its oils will dissolve the adhesive. Let it sit for 10-15 minutes before wiping away. It sounds unusual, but the science is sound: oil dissolves the gum’s sticky, oil-based structure. The natural oils in peanut butter are excellent at breaking down the gum’s grip, making it easy to wipe away.
Follow these steps:
- Apply a Thin Layer: Use a knife or your finger to spread a thin layer of smooth peanut butter directly over the gum. Do not use chunky peanut butter, as the nut pieces can create more of a mess.
- Let it Sit: Allow the peanut butter to sit on the gum for 10-15 minutes. This gives the oils time to penetrate and break down the adhesive.
- Wipe Away: Take a clean, damp cloth and wipe away the peanut butter. The gum should lift away with it.
- Clean the Area: Thoroughly clean the spot with a cloth and soapy water to remove any oily residue.
Caution: Peanut butter can leave an oil stain on fabric seats. Be prepared to clean the area with soapy water afterward.
Using a Commercial Adhesive Remover (For Tough Cases)
For stubborn gum, use a commercial adhesive remover like Goo Gone, but always test it first and follow product directions carefully. When home remedies just won’t cut it, a product specifically designed to remove sticky residues is your most powerful weapon. Brands like Goo Gone or 3M Gum Remover are formulated to dissolve adhesives quickly and effectively.
For the best results:
- Choose the Right Product: Look for an “automotive-specific” formula if possible, as these are designed to be safe on car interior materials.
- Perform a Patch Test: Apply a tiny amount of the product to a hidden area of your seat to ensure it doesn’t cause discoloration.
- Apply Sparingly: Put a small amount of the remover onto a clean cloth or directly onto the gum.
- Follow Instructions: Let it sit for the time recommended on the product label, usually just 1-2 minutes.
- Scrape and Wipe: Use a plastic scraper to lift the softened gum, then wipe the area clean with a fresh, damp cloth to remove any chemical residue.
Always work in a well-ventilated area and follow all manufacturer instructions closely to prevent damage to your upholstery.
Using Rubbing Alcohol (Great for Leather)
Dab gum on leather with rubbing alcohol to dissolve it, then immediately clean and condition the leather to prevent it from drying out. Isopropyl alcohol is a powerful solvent that can quickly break down gum, making it a great option for less porous surfaces like leather and vinyl. However, alcohol is also a dehydrating agent that strips leather of its natural oils. This makes the final step absolutely critical.
Think of this as a two-step process: remove the gum, then feed the leather. This keeps it from cracking.
- Test First: Apply a small amount of rubbing alcohol to an inconspicuous area to check for any adverse reaction.
- Dab the Gum: Dampen a cotton ball or the corner of a clean cloth with isopropyl alcohol. Gently dab it onto the gum, being careful not to soak the surrounding leather.
- Let it Work: Wait a few minutes for the alcohol to dissolve the gum’s structure.
- Lift the Gum: Use a plastic scraper or your fingernail to gently lift the loosened gum off the surface.
- Clean and Condition: This is the most important step. Immediately after removing the gum, wipe the area with a clean, damp cloth. Then, apply a high-quality leather cleaner followed by a leather conditioner to restore moisture and protect the material.
Step 3: Post-Removal Cleaning & Restoration
Always clean the affected area after removing gum. Use an upholstery cleaner for fabric and a dedicated leather cleaner and conditioner for leather to remove residue and prevent damage. Don’t skip this step! This is what makes the repair invisible and restores your car’s interior to its former glory. Successfully removing the gum is only half the battle; the final cleaning removes any lingering solvent residue, faint stains, or rings, ensuring a perfect finish. Positioning this as a non-negotiable step is the mark of a professional-level cleaning job.
- For Fabric Seats: After the gum is gone, there might be a slight stain or residue left behind. You can create a simple and effective DIY cleaning solution by mixing a few drops of dish soap and a splash of white vinegar in a bowl of warm water. Apply the suds with a clean cloth, gently scrub the area, then “rinse” by blotting with a separate cloth dampened with plain water. Finally, blot the area dry with a clean towel.
- For Leather Seats: Any time you use a solvent (even peanut butter oil) on leather, you must restore its balance. After wiping away the gum and remover, use a mild, pH-balanced leather cleaner on the entire panel of the seat to ensure an even appearance. Once it’s dry, apply a high-quality leather conditioner with a microfiber applicator pad. This replenishes the essential oils, keeping the leather soft, supple, and protected from cracking.
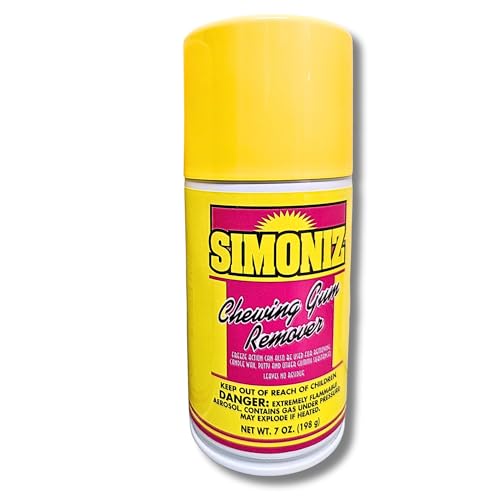
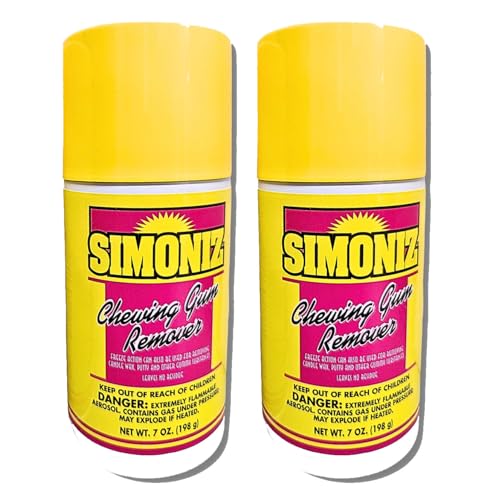
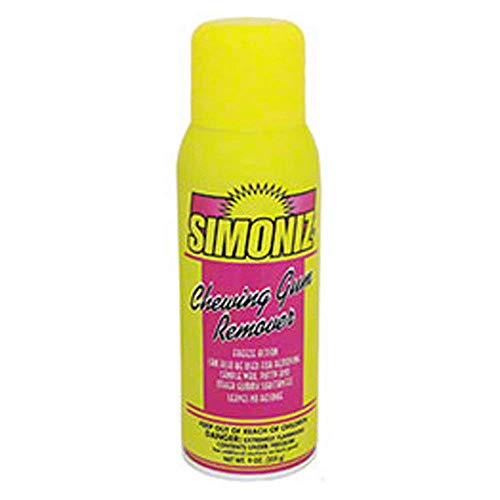
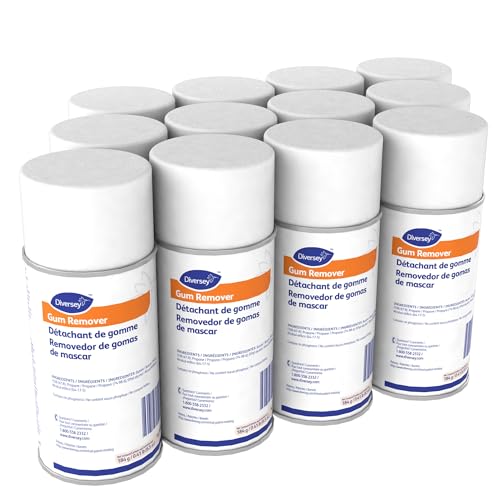
To simplify the process and ensure you’re using products specifically designed for your car’s interior, having a good quality automotive gum remover and upholstery cleaner on hand can be a lifesaver.
FAQs About Getting Gum Out of a Car Seat
How do I get melted gummy candy out of a car seat?
Melted gummy candy is similar to chewing gum. The best approach is the freezing method. Place an ice pack on the sticky mess until it hardens completely. Once solid, you can gently scrape it off with a plastic card. Any remaining color stain can be treated with an appropriate upholstery cleaner for your seat type.
What’s the best way to get gum out of a car seatbelt?
For a seatbelt, the freezing method is also ideal as it avoids saturating the belt with chemicals. Hold an ice cube directly on the gum until it hardens, then flake it off. If a solvent is needed, apply a small amount of rubbing alcohol to a cotton swab and dab the gum carefully, then clean the area with soapy water.
Is the freezing method with ice really effective on fabric?
Yes, it is highly effective. The extreme cold makes the gum brittle, causing it to release its grip on the fabric fibers. For gum that is deeply ground into the weave, you may need to repeat the freeze-and-scrape process a few times and use duct tape to lift the final small particles.
What should I do if the gum is deeply embedded in the fabric?
If the gum is worked deep into the fibers, a combination of methods may be necessary. Start with the freezing technique to remove the bulk. Then, treat the remaining residue with warm vinegar or a commercial adhesive remover, using a soft toothbrush to gently work the gum out of the weave before cleaning the area.
How can I prevent gum from getting on my car seats in the future?
Prevention is always the best strategy. Consider having a “no gum” rule in the car, especially for children. Using high-quality seat covers provides a protective barrier that is much easier to clean or replace than the seat itself. Keeping a small, dedicated trash receptacle in the car also encourages proper disposal.
Final Summary: Key Takeaways for a Gum-Free Car
Tackling a gum stain on your car seat doesn’t have to be a nightmare. By correctly identifying your seat’s material and choosing the right method, you can restore your upholstery without causing damage. The logic is simple: if you have fabric seats, you can try freezing or the vinegar method; if you have leather seats, stick to the freezing method or use an oil-based approach like peanut butter or rubbing alcohol, followed by mandatory conditioning.
Armed with these methods, you can tackle that sticky situation with confidence. Remember these crucial points before you start:
- ✅ Assess First: Always identify whether your seat is fabric or leather before you begin.
- ✅ Freeze is Safest: Start with the ice cube method. It’s the most effective and least risky option for all upholstery types.
- ✅ Always Patch Test: Before using any liquid solvent, test it on a small, hidden area to ensure it won’t cause discoloration.
- ✅ Clean and Restore: Never skip the final cleaning step. This removes residue and, for leather, restores essential moisture to prevent cracking.
Let us know which trick worked for you in the comments
Last update on 2026-02-14 / Affiliate links / Images from Amazon Product Advertising API
