Notice those frustrating, chalky rings on your car’s upholstery? You’re not alone. A simple water spill can leave behind an unsightly stain that makes your entire car interior look dirty and neglected. Many car owners are hesitant to tackle these spots, fearing they might make the stain worse, spread it, or permanently damage the fabric or leather.
To get a water stain out of a car seat, you must first vacuum the area thoroughly, then identify the seat material. For fabric, use a dedicated upholstery cleaner or a vinegar-water solution applied with a soft brush. For leather, use a damp cloth with a gentle vinegar-water mix, then apply a leather conditioner. In all cases, drying the seat completely is critical to prevent mold.
This guide cuts through the confusion. Leveraging a systematic analysis of proven detailing techniques, we will walk you through the exact, step-by-step process for how to get a water stain out of a car seat, whether it’s fabric or leather. We’ll cover not just the “how” but the critical “why” behind each step, ensuring you get a professional-level result without causing damage. Forget guesswork—it’s time to restore your car’s interior with confidence.
Understanding Why Water Stains Car Seats
Water stains are caused by mineral deposits (like calcium and magnesium from hard water) left behind after evaporation, which can appear as white, chalky marks. Prolonged dampness can also lead to mold and mildew. To effectively learn how to get a water stain out of a car seat, you first need to understand what you’re actually fighting. It’s rarely the water itself that’s the problem.

The real culprits are the invisible passengers within that water. When you understand the science, the cleaning process makes perfect sense, setting you up for success. This foundational knowledge demonstrates a deeper expertise on the root cause of the issue, moving beyond simple cleaning tipss to a true solution.
Here’s the bottom line:
- Mineral Deposits: The most common cause of a water stain is the residue left behind when water evaporates. So-called “hard water” is rich in dissolved minerals like calcium and magnesium ions. When the water dries, these minerals remain on the fabric fibers, creating those distinct, chalky white spots or discolored rings.
- Embedded Dirt: If the seat had any surface dirt, the water can mix with it, carrying it deeper into the upholstery fibers. As it dries, it can leave a concentrated ring of dirt that’s now more difficult to remove.
- Mold and Mildew Growth: This is the most serious consequence. If water is left to sit for too long, it seeps into the seat’s cushioning. This creates a dark, damp environment—the perfect breeding ground for mold and mildew. This not only causes discoloration but also poses a potential health hazard.
Quick Fact: Did you know the stain isn’t from the water itself, but from the invisible minerals it leaves behind? Think of it like the white spots that can appear on a glass after it air-dries. You’re not cleaning the water; you’re cleaning what the water left behind.
Step 1: Prepare Your Car Seats for Cleaning
This crucial first step involves thoroughly vacuuming the entire seat to remove loose debris and correctly identifying the material (fabric or leather) to choose the right cleaning method. Before you even think about applying a cleaning solution, you must prep the surface. Skipping this non-negotiable step can turn a simple cleaning job into a muddy mess or, even worse, cause permanent damage to your upholstery.
A professional and thorough approach starts here. Taking a few extra minutes to prepare the seat prevents you from grinding existing dirt deeper into the fabric or scratching delicate leather surfaces. Think of it as clearing the workspace before starting a project.
Here’s exactly what you need to do:
- Thoroughly Vacuum the Car Interior: Your first action is to eliminate all loose dirt, crumbs, dust, and debris from the seats and surrounding areas. These particles can become abrasive grit when mixed with a liquid cleaner. Work methodically across the entire seat, paying special attention to the seams and crevices where debris loves to hide.
- Identify Your Seat Material: This is the most critical decision point in the entire process. The techniques and products required to get a water stain out of a car seat differ significantly between materials. Is your seat fabric/cloth, or is it leather? An incorrect choice here could lead to discoloration or damage. If you’re unsure, check your vehicle’s manual or look for a tag on the seat itself.
Pro Tip: Use your vacuum’s crevice tool and even a blast of compressed air to ensure every last crumb is gone before you start cleaning. This is especially effective for dislodging stubborn particles from deep within the seams.
Step 2: Remove Water Stains from Fabric & Cloth Car Seats
This method focuses on using a dedicated upholstery cleaner or a DIY vinegar-water solution, applying it with a soft brush, blotting to rinse, and ensuring the seat dries completely to prevent mold. Fabric seats are absorbent, which means they are more susceptible to deep-set stains from spills. However, with the right technique, you can effectively lift the mineral deposits and restore your upholstery.
This systematic process synthesizes multiple effective methods into one cohesive workflow. We’ll cover everything from pre-treating stubborn hard water stains to the final vacuuming pass that leaves your seats looking refreshed. Remember to be patient and avoid harsh scrubbing, which can damage the fabric fibers.
Here is the step-by-step process for fabric seats:
- Pre-Treat (Optional, for Hard Water Stains): If you live in an area with hard water or suspect the stain is from saltwater, a vinegar pre-treatment can be highly effective. Apply about a teaspoon of plain white vinegar directly onto the stain. Let it sit for a few minutes to begin breaking down the concentrated mineral deposits before you begin the main cleaning process.
- Test Your Cleaning Solution: This is a crucial safety step. Before applying any cleaner to the visible parts of your seat, always test it on a small, hidden area, such as under the seat or behind the headrest. Apply a small amount, gently work it in, and let it dry. Check for any signs of discoloration or damage. This single action can save you from a costly mistake.
- Apply the Cleaner Correctly: To avoid oversaturating the fabric and creating new water marks, spray your chosen cleaner onto a soft-bristled brush or a clean microfiber cloth, not directly onto the seat. This gives you much better control over the amount of liquid being used.
- Work the Solution into the Fabric: Using the dampened brush or cloth, gently massage the cleaner into the upholstery. Work in small, overlapping circular motions. Tempted to scrub hard? Don’t. Gentle, circular motions are key to lifting the stain without damaging the fabric. Focus on the stain, but be prepared to blend the cleaning area outwards.
- Rinse and Blot: Lightly dampen a separate, clean microfiber cloth with plain water. Use this to blot the area you just cleaned. This action helps to “rinse” the fabric by lifting the cleaning solution and the dissolved stain residue. Be careful not to over-wet the seat during this step. Wring the cloth out frequently.
- Dry Thoroughly: This is one of the most important steps. Allow the seat to air dry completely. You can significantly speed up the process and improve results by opening the car doors and windows to facilitate airflow. A hair dryer can also be used, but make sure it is on a cool setting to avoid damaging the fabric.
- Perform a Final Vacuum: Once the seat is 100% dry, give it one last vacuuming. This helps to fluff up the fabric fibers for a uniform, polished finish and removes any loosened particles.
DIY Fabric Cleaner Option: For a powerful and cost-effective homemade solution, mix equal parts white vinegar and water in a clean spray bottle. This solution is particularly effective on stubborn mineral-based stains.

2a. The “Clean-the-Whole-Seat” Principle
Crucial Tip: Always clean the entire seat section from seam to seam to avoid creating new water rings around the original stain. This might be the single most important piece of advice for achieving a flawless finish on fabric upholstery. Simply cleaning the spot—a method known as “spot cleaning”—is a common DIY mistake that often leads to a worse-looking result: a clean spot surrounded by a very obvious “water line” or ring.
As professional detailers know, the secret to an invisible repair is to blend the cleaned area with its surroundings. By cleaning the entire panel of the seat (e.g., the whole seat bottom or the entire backrest panel), you ensure that the fabric dries evenly, leaving a uniform color and texture without any tell-tale rings. This prevents the frustrating outcome where you successfully remove one stain only to create another, larger one in its place.
2b. Ensuring Thorough Drying to Prevent Mold
Proper drying is essential to prevent mold. Maximize airflow by opening windows or use a hair dryer on a cool setting until the seat is completely dry. The final step in learning how to get a water stain out of a car seat is arguably the most critical for the long-term health of your vehicle’s interior. Insufficient drying is the primary cause of mold and mildew growth inside a car, which is not only unsightly but also hazardous to your health.
Your commitment to user safety and well-being means taking this step seriously. Don’t rush the drying process. Lingering moisture that seeps into the foam cushion beneath the upholstery can take a very long time to evaporate on its own in an enclosed space.
Here are the best techniques to ensure your seats are bone-dry:
- Promote Airflow: The easiest method is to maximize natural ventilation. Open all the car doors and windows and let it sit for several hours, preferably in a dry, breezy location that is out of direct sunlight.
- Use a Fan: To speed things up, you can place a portable fan inside the car, aimed directly at the damp seat. This continuous airflow is highly effective at wicking away moisture.
- Use a Hair Dryer (Safely): A hair dryer can be used to spot-dry the area more quickly. However, you must use it on the coolest setting. High heat can shrink or damage the synthetic fibers in modern car upholstery. Keep the dryer moving constantly to avoid overheating any single spot.
Step 3: Remove Water Stains from Leather Car Seats
For leather, use a gentle vinegar-water solution on a damp cloth, wipe the stain outward, dry immediately, and always finish by applying a leather conditioner to protect the material. Leather is generally more resilient to water than fabric, and in many cases, small water droplets will evaporate without leaving any mark at all. However, larger spills or water with a high mineral content can still leave a persistent stain that requires careful attention.
The approach for leather is one of finesse, not force. Harsh scrubbing or aggressive chemicals can strip the leather’s protective coating and natural oils, leading to dryness, discoloration, and cracking. This process is structured to clean effectively while preserving the integrity of the material, with a crucial final step to restore its suppleness.
Follow this precise process for cleaning leather seats:
- Create a Gentle Cleaning Solution: There’s no need for harsh chemicals. Simply create a mixture of equal parts white vinegar and room-temperature water. This solution is acidic enough to dissolve mineral deposits without being overly harsh on the leather finish.
- Apply with a Damp Microfiber Cloth: Dip a clean, soft microfiber cloth into the vinegar-water mixture. It is critical that you then wring it out thoroughly until it is just damp, not dripping wet. Excess water is the enemy here.
- Work the Stain Gently Outward: Gently rub the stained area with the damp cloth. The key technique, according to detailing experts, is to start at the center of the stain and work your way outward towards the seams of the leather panel. This helps to feather the cleaning area and prevent creating a distinct line. Use gentle pressure and avoid aggressive scrubbing.
- Wipe and Dry Immediately: As soon as you have worked the stain, use a separate, completely dry microfiber cloth to wipe away any moisture from the leather surface. Allow the area to then air dry naturally.
- Apply a Leather Conditioner: This final step is non-negotiable. Cleaning can remove some of the essential oils that keep leather soft and supple. Once the seat is dry, apply a high-quality, fast-drying leather conditioner. This restores moisture, protects the finish from future damage, and helps maintain the leather’s rich appearance.
Pro Tip: After cleaning, a quality leather conditioner isn’t just a suggestion—it’s essential for keeping the leather soft and preventing future damage. Think of it as moisturizer for your upholstery; it prevents it from drying out and cracking over time.
Step 4: How to Prevent Future Water Stains on Car Seats
The best defense is proactive prevention: use quality seat covers, address spills immediately, ensure good ventilation, and use rubber floor mats to protect your car’s upholstery from future stains. While knowing how to get a water stain out of a car seat is a valuable skill, not having to do it in the first place is even better. Adopting a few simple habits can drastically reduce the chances of future stains and keep your car’s interior looking its best.
Think of the following as a comprehensive Maintenance Checklist. By positioning your approach as part of a complete car care resource, you move from simply solving a problem to helping users maintain their vehicle’s value. Which of these preventative steps could you easily add to your car care routine this week?
- Invest in High-Quality Seat Covers: This is the most effective barrier against spills, moisture, and dirt. Modern seat covers are available in a wide variety of materials and styles, and they can be easily removed and washed, preserving your original upholstery underneath.
- Use Custom-Fit Rubber Floor Mats: Spills often start on the floor. Deep-grooved rubber floor mats are excellent at containing liquids from spilled drinks or melted snow, preventing moisture from ever reaching the carpet and wicking its way up to the seats.
- Address Spills Immediately: Time is your enemy. The sooner you can blot up a spill, the less chance it has to soak into the upholstery and leave mineral deposits behind. Keep a roll of paper towels or a few microfiber cloths in your car for emergencies. Do not wait, as moisture can quickly lead to mold growth.
- Ensure Good Ventilation: Good airflow prevents the buildup of dampness and condensation inside your car. Change your car’s cabin air filter regularly as recommended by the manufacturer, and when possible, open the windows to bring in fresh air.
- Be Mindful of Open Windows: Always roll up your windows when parking your car outside, especially if there is even a small chance of rain. An unexpected shower is a common cause of significant water staining.
- Consider Regular Professional Detailing: Having your car’s interior professionally detailed on a regular basis can help maintain its condition and catch minor issues before they become major problems.
Step 5: When to Call a Professional Detailer
If DIY methods fail to remove a stubborn water stain from any seat type, it is recommended to consult a professional detailer to prevent potential damage to the upholstery. While the methods in this guide are effective for most common water stains, it’s important to recognize when a problem is beyond the scope of a DIY solution. Pushing too hard with home remedies on a persistent stain can lead to permanent discoloration, fabric fraying, or leather damage.
Offering the responsible advice to call a professional builds trust by acknowledging the limits of these solutions. Sometimes, the smarter and ultimately more cost-effective choice is to rely on an expert. Professional detailers have access to specialized equipment like hot water extractors and commercial-grade cleaning agents, along with the experience to know exactly how to treat a specific stain on a specific material without causing harm. If the stain won’t budge after a careful attempt, it’s time to make the call.
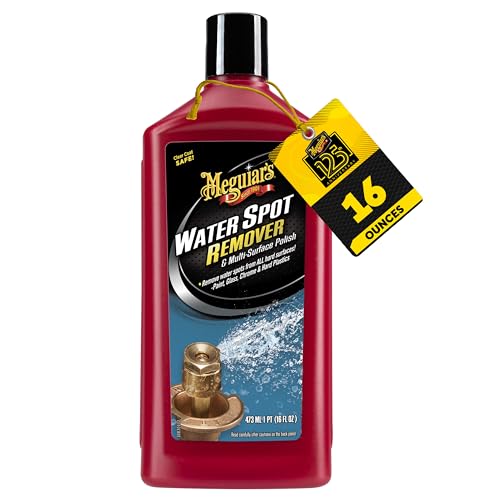
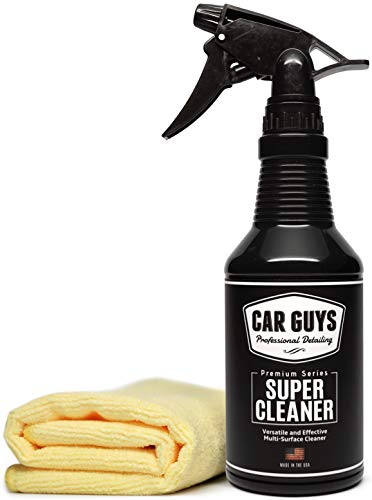
For those looking to tackle these jobs with the right tools, having a dedicated cleaner on hand is essential. Investing in a high-quality, purpose-built product can significantly simplify the process of removing water stains and maintaining your car’s interior.


FAQs About Removing Water Stains from Car Seats
What is the best water stain remover for cars?
The best remover depends on your seat material. For fabric seats, a high-quality automotive upholstery cleaner is often the most effective choice. For a DIY alternative, a solution of equal parts white vinegar and water works well on the mineral deposits in hard water stains. For leather seats, this same gentle vinegar and water solution is the recommended choice, followed by a leather conditioner.
How do you get dried water stains out of upholstery?
Dried water stains can be more stubborn because the mineral deposits are fully set into the fibers. The process is the same as for a fresh stain, but you may need to allow the cleaning solution to sit on the stain for a few minutes to help break it down. For fabric, pre-treating the spot with a small amount of white vinegar can be particularly effective before proceeding with the full cleaning method.
Can I use baking soda to remove water stains from car seats?
Baking soda is another common DIY cleaning agent. It is typically used by making a paste with a small amount of warm water (for example, a quarter cup of baking soda mixed with a few tablespoons of water). This paste can be applied to the stain, allowed to sit, and then gently brushed and vacuumed off. It’s best used on fabric seats after testing on an inconspicuous area.
How do you get water out of a car seat quickly after a spill?
The key is to act fast and blot, don’t rub. Immediately press a clean, dry towel or paper towels firmly onto the spill to absorb as much liquid as possible. Continue using dry sections of the towel until no more moisture is being pulled out. Afterward, focus on drying the area completely by ensuring good airflow with open windows or by using a hair dryer on a cool setting.
Will a simple car upholstery cleaner remove hard water stains?
Yes, most quality car upholstery cleaners are formulated to handle common stains, including those from hard water. They contain surfactants and cleaning agents that help break down and lift the mineral deposits. For particularly stubborn hard water rings, you can boost the cleaner’s effectiveness by pre-treating the stain with a white vinegar solution for a few minutes before cleaning.
Final Summary: Key Steps for Stain-Free Car Seats
Successfully removing unsightly water stains from your car’s interior comes down to a systematic, patient approach. By understanding that you are cleaning mineral deposits rather than just water, you can choose the right tools for the job. The entire process hinges on careful preparation, using a material-appropriate cleaning method, and—most importantly—ensuring the seat is dried thoroughly to prevent any future issues like mold. Following this complete, safe, and effective process will restore your upholstery’s appearance.
To recap the most critical takeaways from this guide:
- ✅ Always Prepare First: Thoroughly vacuum the seat to remove any loose debris before you begin cleaning.
- ✅ Know Your Material: Identify whether your seats are fabric or leather, as the cleaning methods are fundamentally different.
- ✅ Clean the Whole Panel: On fabric seats, clean the entire section from seam to seam to avoid creating new water rings.
- ✅ Condition Leather: After cleaning leather, always apply a quality leather conditioner to restore moisture and prevent cracking.
- ✅ Focus on Prevention: The best long-term strategy is to use preventative measures like seat covers and immediate spill cleanup.
Take these expert-backed steps and confidently restore your car’s interior to its best condition
Last update on 2026-02-14 / Affiliate links / Images from Amazon Product Advertising API