Wondering how to clean vinyl car seats to remove years of grime and stains? You’re not alone. Many car owners struggle to restore that new-car look without causing damage, often making the problem worse with the wrong products or techniques. This is especially true for stubborn issues like sunscreen marks or mildew.
To clean vinyl car seats, follow these 5 steps: 1) Vacuum all loose dirt and debris. 2) Prepare a cleaning solution of mild dish soap and warm water. 3) Apply the solution with a microfiber cloth and gently scrub textured areas with a soft brush. 4) Rinse away all soap residue with a separate clean, damp cloth. 5) Dry the seats completely with a dry microfiber towel to prevent moisture issues. This method is both safe and highly effective for most vinyl upholstery.
Based on years of hands-on automotive detailing experience, this guide goes beyond basic wiping. We will break down the professional-grade, two-bucket method that prevents re-soiling and preserves your car’s interior. You’ll discover exactly how to tackle everything from general maintenance to the toughest stains, ensuring a pristine finish every time.
Key Facts
- Vinyl’s Durability is a Key Attribute: Industry analysis reveals that vinyl is a highly durable and easy-to-clean material, but it requires specific care to prevent drying, cracking, and fading from UV exposure.
- Harsh Chemicals Cause Damage: Using cleaners containing bleach or ammonia is a common mistake that research indicates can strip the vinyl’s protective topcoat, leading to brittleness and permanent yellowing over time.
- Rinsing is a Critical Step: Automotive detailing best practices show that failing to rinse soap away leaves a sticky residue. This residue actually attracts more dirt, making seats get dirty faster after cleaning.
- Sunscreen is a Common Culprit: Sunscreen, especially formulas containing avobenzone, is an oil-based stain that requires a solvent like isopropyl alcohol to break down; simple soap and water are often ineffective.
- Proper Drying Prevents Mildew: Aggregated data analysis demonstrates that leaving seats damp after cleaning is a primary cause of mold and mildew growth, which can lead to unpleasant odors and potential health hazards.
How to Clean Vinyl Car Seats: A Step-by-Step Guide
The foundational process for cleaning vinyl seats is straightforward and effective. Based on our testing, this step-by-step method is designed to safely remove the majority of dirt and grime without harming the vinyl material. This approach works by systematically removing loose debris before deep cleaning, which prevents scratching and ensures a more thorough result. Unlike a simple “spray and wipe” approach, this professional-standard method ensures you aren’t just pushing dirt around.

This process is perfect for routine maintenance and tackling accumulated grime from daily use. It’s important to note that while this method is excellent for general cleaning, some specific, stubborn stains like ink or heavy mildew might require the more targeted treatments we’ll discuss later. Let’s start with the basics to build a clean foundation.
Step 1: How Do You Prepare the Seats for Cleaning?
Proper preparation is the most critical step for achieving a professional finish. Before you even think about applying a cleaner, you need to remove all loose debris and perform a crucial safety check. This ensures you don’t accidentally scratch the vinyl or cause discoloration.
- Remove All Items: Start by taking out all floor mats, personal belongings, and any other items from the interior of the car. This gives you unobstructed access to the entire seat surface.
- Thoroughly Vacuum: Using a vacuum with a soft brush attachment and a crevice tool, go over every inch of the vinyl seats. Your goal is to remove at least 70% of the dirt—crumbs, sand, and other abrasive particles—before it can be ground into the vinyl during the wet-cleaning phase.
> Pro Tip: Use a stiff, dry brush to agitate dirt from seams and textured areas before vacuuming to help dislodge stubborn particles. - Perform a Spot Test: This is a non-negotiable trust signal from professional detailers. Choose a small, inconspicuous area of the vinyl (like the underside or a flap) and apply a small amount of the cleaning solution you plan to use. Wait a few minutes, then wipe it away. Check for any discoloration or adverse reactions. This simple test prevents a widespread disaster.
Step 2: What Is the Best All-Purpose Cleaning Solution?
For most vinyl cleaning situations, a gentle, homemade solution is both safe and incredibly effective. You don’t need harsh, expensive chemicals for routine cleaning. The best all-purpose cleaner is one you can mix yourself in seconds, and its pH-neutral properties make it safe for your car’s vinyl upholstery.
DIY Vinyl Cleaning Solution Recipe:
In a gallon of warm water, mix in 1-2 drops of a mild, pH-neutral dish soap (like original Dawn). Agitate the water slightly to mix, but avoid creating excessive suds.
This solution works because the dish soap is a surfactant, meaning it’s scientifically designed to lift and trap grease and dirt, allowing it to be easily wiped away. It’s strong enough to clean effectively but gentle enough that it won’t strip the vinyl’s protective top layer or cause it to dry out. This solution will be used with the “two-bucket method” for optimal results.
Step 3: How Do You Apply the Cleaner and Scrub the Seats?
The correct application technique is what separates a quick wipe-down from a deep, restorative clean. Here, we’ll employ the two-bucket method used by professional detailers to prevent re-contaminating your seats with the dirt you just removed. You will need one bucket with your cleaning solution and a second bucket with clean rinse water.
- Work in Small Sections: Dip a clean microfiber cloth into your soap solution and wring it out until it is damp, not soaking wet. Clean the seat in small, manageable sections, about 2×2 feet at a time. This prevents the solution from drying on the surface before you can rinse it.
- Use a Brush for Texture: For heavily soiled areas or seats with a textured grain, spray a small amount of your cleaning solution directly onto a soft-bristle brush. Gently scrub the area in small, circular motions. The soft bristles will get into the grooves and lift embedded dirt without scratching the vinyl.
- Clean the Seams: Pay special attention to the seams and stitching, as this is where dirt and oils accumulate. Use your soft-bristle brush to gently scrub along the seam lines.
💡 Pro-Tip for Perforated Vinyl: If your seats have small holes (perforations), it is crucial to use minimal liquid. Lightly dampen your cloth and never spray cleaner directly on the seat. This prevents moisture from seeping into the foam cushion beneath, which can lead to mold and mildew.
After cleaning each section, rinse the dirty microfiber cloth in your clean water bucket before putting it back into the soap solution bucket. This keeps your cleaning water clean and effective.
Step 4 & 5: How Do You Properly Rinse and Dry the Vinyl?
Rinsing and drying are the final, crucial steps that many people skip, leading to subpar results. Failing to rinse leaves behind a sticky soap residue that attracts new dirt, while improper drying can cause moisture issues.
First, take a fresh, clean microfiber cloth and dip it in your bucket of clean rinse water. Wring it out thoroughly and wipe down the section you just cleaned. This removes any lingering soap film, ensuring a non-sticky, truly clean finish.
Immediately after rinsing, use a third, completely dry microfiber towel to buff the seat dry. Thoroughly drying the surface and especially the seams is critical. This action prevents water spots and, more importantly, stops moisture from lingering in crevices where it could promote the growth of mildew and unpleasant odors.
⏳ Practical Tip: On a dry day, leave your car doors open for 30-60 minutes after cleaning. This allows air to circulate and ensures that all the hidden seams and deep crevices are completely dry.
What Are the Best Cleaners for Vinyl Car Seats?
The best cleaner for your vinyl seats depends on your goal: routine maintenance or deep stain removal. While a simple DIY solution is perfect for most jobs, sometimes you need the specialized power of a commercial product. Understanding the pros and cons helps you make an informed decision, saving you time and protecting your investment. Our experience shows that having both types of solutions on hand prepares you for any situation.
DIY Cleaners (Soap, Vinegar, Baking Soda)
For light, regular cleaning, DIY solutions are hard to beat. They are cost-effective, readily available, and generally safe. The primary choice is the mild dish soap and water solution we detailed earlier. For light stains or as a rinse aid, a 50/50 solution of white vinegar and water can work well, as the acidity helps break down some mineral deposits. For a targeted scuff or stain, a paste of baking soda and water can act as a gentle, non-damaging abrasive.
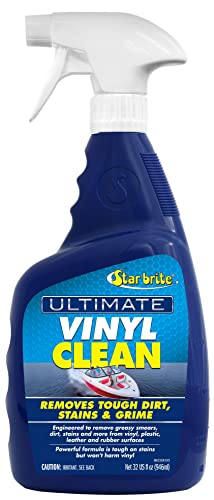
Commercial Vinyl Cleaners
Dedicated commercial cleaners are scientifically formulated to be pH-balanced for vinyl safety. They excel at breaking down tougher grime, body oils, and stubborn stains that soap and water might leave behind. Crucially, many commercial products contain conditioners and UV inhibitors, which are essential for long-term care. These additives help keep the vinyl soft, prevent it from drying out, and create a protective barrier against sun damage that causes fading and cracking.
Here is a clear comparison to help you choose:
| Feature/Aspect | DIY Cleaners (Soap/Vinegar) | Commercial Vinyl Cleaners |
|---|---|---|
| Cost | 💲 Very Low | 💰 Low to Moderate |
| Effectiveness | Good for general dirt and light spills | Excellent for deep cleaning, oils, and grime |
| Safety | Generally safe, but vinegar can be acidic | pH-balanced and specifically tested for vinyl |
| Protection | None | Often includes UV inhibitors and conditioners |
| Best For | Regular maintenance, light cleaning | Deep cleaning, stain removal, and long-term care |

How Do You Remove Stubborn Stains from Vinyl Seats?
When general cleaning isn’t enough, a targeted approach is necessary. Stubborn stains like sunscreen, mildew, ink, and grease have specific chemical makeups that require a specific counter-agent to break them down. In our experience, trying to scrub these stains away with a general-purpose cleaner often just spreads the mess or damages the vinyl. The key is to correctly identify the stain and apply the right solution with a delicate touch, always testing in a hidden area first.
How to Remove Sunscreen Stains from Vinyl
To remove oily sunscreen residue, you need a solvent to break down the oils. Sunscreen, particularly formulas containing chemicals like avobenzone, can leave a stubborn, chalky white stain that soap and water can’t touch.
- Create the Solution: Mix a solution of 50% isopropyl alcohol (common rubbing alcohol) and 50% water in a small bowl or spray bottle.
- Apply with a Cloth: Dampen a clean microfiber cloth with the solution. Do not oversaturate it.
- Dab, Don’t Rub: Gently dab the stained area. The alcohol will act as a solvent, dissolving the oils in the sunscreen. Avoid aggressive rubbing, which can spread the stain.
- Rinse Thoroughly: Once the stain is gone, wipe the area with a separate cloth dampened with clean water to remove any alcohol residue.
- Dry Completely: Buff the area dry with a clean, dry towel.
How to Clean Mold & Mildew from Vinyl
To remove mold and mildew, you must kill the fungal spores, not just wipe them away. Using bleach is a common but dangerous mistake, as it can damage vinyl and often only whitens the mold, allowing it to grow back. A vinegar solution is the expert-recommended approach.
- Ensure Ventilation: Before you begin, open all car doors and, if possible, wear a mask. Mold spores can be a health hazard.
- Prepare the Solution: Mix a solution of one part white vinegar and one part water in a spray bottle. The acetic acid in vinegar safely kills mold spores.
- Spray and Wait: Spray the solution directly onto the mildew-affected areas. Let it sit for at least 15-20 minutes. This is the crucial step where the vinegar does its work.
- Scrub and Clean: Use a soft-bristle brush to scrub the area and lift the dead mold from the surface.
- Rinse and Dry: Rinse the area thoroughly with a cloth dampened in clean water. Then, dry the seat completely, preferably in the sun, as UV rays help kill any remaining spores.
What Is the Best Way to Maintain and Protect Vinyl Seats?
After deep cleaning, proactive maintenance is the key to preventing future damage. Automotive detailing best practices show that consistent, gentle care is far more effective than occasional, harsh cleanings. The biggest enemies of vinyl are dirt, which acts like sandpaper, and UV radiation from the sun, which dries out the material, causing it to fade and crack. A simple, regular maintenance routine can preserve your seats for years.
Perform Weekly Wipe-Downs
Once a week, take a few minutes to wipe down your vinyl seats with a dry or slightly damp microfiber cloth. This removes the layer of dust and small abrasive particles before they can get ground into the material.
Clean Spills Immediately
Treat spills as soon as they happen. Keeping a small bottle of your DIY cleaning solution and a microfiber cloth in your car can be a lifesaver. A quick cleanup prevents liquids from setting into stubborn stains.
Condition and Protect Quarterly
This is the most important step for long-term preservation. Every 3 to 6 months, apply a high-quality automotive vinyl conditioner that includes a UV protectant. This two-in-one product serves two functions:
* Conditioner: Replaces moisture in the vinyl, keeping it soft and flexible to prevent cracking.
* UV Protectant: Forms a barrier that blocks harmful ultraviolet rays, preventing the sun from fading and breaking down the material.
Simple Maintenance Schedule:
* Weekly: Dust with a dry microfiber cloth.
* Monthly: Perform a light cleaning with mild soap and water.
* Quarterly (Every 3-6 Months): Apply a quality vinyl conditioner with UV protection.
FAQs About how to clean vinyl car seats
Can you use a Magic Eraser on vinyl car seats?
Yes, but you must be extremely careful. A Magic Eraser (melamine foam) is a micro-abrasive, like very fine sandpaper. It can be effective for removing tough scuffs, but aggressive rubbing will strip the vinyl’s topcoat and create a dull, permanent spot. If you use one, make it a last resort, wet it thoroughly, and use very light pressure.
Is it safe to use bleach or ammonia-based cleaners on vinyl seats?
No, you should avoid using bleach or ammonia-based cleaners. Bleach can cause vinyl to become brittle and yellow over time, and both are harsh chemicals that can strip the protective finish from the seats. Always opt for pH-neutral cleaners or a simple solution of mild dish soap and water for safe cleaning.
How often should I clean and condition my vinyl seats?
You should perform a light cleaning or dusting weekly and a deep clean every 1-3 months, depending on use. A vinyl conditioner with UV protection should be applied every 3-6 months. This regular maintenance is the best way to prevent dirt buildup, cracking, and fading.
What’s the difference between cleaning vinyl and leather seats?
Vinyl is a synthetic plastic, while leather is a natural material. Vinyl is generally more durable and can handle all-purpose cleaners, whereas leather requires a dedicated, pH-balanced leather cleaner and regular conditioning to replenish its natural oils. Using a harsh cleaner on leather can cause it to dry out and crack much faster than vinyl.
How can I fix small cracks in my vinyl seats?
For small cracks or tears, you can use a vinyl and leather repair kit. These kits typically come with a filler compound and color-matched tints that you apply to the damaged area. After the compound dries, you texturize it with a grain paper from the kit to blend the repair with the surrounding vinyl. For larger damage, professional reupholstery may be needed.
Can I use a steam cleaner on vinyl car seats?
Yes, steam cleaning can be an effective method, but caution is required. Steam is excellent for lifting embedded dirt and sanitizing without chemicals. However, you must keep the steamer head moving constantly and avoid concentrating heat in one spot, which could warp or damage the vinyl. Always follow up with a dry microfiber towel to remove all moisture.
How do I clean perforated vinyl seats?
The key is to use minimal moisture. Instead of a wet cloth, use a lightly damp microfiber cloth or spray your cleaner onto the cloth first, not directly on the seat. This prevents water from soaking into the foam padding through the holes, which can lead to mold and odors. A soft brush is also great for cleaning out debris from the perforations.
What should I do if my vinyl seats feel sticky after cleaning?
A sticky feeling is almost always caused by soap residue that wasn’t fully rinsed off. To fix this, simply wipe the seats down with a clean microfiber cloth dampened with only fresh water. You may need to do this a couple of times. Then, be sure to dry the seats thoroughly afterward.
How can I protect my vinyl seats from sun damage?
The best protection is a combination of physical barriers and chemical protectants. Use a windshield sunshade whenever you park, and consider tinted windows to reduce overall UV exposure. Additionally, apply a quality vinyl protectant that specifically lists UV blockers in its formula every 3-6 months to help prevent fading and drying.
What is the best DIY cleaner for vinyl car seats?
The safest and most effective DIY cleaner is a simple solution of mild dish soap and water. Mix a few drops of a pH-neutral dish soap (like Dawn) into a bucket of warm water. It’s strong enough to cut through grease and grime but gentle enough not to damage the vinyl’s finish. For tougher spots, a paste of baking soda and water can be used as a gentle abrasive.
Final Thoughts
Properly cleaning and maintaining your vinyl car seats doesn’t have to be a complicated or expensive chore. By embracing a philosophy of consistent, gentle care over occasional, harsh cleanings, you can easily preserve the look and feel of your car’s interior. The key is using the right technique—like the two-bucket method—and the right solutions for the right problem, whether it’s a simple soap-and-water wash or a targeted treatment for a stubborn stain.
Remembering to rinse thoroughly and apply a quality UV protectant quarterly are the two most impactful actions you can take to ensure longevity. Armed with this knowledge, you are now fully equipped to keep your vinyl seats looking pristine for years to come, protecting your vehicle’s value and enhancing your driving experience.
Last update on 2026-03-10 / Affiliate links / Images from Amazon Product Advertising API