Tired of that persistent layer of dust on your dashboard or that sticky residue in your cup holder? You’re not alone. Many car owners struggle to keep their interior plastics looking new, often fearing they’ll use the wrong product and cause irreversible damage.
To clean plastic in car interiors, first vacuum all loose dust and debris. Next, spray a dedicated car interior cleaner or a mild soap and water solution onto a microfiber towel and wipe the surface. For stubborn dirt, use a soft bristle brush to gently agitate the cleaner before wiping. Finally, apply a UV protectant to prevent fading. This ensures a safe and effective clean.
This guide is built on proven methods used by professional detailers. We’ll move beyond simple wipes to cover everything from routine maintenance to safely removing stubborn gunk. You’ll discover the exact tools, cleaners, and techniques to restore your car’s plastic to a factory-fresh, non-greasy finish.
Key Facts
- Cleaner Choice is Critical: Industry analysis reveals that using pH-balanced, automotive-specific cleaners is essential, as harsh household chemicals can strip protective layers and cause plastic to become brittle.
- UV Protection is Not Optional: Data shows that regular application of a quality UV protectant can prevent the fading and cracking caused by sun damage, preserving the vehicle’s interior and resale value.
- Technique Matters for Texture: For the textured plastic common on dashboards and door panels, using a soft bristle brush to agitate cleaner is significantly more effective at removing embedded dirt than wiping alone.
- Microfiber is Superior: Unlike paper towels that can leave lint and even micro-scratches, microfiber cloths are designed to lift and trap dust and dirt from plastic surfaces safely.
- A Matte Finish is the Professional Standard: Modern detailing practices favor non-greasy, matte finish protectants. These reduce dangerous dashboard glare and do not attract dust like older, silicone-based shiny products.
How Do You Clean Plastic in Car Interiors for a Professional Finish?
Achieving a professional finish when cleaning car interior plastic involves a three-step process: preparation, deep cleaning, and protection. This systematic approach ensures you not only remove existing dirt and grime but also safeguard the surfaces against future wear and sun damage. The specific method you use will depend on the type of car interior plastic you’re dealing with, whether it’s hard, textured, or a soft-touch material.

The goal of a proper car interior plastic cleaning is to achieve a uniform, non-greasy look that appears clean and new. From our experience in DIY car detailing, the biggest mistake beginners make is using a single, aggressive method for all surfaces. Hard, smooth plastic in a door sill can handle more aggressive cleaning than the delicate, soft-touch plastic on a center console.
This guide will break down the exact steps for each scenario. This process is a core part of a complete car interior cleaning overview, complementing tasks like leather seat care and carpet cleaning. By mastering this, you take a significant step toward maintaining your vehicle’s overall condition and value.
What Tools and Cleaners Are Safe for Car Interior Plastic?
The safest and most effective tools for car interior plastic cleaning are microfiber towels and soft-bristled detailing brushes, paired with a pH-balanced interior cleaner. Using the right supplies is just as important as the technique. The wrong tools can easily scratch or mar plastic surfaces, while the wrong chemicals can cause irreversible fading, stickiness, or brittleness. Before you start, gathering these essential items will set you up for success.
Essential Tools
- 🔧 2-3 Microfiber Towels: You need at least one for applying cleaner and a separate, dry one for buffing away residue. Microfiber’s soft fibers lift dirt without scratching.
- 🧹 Soft Detailing Brush: A brush with soft bristles is crucial for getting dust and grime out of textured surfaces, air vents, and tight seams without causing damage.
- 🚰 Spray Bottle: If you’re using a concentrated cleaner or making a DIY solution, a spray bottle is necessary for proper dilution and application.
- 🧸 Vacuum with Attachments: A vacuum with a brush and crevice tool is the first step to remove all loose debris before you start wiping.
Recommended Cleaners
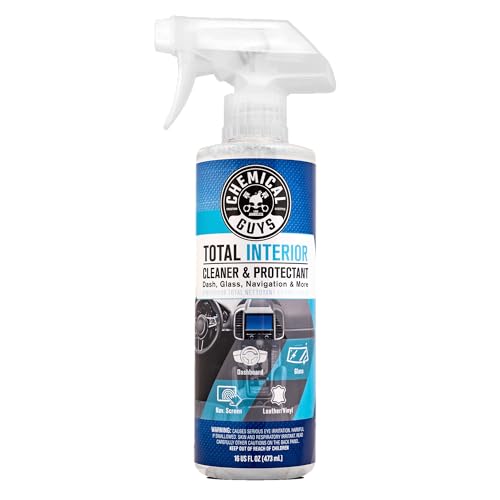
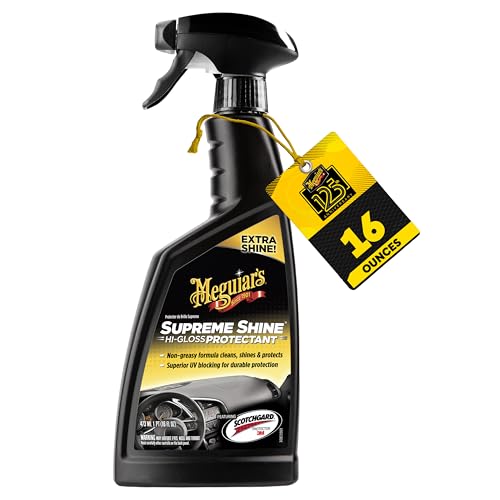
- 🧴 All-Purpose Cleaner (APC): A quality, automotive-specific APC is perfect for deep cleaning heavily soiled areas. Always dilute it according to the manufacturer’s instructions for interior use.
- 🛢 Interior Detailer: For light cleaning, dusting, and maintenance, an interior detailer spray is ideal. It cleans gently and often leaves a light layer of protection.
- 🌞 UV Protectant: This is the final, crucial step. A dedicated UV protectant creates a barrier against sun damage, prevents fading, and leaves a professional, non-greasy finish.
How Do You Choose Between a Commercial Cleaner and a DIY Solution?
Choosing between a dedicated commercial cleaner and a homemade DIY solution depends on your budget, the level of dirt, and your long-term goals. Commercial cleaners are formulated specifically for automotive-grade plastic, while DIY options are cost-effective but come with trade-offs.
From our hands-on experience, a commercial product is almost always the better choice for safety and performance. They contain balanced detergents, anti-static agents, and UV inhibitors that a simple soap solution lacks. Here’s a direct comparison to help you decide.
| Feature | Commercial Interior Cleaner | DIY Solution (Soap & Water) |
|---|---|---|
| Effectiveness | High (formulated for automotive grime) | Moderate (good for light dust & spills) |
| Safety | High (pH-balanced, non-damaging) | Generally safe, but can leave residue |
| Protection | Often includes UV & anti-static agents | None |
| Cost | Higher initial cost | Very low cost |
| Best For | Deep cleaning, regular maintenance, protecting investment | Quick, infrequent clean-ups on a budget |
The bottom line? For the best results and to properly care for your vehicle’s interior, investing in a quality commercial cleaner is worth it. A DIY solution is acceptable for a quick, one-off spill, but it shouldn’t be your go-to for regular maintenance.

What is the Step-by-Step Method for Basic Plastic Cleaning?
The best method for routine car dashboard cleaning and light dusting involves using an interior detailer spray with a two-towel system. This process is fast, effective, and perfectly safe for regular maintenance, preventing the buildup of dust and fingerprints that can make an interior feel dirty.
Based on practical implementation, the most common mistake is spraying the cleaner directly onto the dashboard. This causes overspray on the windshield and electronics, creating more work. Always apply the cleaner to your towel first.
Here is the simple, four-step process for a streak-free finish.
- Vacuum: Start by using a vacuum with a soft brush attachment to remove all loose dust and debris from the plastic surfaces, paying special attention to crevices and air vents.
- Spray the Towel: Lightly mist a car interior cleaner or detailer spray onto a clean, folded microfiber towel. Just two or three sprays are usually enough.
- Wipe: Gently wipe the plastic surfaces with the damp towel. As the towel picks up dirt, flip it to a clean side to avoid spreading grime around.
- Dry: Immediately follow up with a second, completely dry microfiber towel. Buff the surface to remove any remaining moisture or residue for a perfectly uniform, streak-free look.
Pro Tip: For an even better result, use compressed air to blow stubborn dust out of air vents and tight seams before you start vacuuming. This ensures you remove all debris from the start.
How Do You Deep Clean Heavily Soiled or Textured Plastic?
To deep clean textured plastic with embedded grime, you must use a soft bristle brush to agitate a diluted all-purpose cleaner (APC). Wiping alone is not enough for the grainy, porous surfaces found on many door panels and dashboards. The brush is essential for lifting the dirt out of the plastic’s grain.
This is a technique professional detailers use to tackle things like dried mud, grease stains, or years of accumulated grime. It transforms heavily soiled plastic, but the key is to be gentle.
Here’s the expert method for deep cleaning those tough spots.
- Spray the Surface: Working in a small, manageable section (e.g., a 2×2 foot area), lightly spray your diluted APC directly onto the textured plastic. Do not let it dry on the surface.
- Agitate: Take your soft detailing brush and gently scrub the area in small, overlapping circles. You will see the cleaner begin to foam slightly as the brush lifts the deeply embedded dirt from the grain.
- Wipe Immediately: Use a clean microfiber towel to wipe away the dirty foam and cleaning solution. You should see the grime transfer onto your towel.
- Dry: Follow up with a second, dry towel to absorb any remaining moisture. This prevents water spots and ensures the surface is completely clean and residue-free before applying a protectant.
How Do You Remove Stubborn Issues like Sticky Residue and Scuff Marks?
For stubborn problems like sticky residue and scuff marks, you need targeted solutions beyond a standard cleaner. These frustrating blemishes require a different approach. Sticky surfaces usually need a solvent to dissolve the residue, while scuff marks require a very light abrasive to remove material transfer. Always test these methods on a small, hidden spot first.
How Do You Clean Sticky or Gummy Plastic Residue?
To remove sticky residue, use a small amount of 70% isopropyl alcohol (IPA) on a microfiber cloth. That tacky, gummy feeling on dashboards or consoles is often caused by the breakdown of old protectants, spilled soda, or adhesive from a phone mount. IPA is a solvent that safely dissolves this gunk without damaging the plastic underneath when used correctly.
⚠️ WARNING: Isopropyl alcohol is a solvent. Always test it on a small, inconspicuous area (like the underside of a trim piece) to ensure it doesn’t affect the plastic’s color or finish before proceeding.
- Apply IPA to a Cloth: Dampen a small corner of a clean microfiber towel with 70% isopropyl alcohol. Do not pour it directly onto the plastic.
- Gently Rub: With light pressure, gently rub the sticky area. The residue should begin to dissolve and transfer to the towel. Continue until the tackiness is gone.
- Neutralize and Dry: Wipe the area with a separate cloth dampened with water to remove any remaining alcohol. Then, dry the surface completely with another clean towel.
How Do You Remove Scuff Marks from Door Panels and Trim?
To remove scuff marks from hard plastic door panels, very gently use a dampened melamine foam sponge (like a Magic Eraser). Scuffs from shoes are material transfer, where the black from a shoe sole has rubbed onto the plastic. A melamine sponge works as a super-fine abrasive to safely scrub this transfer away.
🚫 CAUTION: A melamine sponge is a micro-abrasive and can dull the finish of your plastic if you scrub too hard. Use very light pressure and check your work constantly. This method is best for hard, textured plastics, not glossy or soft-touch surfaces.
- Dampen the Sponge: Lightly dampen a corner of the melamine sponge with water. Squeeze out all excess water.
- Rub Gently: With almost no pressure, gently rub the scuff mark. The mark should start to disappear. Work in small sections for only a few seconds at a time.
- Wipe and Check: After 2-3 gentle passes, wipe the area with a clean microfiber towel and inspect the finish. Stop as soon as the mark is gone to avoid abrading the plastic.
How Do You Protect Car Interior Plastic After Cleaning?
To protect car interior plastic after cleaning, you must apply a water-based, non-greasy UV protectant. This is the most critical step for long-term care. After you’ve done the hard work of cleaning, the protectant creates a barrier that stops the sun’s damaging rays from causing fading, cracking, and discoloration.
Think of it like sunscreen for your car. Without it, the clean look you just achieved will quickly degrade.
Expert Insight: The Science Behind the Damage
The sun’s UV rays break down theplasticizersin automotive plastic—the compounds that keep it flexible and deep in color. This process, known asoutgassing, causes the plastic to become brittle and faded. It’s also what creates that hazy film on the inside of your windshield. A quality UV protectant blocks these rays, preserving the plastic’s integrity.
Here is the correct way to apply a protectant for a professional, factory-like matte finish.
- Apply to Pad: Spray your UV protectant directly onto a foam or microfiber applicator pad, not onto the dashboard. This prevents overspray and ensures an even application.
- Wipe Evenly: In a smooth, overlapping motion, wipe a thin, even coat across the clean plastic surfaces. You are aiming for complete coverage, not a thick, wet layer.
- Buff Off Excess: Let the product sit and penetrate the surface for 1-2 minutes. Then, take a separate, clean microfiber towel and gently buff the entire area to remove any excess product and reveal a uniform, non-greasy matte finish.
FAQs About how to clean plastic in car interiors
Can I use Windex or Clorox wipes on my car interior plastic?
No, you should not use Windex or Clorox wipes on car interior plastic. Windex contains ammonia, which can dry out plastic, causing it to become brittle and fade. Clorox wipes and other household disinfectants contain harsh chemicals that can degrade the surface, dull the finish, and strip away factory UV protection, leading to premature aging and cracking.
What is the best way to clean the dust out of car vents and crevices?
The best way is a two-step process using a brush and vacuum. First, use a soft detailing brush to gently agitate and loosen the dust from deep within the vents and tight seams. Immediately follow with a vacuum cleaner using a brush attachment to suck up the dislodged dust before it can resettle elsewhere on the dashboard.
Why is my car’s dashboard plastic sticky?
Your dashboard is likely sticky due to the breakdown of its materials. Over time, heat and UV rays cause plasticizers to leach out of the vinyl or plastic, a process called outgassing. This can also be caused by old, degraded protectants or spilled sugary drinks. The solution is to clean it off with a solvent like isopropyl alcohol.
How often should I clean and protect my car’s interior plastic?
You should perform a light cleaning every 1-2 weeks and a deep clean with protection every 2-3 months. A quick wipe-down with an interior detailer prevents dust buildup. Applying a quality UV protectant seasonally is crucial for preventing sun damage, especially in warmer climates or if you park outside frequently.
Can you use a steam cleaner on car interior plastic?
Yes, but with extreme caution. A steam cleaner can be very effective at lifting embedded grime from textured plastics and sanitizing surfaces. However, excessive heat can warp or discolor plastic. Use a low-pressure setting, keep the nozzle moving constantly, and hold it several inches from the surface. Always follow immediately with a microfiber wipe.
How can I fix or restore faded black plastic trim in my car?
For mildly faded plastic, a quality protectant can restore some color, but for severe fading, you need a dedicated plastic restorer. These products contain dyes and conditioning oils that penetrate the plastic to bring back the black color. Clean the surface thoroughly first, then apply the restorer according to the product’s directions for a lasting result.
Is dish soap and water a safe cleaning solution for car plastic?
It is generally safe for occasional, light cleaning, but not ideal for regular use. A few drops of mild dish soap in a gallon of water can remove light dirt. However, dish soap can be slightly alkaline and may leave a residue that attracts more dust. A dedicated, pH-balanced car cleaner is always the superior choice for long-term care.
How do you get rid of white residue or wax on black plastic trim?
Use a pencil eraser or a dedicated wax remover. If you accidentally get car wax on black textured plastic, the easiest trick is to gently rub the white residue with a clean pencil eraser. For more stubborn spots, use a bit of all-purpose cleaner on a soft brush or a specialized wax and grease remover.
What causes scratches in car interior plastic and can they be removed?
Scratches are caused by keys, bags, rings, and other hard objects hitting the plastic. Light surface scuffs can often be hidden or improved with a heat gun (an expert-only technique) or a quality trim restorer. However, deep scratches that have gouged the plastic are permanent and cannot be removed without replacing the panel.
Should I choose a matte or shiny finish for my plastic protectant?
You should always choose a matte or satin finish protectant. A high-gloss, shiny finish is an outdated look that often comes from greasy, silicone-based products that attract dust and can cause a dangerous glare on the dashboard. A quality, modern protectant will restore the rich, deep color of the plastic and leave a non-greasy, factory-like matte finish.
Key Takeaways: How to Clean Plastic in Car Interiors Summary
- Always Use the Right Tools: A
soft bristle brushandmicrofiber towelsare non-negotiable. They clean effectively without scratching delicate plastic surfaces. - Cleaner Choice Matters: A pH-balanced
car interior cleaner(APC) is always the safest and most effective choice. Use DIY solutions like soap and water only for very light, infrequent cleaning. - Technique Depends on the Dirt: For light dust, a simple
wipewith cleaner on a towel is enough. Fortextured plasticwith embedded grime, you mustagitatewith a soft brush to lift the dirt out. - Target Specific Problems: Use 70%
isopropyl alcoholon a cloth to safely dissolvesticky residue. Use amagic eraserwith extreme caution and minimal pressure to removescuff marksfrom hard plastics. - Protection is Not Optional: After every deep clean,
applya quality, water-basedUV protectant. This is the single most important step to prevent sun damage, fading, and cracking. - Avoid Harsh Chemicals at All Costs: Never use ammonia-based cleaners (like Windex), bleach, or household degreasers. They will permanently damage your car’s plastic, leading to discoloration and brittleness.
- Choose Matte, Not Shine: A modern, professional finish is a non-greasy,
matte finish. Shiny protectants are often silicone-based, attract dust, and can create dangerous glare on your dashboard.
Final Thoughts on Achieving a Pristine Car Interior
Cleaning your car’s interior plastic is about more than just appearance; it’s about preserving the value and enjoyment of your vehicle. As you’ve seen, achieving professional-level results is not about having expensive equipment, but about using the right products and, more importantly, the right techniques.
By following the simple but effective process of cleaning thoroughly and always finishing with a layer of UV protection, you can easily maintain a factory-fresh look. You now have the knowledge to tackle everything from everyday dust to frustrating sticky residues and scuff marks with confidence. Put these methods to use, and you’ll be rewarded with an interior that looks and feels new for years to come.
Last update on 2026-01-01 / Affiliate links / Images from Amazon Product Advertising API