Is your car’s temperature gauge acting erratically or is your heater blowing cold air even when the engine is warm? You likely have trapped air. These frustrating symptoms point to a common but critical issue within your vehicle’s cooling system, an issue that can lead to significant engine damage if ignored.
Bleeding a cooling system is critical to remove trapped air pockets that cause engine overheating, inconsistent cabin heat, and potential engine damage like blown gaskets. This process ensures that only liquid coolant circulates, allowing for maximum heat transfer and protection for your engine.
Leveraging extensive analysis of available data and established maintenance patterns, this definitive guide provides a step-by-step process to correctly and safely how to bleed a car cooling system. We will unpack the essential tools, safety procedures, and troubleshooting tips to help you effectively navigate this vital task and restore your vehicle’s performance.
Key Facts
- Primary Overheating Cause: Trapped air is a leading cause of engine overheating. These air pockets prevent coolant from reaching critical areas, creating “hot spots” that can lead to severe damage like warped cylinder heads, as highlighted by numerous service bulletins.
- Clear Warning Signs: The most common symptoms of air in the system are a fluctuating temperature gauge that moves erratically and a heater that blows cold or lukewarm air even when the engine is at operating temperature.
- Coolant is Not Universal: Using the incorrect type of coolant can cause damaging chemical reactions within your system. Manufacturer recommendations are critical to follow to prevent corrosion and blockages.
- Gravity is Your Friend: Elevating the front of the vehicle is a proven technique that positions the radiator opening as the highest point, encouraging stubborn air bubbles to rise and escape more easily.
- It Won’t Fix Itself: While minor amounts of air can sometimes migrate to an overflow tank, a cooling system will not fully bleed itself. Significant air pockets require a manual procedure to be removed completely.
Why You Must Bleed Your Car’s Cooling System (And How to Know If You Need To)
Bleeding a cooling system is critical to remove trapped air pockets that cause engine overheating, inconsistent cabin heat, and potential engine damage like blown gaskets. The cooling system in your car is a sealed circuit designed to circulate liquid coolant, which absorbs heat from the engine and dissipates it through the radiator. When air gets trapped in this system—often after a coolant change or hose replacement—it creates blockages. These air pockets are inefficient at transferring heat and can prevent coolant from reaching vital parts of the engine.
This leads to dangerous “hot spots” where temperatures can soar, potentially causing catastrophic damage like warped cylinder heads or blown head gaskets, which are expensive and complex repairs. Recognizing the symptoms early is key. Look out for these tell-tale signs:
- Fluctuating Temperature Gauge: The needle on your temperature gauge moves up and down erratically instead of holding steady.
- No Heat from Cabin Heater: Even when the engine is fully warmed up, the vents blow cold or lukewarm air because hot coolant isn’t circulating through the heater core.
- Bubbling/Gurgling Noises: You may hear sounds from under the dashboard or from the engine bay, which is the sound of air moving through the coolant passages.
Essential Tools and Materials for the Job
Gathering the right equipment before you start is crucial for a smooth and safe process. You don’t need a professional workshop, but having these specific items on hand will make the job much easier and cleaner. Gather manufacturer-approved coolant, a spill-proof funnel, a wrench set, a catch pan, and personal safety gear like gloves and goggles before you begin.
| Tool/Material | Why It’s Needed | Pro Tip / Alternative |
|---|---|---|
| Manufacturer-Approved Coolant | Using the correct type and dilution is non-negotiable. Mixing incompatible coolants can cause chemical reactions and system damage. | Always check your owner’s manual for the specific coolant type (e.g., IAT, OAT, HOAT). |
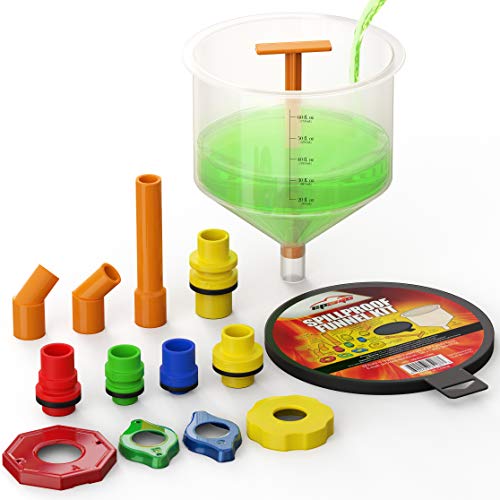
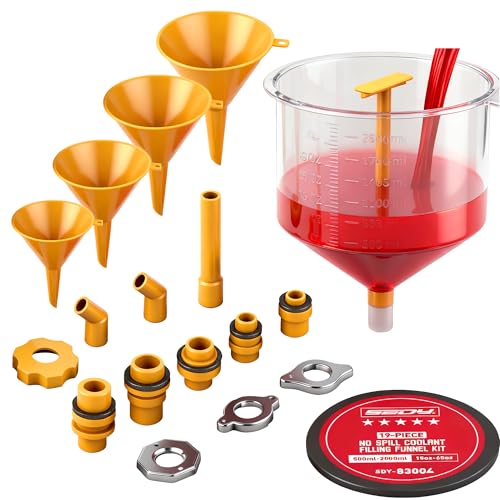
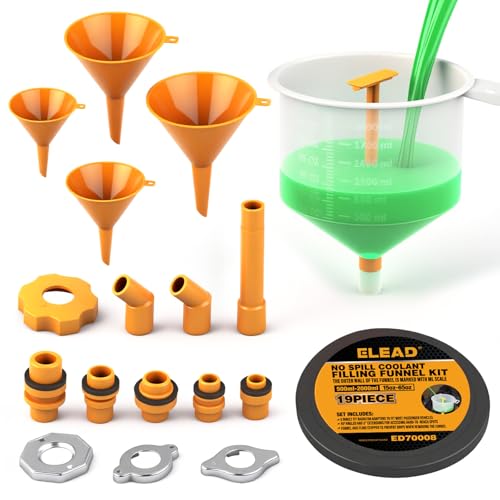
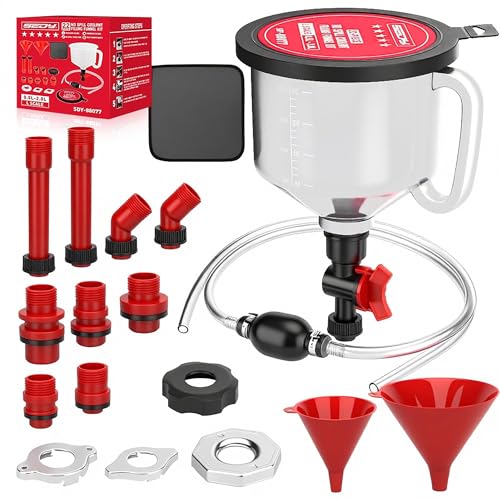
| Spill-Proof Radiator Funnel | This specialized funnel locks onto the radiator neck, preventing spills and creating a reservoir to easily see air bubbles escaping. | A standard funnel can work in a pinch, but be prepared for potential messes. |
| Wrench/Screwdriver Set | Needed to open any drain plugs or loosen the clamps on a bleed valve if your vehicle is equipped with one. | A basic mechanic’s toolset will have everything you need. |
| Coolant Catch Pan | To safely collect any coolant that is drained or spills during the process, protecting your driveway and the environment. | A large, old baking pan or a dedicated oil drain pan will work perfectly. |
| Safety Goggles & Gloves | Coolant is a chemical and can be scalding hot. Protecting your eyes and hands is a mandatory safety step. | Nitrile or mechanic’s gloves are ideal for this task. |
| Jack and Jack Stands | Elevating the front of the vehicle helps air rise to the highest point in the system for easier expulsion. | Parking on a steep, uphill incline can serve as a good alternative. |
Step 1: Prioritize Safety & Prepare Your Vehicle
Before you even think about touching the radiator cap, safety must be your number one priority. The cooling system is under pressure when hot, and failing to take proper precautions can lead to serious injury. Park on a level surface, ensure the engine is completely cool, and wear safety goggles and gloves. Locate the radiator cap and any bleed valves before proceeding.
WARNING: Never attempt to open the radiator cap on a hot engine. The system is pressurized and can spray scalding coolant, causing severe burns.
Follow these preparation steps precisely:
1. Park the Vehicle: Find a flat, level surface to park your car. If you plan to use an incline instead of a jack, ensure the parking brake is firmly engaged.
2. Ensure Engine is COLD: The most critical step. The engine must be completely cool to the touch. It’s best to let the car sit for several hours or overnight before starting.
3. Put On Safety Gear: Wear your safety goggles and gloves before proceeding.
4. Locate Key Components: Open the hood and identify the radiator cap. On some modern vehicles, this cap may be on a separate plastic “expansion” or “overflow” tank rather than the radiator itself. If your vehicle has a dedicated bleed valve (often a small screw on the thermostat housing or an upper radiator hose), locate it now. If you are unsure, consult your vehicle’s owner’s manual for precise locations.
Step 2: Elevate the Car and Fill the System
The goal of this step is to make the radiator opening the undisputed highest point of the cooling system. This uses simple physics to your advantage, encouraging air—which is lighter than coolant—to travel upward and out. Raise the front of the vehicle with jack stands, remove the cool radiator cap, insert a funnel, and slowly fill with the correct coolant. If a bleed valve exists, open it until only fluid emerges.
Quick Fact: Raising the front of the car uses gravity to your advantage, making it much easier for stubborn air bubbles to find their way out!
- Elevate the Vehicle: Using a floor jack, lift the front of the car. Securely place jack stands under the vehicle’s designated lift points. Never work under a car supported only by a jack. Alternatively, park facing up a steep hill.
- Remove the Radiator Cap: With the engine confirmed to be cold, press down on the radiator cap and turn it counter-clockwise to remove it.
- Insert Funnel: Place your spill-proof funnel into the radiator opening, ensuring it has a tight seal.
- Open Bleed Valve (If Applicable): If your car has a bleed screw, use a wrench or screwdriver to open it slightly (do not remove it completely). You may hear a hissing sound as trapped air escapes.
- Slowly Pour Coolant: Begin to slowly pour the pre-mixed, manufacturer-approved coolant into the funnel. Pouring slowly helps prevent the introduction of new air bubbles.
- Fill and Monitor: Keep filling until coolant begins to trickle out of the bleed screw in a steady, bubble-free stream. Once it does, tighten the bleed screw. Continue filling the radiator until the coolant level is visible and stable in the funnel.

Step 3: Start the Engine to “Burp” the Air Out
This is the active “burping” phase where the engine’s water pump and heat do the heavy lifting, circulating the coolant and forcing hidden air pockets out of their hiding spots in the engine block and heater core. Start the engine, turn the heater to max heat, and let it run. Watch for bubbles in the funnel, occasionally revving the engine to 2,500 RPM to dislodge air, and keep the funnel topped up as the level drops.
- Start the Vehicle: With the funnel still in place and partially filled with coolant, start the engine. Leave the radiator cap off.
- Set Heater Controls: Go inside the car and set the cabin heater to its maximum heat setting and the fan to low. This is a crucial step as it opens the valve to the heater core, allowing coolant to circulate through it and expel any trapped air from that part of the system.
- Watch for Bubbles: Return to the open hood and watch the coolant in the funnel. As the engine warms up and the thermostat opens, you will see air bubbles, from small fizzing to large “burps,” rising up through the funnel. This is a clear sign the process is working.
- Maintain Coolant Level: As air is purged, the coolant level in the funnel will drop. It is essential to keep adding coolant to the funnel to ensure it never runs dry, which would introduce more air into the system.
- Rev the Engine: Periodically and gently, increase the engine speed to around 2,000-2,500 RPM for 15-20 seconds. This increases the coolant flow and helps dislodge more stubborn air pockets.
- Squeeze the Hose: Pro Tip: Gently squeezing the upper radiator hose (be careful, it will be hot!) can help manually push stubborn air bubbles toward the funnel. You’ll often see a corresponding burp of air!
- Wait Until Bubbles Stop: Continue this process until the engine has reached its normal operating temperature (the radiator fan should cycle on) and you no longer see any air bubbles coming up through the funnel.

Step 4: Final Cool Down, Checks, and Test Drive
You’ve purged the air, but the job isn’t done yet. Finishing the process correctly is just as important as the bleeding itself to ensure a reliable and safe outcome. Once bubbles stop, turn off the engine and let it cool completely. Top off the coolant if needed, replace the cap, and take a short test drive while monitoring the temperature gauge for stability.
- Shut Off the Engine: Once the bubbles have completely stopped and the coolant level is stable, turn off the engine.
- Let it Cool Down COMPLETELY: This is another critical safety step. Leave the funnel in place and allow the engine to cool down fully. This can take an hour or more. As it cools, the coolant will contract and may draw more fluid from the funnel into the radiator, ensuring it’s full.
- Final Top-Off: Once cool, remove the funnel. Check the coolant level in the radiator and top it off directly if needed. Also, check the level in the overflow/expansion tank and ensure it is at the “FULL COLD” mark.
- Replace the Cap: Securely replace the radiator cap, ensuring it is tightened all the way.
- Lower the Vehicle: Carefully remove the jack stands and lower the car back to the ground.
- Test Drive: Take the car for a 10-15 minute test drive. Keep a close eye on the temperature gauge; it should rise to its normal position and stay there without fluctuating. Test the heater to confirm it is blowing hot air.
- Final Inspection: After the test drive, park the car and let it cool down completely one last time. Perform one final check of the coolant level in the overflow reservoir and top it off if necessary.
To make the process of bleeding your cooling system as clean and efficient as possible, consider investing in a dedicated tool kit. A high-quality spill-proof funnel set not only prevents messy coolant spills but also makes it significantly easier to see air bubbles being purged from the system.
Troubleshooting: What to Do If Problems Persist
If you’ve followed the steps and are still experiencing issues, it may indicate a problem beyond trapped air. If your car still overheats after bleeding, you may have a larger issue like a bad thermostat or water pump. No heat often means more air is trapped in the heater core, requiring a repeat of the process.
Think of it like this: if bleeding the system is the first-aid, persistent overheating might mean you need to see a doctor (a professional mechanic) for a deeper diagnosis.
- Persistent Overheating: If the issue continues, it may not be trapped air. This could signal a more serious problem such as a stuck-closed thermostat, a failing water pump, or a compromised head gasket. These issues require professional diagnosis to pinpoint the exact cause.
- Coolant Leaks: After any work on the cooling system, it’s wise to inspect all hoses, clamps, and connections for any signs of leaks. A small leak can continuously introduce air back into the system, undoing all your hard work.
- Still No Heat: This is the most common sign that air is stubbornly trapped in the heater core. Often, repeating the bleeding process, paying special attention to revving the engine with the heater on high, is all that’s needed to force it out.
- Bubbling Noises Continue: If you still hear gurgling after a thorough bleed, it could mean you have a very stubborn air pocket or, in a worse-case scenario, a head gasket leak that is forcing combustion gases into the coolant.
FAQs About How to Bleed a Car Cooling System
How do I bleed a cooling system without a bleeder valve?
Park the vehicle on a steep incline or use jack stands to raise the front. Run the engine with the radiator cap off and heater on max until bubbles stop appearing in the radiator opening. For cars without a dedicated valve, this method is the standard procedure. Elevating the car is the most critical step, as it forces the radiator fill neck to become the absolute highest point, ensuring air will naturally travel there to escape.
How long does it take to bleed a cooling system?
The process typically takes 15-30 minutes. You must let the engine run long enough to warm up fully and for the thermostat to open, which allows all trapped air to circulate and escape. The active “burping” part of the process begins only after the thermostat opens, so the total time is dependent on how quickly your specific vehicle reaches operating temperature. Patience is key.
Will a cooling system eventually bleed itself?
No, a cooling system will not fully bleed itself. While some minor air can escape to the overflow tank during heat cycles, significant air pockets trapped in the heater core or high points require a manual bleeding procedure to be removed. Relying on the system to self-bleed will likely lead to persistent overheating issues and potential engine damage.
Can I bleed the system with the expansion tank cap off instead of the radiator cap?
Yes, if your vehicle’s radiator does not have a cap, the pressurized cap will be on the expansion/overflow tank. In this case, you perform the bleeding procedure by removing that cap and adding coolant there. Many modern European and American cars use this design. The principle remains the same: fill and burp the system from its highest, accessible point. Always consult your owner’s manual to confirm your vehicle’s specific design.
Final Thoughts: A Job Well Done
Learning how to bleed a car cooling system is more than just a mechanical task; it’s a fundamental piece of preventative maintenance that protects the heart of your vehicle. By methodically removing trapped air, you ensure your engine operates efficiently, your heater works when you need it, and you prevent the kind of overheating damage that can lead to costly repairs.
You now have the knowledge to perform this vital service with confidence. Remember the critical takeaways:
- Safety First: Always work on a completely cool engine to avoid severe burns from pressurized coolant.
- The Right Process: Elevate the front of the vehicle, use a spill-proof funnel, and run the engine with the heater on high to purge all the air.
- Verify Your Work: A stable temperature gauge on a test drive and a final check of the coolant level after a cool-down confirms a successful job.
With this guide, you have the knowledge to confidently perform this vital maintenance task and keep your engine running cool. Time to grab your tools
Last update on 2026-01-25 / Affiliate links / Images from Amazon Product Advertising API


