That sinking feeling of seeing an ugly paint scuff on your car is universal. It’s an instant eyesore that seems destined for a costly trip to the body shop. But what if that blemish isn’t a deep, permanent scratch, but something you can fix yourself in an afternoon?
Paint transfer is a common, surface-level blemish caused by foreign paint smearing onto your car’s clear coat, which is often removable with the right DIY methods.
Leveraging a systematic analysis of professional detailing techniques and proven product data, this guide unpacks the 7 safest fixes to remove paint transfer from a car. We’ll walk you through the exact steps, from the gentlest approaches to more advanced solutions, ensuring you have the knowledge to restore your car’s finish without causing more damage.
Key Facts
- It’s Not a Deep Scratch: Paint transfer is a surface-level issue where foreign paint sits on top of your car’s protective clear coat, unlike deep scratches that cut into it.
- The Golden Rule is “Least Abrasive First”: Professional detailers unanimously agree you must always start with the gentlest method, like washing and claying, before moving to stronger compounds to prevent damage.
- Lubrication is Non-Negotiable: When using a clay towel, clay bar, or even some compounds, proper lubrication (like diluted car soap) is essential to prevent grinding dirt into the finish and causing more scratches.
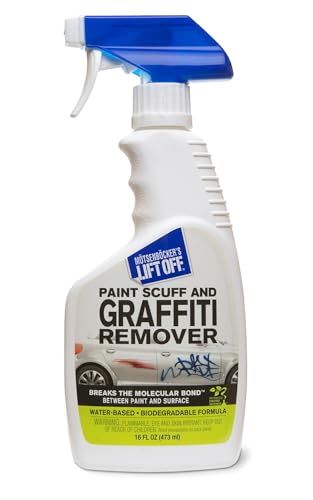
- Consumer Products Are Highly Effective: Widely available products like Meguiar’s Ultimate Compound and Turtle Wax Scratch Repair & Renew are frequently recommended for their ability to safely remove paint transfer by hand.
- The Job Isn’t Done Until It’s Protected: According to detailing best practices, successfully removing the transfer is only half the battle; you must polish the area to restore shine and apply a wax or sealant to protect the clear coat.
What Is Paint Transfer (And Is It Removable at Home)?
Paint transfer is a common, surface-level blemish caused by foreign paint smearing onto your car’s clear coat, which is often removable with the right DIY methods. Think of it as a superficial smear, not a wound. When your car makes light contact with another painted object—like another car’s bumper, a garage wall, or a parking bollard—the paint from that object can rub off onto your car’s exterior.

The key difference lies in what layer of your car’s paint is affected. Paint transfer sits on top of the clear coat, which is the transparent, protective top layer of your car’s paint job. A deep scratch, however, cuts through the clear coat and potentially into the color coat or even the primer underneath.
Here’s a simple way to tell the difference:
- Paint Transfer:
- Looks like a colored smudge or streak on top of your paint.
- The surface often feels slightly raised or rough.
- It is the color of the object your car hit.
- Deep Scratch:
- Looks like a thin groove or valley cut into your paint.
- Your fingernail will catch in the groove when you run it across the surface.
- May show the white primer or grey metal underneath.
Frustrating, right? The good news is, you likely have the power to fix it yourself. Because paint transfer is an additive problem (something was added to your paint) rather than a subtractive one (your paint was removed), it can often be safely cleaned off at home.
The Golden Rule: Start With the Least Abrasive Method First
Before you grab the most potent chemical or the grittiest compound, you must understand the single most important principle of paint correction: always start with the least abrasive method first. This is the non-negotiable rule used by professional detailers to ensure they don’t turn a minor, fixable problem into major, expensive damage.
The key to safely removing paint transfer is to always start with the least abrasive method and only move to more aggressive options if necessary. This prevents accidental damage to your car’s clear coat.
Think of it as a ladder. You start on the bottom rung (washing) and only climb higher if the previous step didn’t work. The term “abrasive” simply refers to how gritty or rough a product is. A polishing compound is more abrasive than car soap, and a rubbing compound is more abrasive than a polish. Starting too high on the ladder can create fine scratches or “marring” in your clear coat, dulling the finish and creating more work to fix.
Here is the hierarchy of methods we’ll follow, from least to most aggressive:
1. Thorough Washing
2. Clay Towel / Clay Bar
3. Mild Polishing Compound
4. Stronger Rubbing Compound
5. Chemical Solvents
Pro Tip: Patience is your most important tool. Rushing this process is the #1 cause of creating more damage.
Step-by-Step Guide: 7 Safe Fixes for Paint Transfer
Ready to get started? This 7-fix guide walks you through the complete process: assessing, cleaning, removing the transfer with progressively stronger methods, polishing, and protecting the paint. Following this systematic approach ensures you get professional-level results safely.
What You’ll Need:
- Two buckets
- Quality car wash soap
- Multiple clean microfiber towels
- A microfiber wash mitt
- Clay towel or automotive clay bar
- Lubricant (diluted car soap or a dedicated clay lube)
- Automotive polishing or rubbing compound (e.g., Meguiar’s Ultimate Compound)
- Microfiber or foam applicator pads
- Car polish (optional, but recommended)
- Car wax or paint sealant
Let’s break down each step in detail.
Method 1: Thorough Washing & Claying (Least Abrasive)
After washing, use a lubricated clay towel or clay bar with light, straight motions to safely lift surface contaminants and paint transfer from the clear coat. Never attempt to remove paint transfer from a dirty car. Any loose dirt or grit will be ground into your paint during the removal process, causing a web of new scratches.
- Wash Thoroughly: Using the two-bucket method, wash the affected area and its surroundings with a quality car wash soap and a clean wash mitt. This removes loose debris.
- Inspect: Rinse and dry the area completely with a clean microfiber towel. Check the transfer. Quick Fact: Sometimes, a good wash with a quality wash mitt is enough to remove very fresh paint transfer. Always check after washing!
- Lubricate: If the transfer remains, it’s time to clay. Generously spray the area with a lubricant. A simple solution of car soap diluted 1:1 with water works perfectly. The surface should be very slick.
- Clay the Surface: Gently glide a clay towel or clay bar over the lubricated area in straight, back-and-forth motions. Do not use swirling motions. Apply only light pressure and let the clay do the work of grabbing the bonded paint transfer.
- Wipe and Inspect: Frequently wipe the area with a clean microfiber towel to check your progress and remove any residue. Fold your clay towel or knead your clay bar often to expose a clean surface.
Caution: Never use a clay bar or towel on a dry or poorly lubricated surface. This is the fastest way to create marring—fine surface-level scratches or cloudiness—in your clear coat.
Method 2: Using Polishing & Rubbing Compounds by Hand
Apply a quality polishing compound (e.g., Meguiar’s Ultimate Compound) to a microfiber applicator and use firm, back-and-forth motions to remove stubborn paint transfer. If claying didn’t fully remove the scuff, the next step is a polishing compound. These products contain microscopic abrasives that gently scrub away the transferred paint from the surface of your clear coat.
For stubborn paint transfer, apply a small amount of a polishing compound to a microfiber pad. Rub the area with firm pressure in back-and-forth motions until the transfer is gone, then wipe the residue clean.
Here’s how to do it effectively:
1. Apply a pea-sized amount of compound to a microfiber applicator pad or a folded microfiber towel.
2. Using firm pressure, rub the compound over the paint transfer area. Use straight, overlapping back-and-forth motions. Avoid swirling.
3. Continue rubbing until the paint transfer disappears. You may need to reapply a small amount of compound.
4. Wipe the area clean with a separate, clean microfiber towel to remove any residue and inspect the finish. The area might look slightly hazy, which is normal and will be fixed by polishing.
Some highly recommended, readily available products include:
* Meguiar’s Ultimate Compound: A favorite among detailers for its effectiveness and safety when applied by hand.
* Turtle Wax Scratch Repair & Renew: Another excellent option designed to remove surface blemishes with firm finger pressure.
Remember that ‘elbow grease’ is key here, but always check your progress frequently to avoid overdoing it.

Method 3: Trying Common Household Items (With Caution)
Household items like toothpaste can work on light scuffs due to their mild abrasiveness, but always use gentle pressure and be prepared to polish the clear coat afterward to restore its shine. Ever wondered if the toothpaste trick really works? Here’s the truth, and what you MUST do afterward. While automotive-specific products are always the safest bet, some common household items can work in a pinch if used correctly and with extreme caution.
| Household Item | How It Works | CRITICAL Warning |
|---|---|---|
| Toothpaste | Contains very mild abrasives designed for enamel. A non-gel, whitening toothpaste works as a makeshift ultra-fine polish. | Can be too abrasive if you rub too hard. ALWAYS follow up by polishing the area to restore gloss. |
| Magic Eraser | Made of melamine foam, which acts like an extremely fine sandpaper. It will remove paint transfer. | > It will also remove the shine from your clear coat, leaving a dull, hazy patch. This is a very aggressive method. You MUST use a polishing compound afterward to fix the dullness. |
If you choose to try one of these, use the same technique as with a polishing compound: apply a small amount to a damp microfiber cloth, rub gently, and check your progress constantly. Treat these as a step up in aggressiveness from a dedicated automotive compound.
Method 4: Using Chemical Solutions (As a Last Resort)
For the most stubborn cases, use a solvent like WD-40 on a cloth to gently wipe the area, but always test first and wash the surface immediately after to avoid damaging your car’s clear coat. This is the ‘break glass in case of emergency’ method. Chemicals like solvents can dissolve the transferred paint, but they can also soften or damage your car’s clear coat if left on for too long or used improperly. Proceed with extreme caution and follow these steps exactly.
Common chemical options include WD-40, isopropyl (rubbing) alcohol, mineral spirits, or even acetone for very minor streaks. WD-40 and alcohol are generally the safest of these options. They work by softening the foreign paint, allowing you to wipe it away.
Follow this strict safety protocol:
1. Test First: “Always test on a small, inconspicuous area first.” Apply a tiny amount to a hidden spot (like a door jamb) to ensure it doesn’t react negatively with your paint.
2. Apply to Cloth, Not Car: Dampen a clean microfiber cloth with the chemical. Never pour or spray it directly onto the car’s body panel.
3. Wipe Gently & Briefly: Lightly wipe the paint transfer. Don’t let the chemical sit on the surface for more than a few seconds.
4. Wash Immediately: As soon as the transfer is gone, immediately wash the entire area with car soap and water to neutralize and remove any remaining solvent.
5. Inspect and Polish: Dry the area and inspect it. You will likely need to polish the surface to remove any hazing caused by the chemical.
Final Steps: How to Polish and Protect Your Car’s Paint
To finish the job, polish the treated area to restore the clear coat’s clarity and shine, then apply a layer of wax or sealant to protect the paint. Don’t skip this last step! This is what makes your repair invisible and keeps your paint looking great. Any method that uses abrasion or chemicals, even mildly, can affect the finish of your clear coat. Polishing and protecting are what separate an amateur job from a professional result.
- Step 1: Polish the Area. Polishing uses an even finer abrasive than a compound to remove any light hazing or marring and restore a deep, wet-looking gloss. Apply a dedicated car polish with a clean foam or microfiber applicator using the same back-and-forth motions. Buff off the residue with a clean microfiber towel.
- Step 2: Apply Protection. You’ve just stripped away any previous wax or sealant. You must apply a new layer of protection. This shields the paint from UV rays, contaminants, and future minor scuffs. You can use a traditional carnauba wax for great shine, a synthetic paint sealant for longer-lasting durability, or a ceramic coating for the most robust protection.
This final phase is critical for:
* Restoring a perfectly uniform, high-gloss shine.
* Removing any fine marring caused by the removal process.
* Adding a durable layer of protection against future damage.
When to Call a Professional Detailer
If you can feel the scratch with your fingernail, see the underlying metal or primer, or are unsure about the process, it’s safer and more effective to consult a professional. While many cases of paint transfer are perfect for a DIY fix, it’s crucial to know when to put the tools down and call an expert. Attempting to fix severe damage yourself can make the problem much worse.
Not sure if it’s just transfer? Try the fingernail test: if your nail catches in the groove, it’s likely a deep scratch that needs professional attention.
Here are clear signs you need a pro:
* The Fingernail Test: If you can feel a groove with your fingernail, the scratch has gone through the clear coat.
* Exposed Metal or Primer: If you see grey, white, or silver-colored material at the bottom of the mark, the damage is too deep for polishing.
* Dents or Creases: If the body panel itself is dented, it will require professional bodywork.
* Extensive Damage: If the paint transfer covers a very large area (e.g., the entire side of the car), a professional can handle it more efficiently and effectively.
* You’re Not Confident: If you’re hesitant or worried about making things worse, the peace of mind that comes with hiring a professional detailer or body shop is well worth it.
A professional has tools like machine polishers and paint thickness gauges, and the experience to perform more advanced techniques like wet sanding for deeper paint correction.
For a hassle-free experience, consider picking up a complete kit with high-quality automotive polishing compounds and applicator pads, which can make all the difference in achieving a flawless finish.


FAQs About Removing Paint Transfer From a Car
Does WD-40 really remove paint transfer from a car?
Yes, WD-40 can be effective at removing paint transfer. It acts as a solvent that helps soften the foreign paint, allowing it to be wiped away more easily. However, it should be used with caution. Apply it to a microfiber cloth, not directly to the paint, wipe gently, and immediately wash the area with car soap and water to prevent any damage to the clear coat.
Will a Magic Eraser remove paint transfer from my car?
Yes, a Magic Eraser (melamine foam) will remove paint transfer because it acts like an extremely fine sandpaper. However, it will also dull your car’s clear coat, leaving a hazy, matte finish behind. If you use one, you absolutely must follow up with a polishing compound and then a polish to restore the gloss and shine to the affected area.
How do you remove paint from a car without damaging the original finish?
The safest way is to follow the “least abrasive method first” principle. Start by thoroughly washing the area. If that doesn’t work, use a well-lubricated clay bar or clay towel. If the transfer persists, move to a mild polishing compound. Always use clean microfiber towels and avoid excessive pressure to protect your car’s clear coat.
Can you use acetone to remove paint transfer on a car?
Acetone can remove paint transfer, but it is a very powerful solvent that can easily damage or strip your car’s clear coat. It should only be considered an absolute last resort for tiny, thin streaks and used with extreme caution. Always test it on an inconspicuous area first, apply it sparingly to a cloth, wipe for only a second, and wash it off immediately.
What is the best and safest product to remove paint transfer at home?
For most DIY situations, the best and safest products are dedicated automotive polishing compounds. Products like Meguiar’s Ultimate Compound or Turtle Wax Scratch Repair & Renew are specifically designed to be effective at removing surface blemishes like paint transfer by hand without being overly aggressive on the clear coat, making them ideal for home use.
Final Summary: Key Takeaways for a Perfect Finish
Removing paint transfer from your car is an incredibly satisfying DIY project that can save you time and money. By understanding the nature of the blemish and following a systematic, safety-first approach, you can achieve results that look like they came straight from a professional detailer’s shop. The key is to work patiently and methodically, respecting your car’s delicate clear coat finish.
Take these steps and confidently restore your car’s finish. Remember to start gentle, and you’ll be surprised at the professional results you can achieve!
- Assess First: Determine if it’s truly paint transfer on top of the clear coat or a deep scratch that cuts into it.
- Start Gentle: Always begin with the least abrasive method—washing and claying—before escalating to compounds or chemicals.
- Work Clean: Use clean microfiber towels, applicators, and a well-washed surface to prevent causing additional scratches.
- Polish and Protect: This final step is not optional. Always polish the area to restore gloss and apply a layer of wax or sealant to protect the repair.
- Know When to Stop: If the damage is deep, extensive, or you’re not confident, seeking professional help is the smartest move.
Last update on 2026-03-29 / Affiliate links / Images from Amazon Product Advertising API


![Dubai Luxury Cars: Ultimate Guide for Buying & Renting [year]](https://i0.wp.com/carxplorer.com/wp-content/uploads/2026/03/Dubai-Luxury-Cars-Ultimate-Guide-for-Buying-Renting-year-1.jpg?resize=60%2C60&ssl=1 "Dubai Luxury Cars: Ultimate Guide for Buying & Renting [year] 11")
![9 Old Luxury Cars: Cheap, Reliable & Built to Last [year]](https://i0.wp.com/carxplorer.com/wp-content/uploads/2026/03/9-Old-Luxury-Cars-Cheap-Reliable-Built-to-Last-year-1.jpg?resize=60%2C60&ssl=1 "9 Old Luxury Cars: Cheap, Reliable & Built to Last [year] 13")

![Luxury Cars White: 9 Elegant Designs & Top Models for [year]](https://i0.wp.com/carxplorer.com/wp-content/uploads/2026/03/Luxury-Cars-White-9-Elegant-Designs-Top-Models-for-year-1.jpg?resize=60%2C60&ssl=1 "Luxury Cars White: 9 Elegant Designs & Top Models for [year] 17")
![Blue Luxury Cars: 11 Stunning Models & Shades in [year]](https://i0.wp.com/carxplorer.com/wp-content/uploads/2026/03/Blue-Luxury-Cars-11-Stunning-Models-Shades-in-year-1.jpg?resize=60%2C60&ssl=1 "Blue Luxury Cars: 11 Stunning Models & Shades in [year] 19")