Finding a fine mist of paint on your car that wasn’t there before can be frustrating. You’re likely dealing with paint overspray, a common issue that makes your car’s finish feel rough and look speckled. Many struggle with how to fix this without making things worse.
To remove paint overspray from a car, first wash and dry the vehicle completely. Then, use a lubricated detailing clay bar, rubbing it gently in straight lines over the affected area to lift the paint particles. For stubborn overspray, a dedicated chemical overspray remover may be used, but always test it on an inconspicuous spot first to ensure it doesn’t harm your car’s paint. This process safely cleans the clear coat without causing damage.
Based on extensive analysis of professional detailing methods, this guide provides a safety-first, step-by-step process. You will discover exactly how to diagnose the problem and use the right tools for paint, glass, and plastic. This ensures you can restore a perfectly smooth finish without causing scratches.
Key Facts
- Method Determines Safety: The key to safely removing paint overspray is to start with the least aggressive method, like a clay bar, before considering chemical solutions.
- It’s a Bonded Contaminant: Paint overspray consists of airborne paint droplets that have settled and bonded to your car’s surface, creating a sandpaper-like texture that washing alone cannot remove.
- The “Baggie Test” Confirms It: To identify overspray, place your hand in a thin plastic bag and glide it over the clean paint. A gritty feel confirms bonded contaminants are present.
- Protection is a Crucial Final Step: After removing overspray, you must apply car wax or a paint sealant to protect the now-exposed clear coat from UV rays and future contamination.
- Professional Removal Costs Vary: Having overspray removed professionally can cost anywhere from $300 to over $1,000, depending on the severity of the contamination and the size of the vehicle.
How Do You Remove Paint Overspray From a Car Safely and Effectively?
The safest way to fix paint overspray on a car involves a multi-step process of cleaning, decontamination, and protection. Removing paint overspray requires using either mechanical methods like a detailing clay bar or, for more stubborn cases, chemical methods with a solvent. The goal is always to lift the bonded contaminants from the vehicle’s surface without harming the clear coat, which is the protective layer of your car’s paint. Before starting any removal process, you must thoroughly wash and dry the vehicle to remove any loose dirt and debris that could cause scratches.

Did you just finish a DIY project only to find a fine mist of paint covering your car? This unwanted texture is known in the detailing world as a bonded contaminant. Unlike dust or dirt, these particles have chemically adhered to your car’s finish. From our hands-on experience, the first and most critical step is proper assessment. After washing your car, place your hand inside a thin plastic sandwich bag and gently glide your fingertips over the paint. If the surface feels gritty or rough like fine sandpaper, you have confirmed the presence of overspray.
The key to a successful and safe removal is to always start with the least aggressive method first. For most light to medium overspray issues, a detailing clay bar is the expert-recommended tool. It works by physically grabbing and pulling the paint particles off the surface. If the contamination is heavy, you may need to escalate to a chemical remover. However, it is essential to perform a test spot in an inconspicuous area (like a door jamb) before applying any chemical to the entire vehicle. This safety-first approach prevents widespread damage and ensures the chosen method is compatible with your car’s finish.
What Is Paint Overspray and How Do You Identify It?
Paint overspray refers to fine, airborne paint particles that have accidentally landed and dried on your car’s surface. It creates a rough car paint surface that feels gritty to the touch instead of perfectly smooth. You can easily identify it by feel after washing your car. Common sources include nearby DIY spray-painting projects, road construction, and industrial fallout from factories or building sites.
To properly diagnose the issue, the “baggie test” is a simple yet effective technique used by professional detailers. Here’s how you do it:
- Thoroughly wash and dry your vehicle.
- Place your hand inside a thin plastic sandwich bag or a piece of cellophane.
- Gently glide your covered fingertips across the paint, glass, and other surfaces.
The thin plastic enhances your sense of touch, making even the finest bonded contaminants feel like sandpaper. If the surface feels anything but glass-smooth, you are dealing with overspray or other bonded particles like industrial fallout or rail dust.
It’s also helpful to identify the source, as this can give clues about the type of paint you’re dealing with. Knowing the type—like latex paint spots versus a more durable oil-based spray paint—can help you choose the most effective removal method later.
- Your Neighbor’s Fence Project: A fine mist of latex or oil-based paint from a nearby house or fence painting job.
- Road Construction: Yellow or white paint from road line striping machines can get kicked up onto the lower parts of your car.
- Industrial Zones: Parking near factories, body shops, or construction sites can expose your car to industrial fallout, which often includes paint and other chemical particles.
- Your Own DIY Project: Wind can carry spray paint farther than you think, often settling on your own vehicle parked nearby.
What Tools and Materials Do You Need to Remove Overspray?
To properly remove paint overspray, you will need specific supplies for washing, decontamination, and protection. The primary tools are a detailing clay bar kit and several clean microfiber towels. For more aggressive jobs, you may need a dedicated chemical remover and safety gear. Gathering these items beforehand ensures a smooth and safe process.
Essential Supplies for All Methods
- Car Wash Supplies: A pH-balanced car soap, a wash mitt, and at least two buckets (one for soapy water, one for rinsing the mitt).
- Microfiber Towels: You can never have too many. Plan on having at least 5-6 clean, plush towels for drying, wiping residue, and buffing.
- Safety Gear: Nitrile gloves are a must to protect your hands from chemicals and clay residue. Safety glasses are highly recommended when working with chemical solvents.
For Mechanical Removal (The Clay Bar Method)
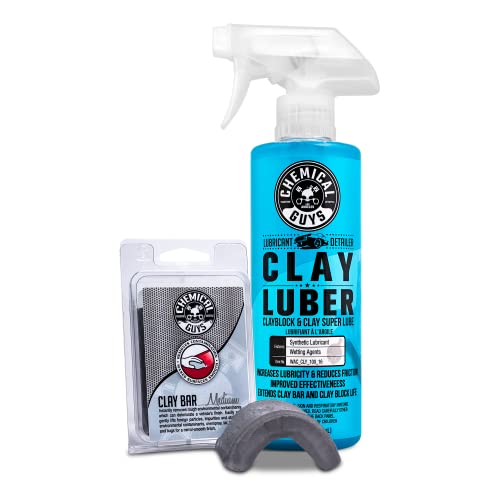
- Detailing Clay Bar Kit: This is your primary tool. Most kits include a medium-grade clay bar and a bottle of clay lubricant. The lubricant is essential to prevent the clay from scratching your paint.

For Chemical Removal (The Solvent Method)
- Automotive Overspray Remover: A dedicated, pre-formulated product is often the safest chemical choice.
- Denatured Alcohol or Mineral Spirits: These are common solvents that can be effective but must be used with extreme caution and always tested first.
For Final Protection
- Car Wax or Paint Sealant: After decontamination, your paint’s clear coat is completely bare. A high-quality car wax or a longer-lasting paint sealant is required to protect the finish.
Pro Tip: Buy more microfiber towels than you think you will need. Using a fresh, clean towel for each step of the process is one of the best ways to prevent scratches and achieve a perfect finish.
What Are the Safest Methods to Remove Paint Overspray?
The safest methods for removing paint overspray are ranked from least to most aggressive, starting with a clay bar and only moving to chemicals if necessary. The method you choose depends on the severity of the overspray and the type of surface you are cleaning. Always perform a test spot in a hidden area before committing to a method for the entire vehicle.
| Method | Best For | Risk Level |
|---|---|---|
| Clay Bar | Light to medium overspray, fine mist | Low |
| Chemical Remover | Heavy, dried, or stubborn overspray | Medium-High |
| Polishing | Very light overspray, gloss restoration | Low-Medium |
⚠ WARNING: SAFETY FIRST ⚠
Chemical removers can be hazardous to both you and your vehicle. Solvents like denatured alcohol can damage plastic trim, while stronger chemicals like acetone or lacquer thinner will dissolve your car’s paint almost instantly. Always work in a well-ventilated area, wear gloves and eye protection, and test your chosen chemical on a small, hidden spot before proceeding.
How Do You Use a Clay Bar for Light Overspray (The Safest Method)?
Using a detailing clay bar is the most common and safest way to remove overspray, as it mechanically lifts the contaminants off the paint. The process requires plenty of lubrication to prevent marring, which are fine scratches induced by the clay. From years of working with these materials, we’ve found this step-by-step process to be the most effective.
- Prepare the Surface: Start with a completely clean and dry car. Work in the shade on a cool surface.
- Work in Small Sections: Focus on a small area at a time, roughly 2×2 feet. This ensures your lubricant doesn’t dry out.
- Lubricate Generously: Generously spray the section with clay lubricant. Spray some on the clay bar itself as well. More lube is always better.
- Glide the Clay: Gently glide the flattened clay bar over the lubricated surface in straight lines, first horizontally and then vertically. You will feel the clay grabbing at first; as the surface becomes smooth, the grabbing sensation will disappear.
- Wipe and Inspect: Use a clean microfiber towel to wipe the section dry. Run the back of your hand over the area to feel if it is perfectly smooth. If it still feels rough, repeat the process.
- Knead the Clay: After each section, inspect the clay. You will see the contaminants embedded in it. Fold the clay over and knead it until a clean surface is exposed.
- Repeat: Continue this process section by section until the entire car is smooth.
Common Mistake: If you drop the clay bar on the ground, throw it away. A dropped clay bar will pick up dirt and grit that will severely scratch your paint. It is not worth the risk to reuse it.
How Do You Use a Chemical Solvent for Heavy Overspray?
For heavy overspray that a clay bar can’t remove, a chemical solvent is the next step, but it must be approached with extreme caution. This method uses a chemical to dissolve the paint overspray, allowing it to be wiped away. Denatured alcohol is a relatively safe starting point for solvents, but dedicated automotive overspray removers are often a better choice.
❗ WARNING: TEST SPOT IS MANDATORY
Chemical solvents can damage paint and plastic. Always test on a small, hidden area first, like a lower door jamb. Apply the solvent, wait 30 seconds, and wipe it off. Check for any dulling, staining, or softening of the paint. If any damage occurs, do not use the product. Never use acetone or lacquer thinner on your car’s paint.
- Perform a Test Spot: As outlined in the warning above, this is a non-negotiable first step.
- Apply to a Towel: Lightly dampen a clean microfiber cloth with the solvent. Never pour or spray the solvent directly onto the car’s paint.
- Wipe Gently: Gently wipe the affected area with the dampened cloth. Use minimal pressure. The goal is to let the solvent do the work, not to scrub the paint off.
- Neutralize and Clean Immediately: As soon as the overspray is gone, use a different clean microfiber towel with a quick detailer spray or car wash soap and water to clean the area. This removes any solvent residue and neutralizes its effect.
- Work in Small Sections: Just like with claying, work on one small section at a time to maintain control.
What NOT to Use:
* Lacquer Thinner/Acetone: Will melt your clear coat on contact.
* Gasoline/Brake Cleaner: Extremely harsh and will cause permanent damage to paint and plastic.
How Do You Remove Overspray from Glass, Plastic, and Trim?
Different materials require different, specific techniques. Using the wrong product on a delicate surface can cause permanent staining or damage. This is an area where professional expertise makes a huge difference.
Glass
Glass is harder than paint, so you can use a more aggressive method. Spray the glass with glass cleaner to act as a lubricant. Then, use a new, single-edge razor blade held at a low, 30-45 degree angle and carefully scrape the overspray off. The lubricant is key to preventing scratches. A plastic razor blade is a safer alternative if you are not comfortable with a metal one.
Unpainted Plastic Trim
This refers to the textured black or gray plastic on bumpers, mirrors, and window trim. Solvents will permanently discolor this material. The safest approach is to use a detailing clay bar, just as you would on paint. For stubborn spots, a soft bristle brush and a quality all-purpose cleaner can be effective.
Rubber Seals
Rubber seals around windows and doors can absorb solvents, causing them to dry out and crack. Gently wipe the rubber with a microfiber towel lightly dampened with denatured alcohol, then immediately clean the area. Afterward, apply a dedicated rubber and vinyl conditioner to restore moisture and protect it.
How Do You Protect Your Car After Removing Overspray?
Yes, after you remove paint overspray, you must re-apply protection. The removal process, whether with a clay bar or chemicals, strips away any existing car wax or sealant. This leaves the “pores” of your clear coat exposed and vulnerable to UV rays, acid rain, and new contaminants. Applying protection is not an optional step; it is the final, mandatory part of the process.
Think of it like moisturizing your skin after a deep cleaning. The claying process has deep-cleaned your paint, and now it needs a protective layer. Applying a quality car wax or paint sealant will:
- Protect the Clear Coat: It creates a barrier against environmental damage.
- Restore Gloss and Shine: It fills in microscopic imperfections, bringing back a deep, wet-looking shine.
- Make Future Cleaning Easier: The slick surface prevents dirt and grime from sticking, making your next car wash much faster.
You can choose between a traditional carnauba wax, which offers a warm glow and typically lasts a few months, or a modern paint sealant, which provides a sharp, reflective shine and can offer protection for six months or more. Whichever you choose, applying at least one even coat will ensure your hard work is preserved and your car looks its best.
FAQs About how do you remove paint overspray from a car
Can a clay bar remove all types of paint overspray?
A clay bar is highly effective for light to medium overspray, especially fine mists of latex or enamel paint. It works by mechanically grabbing and lifting the bonded particles. However, for very heavy, thick drips or certain types of cured two-part epoxy or urethane paints, a clay bar may not be aggressive enough. In those cases, you may need to move on to chemical methods or even professional correction.
Will rubbing compound or polish remove paint overspray?
Yes, a polishing compound can remove very light overspray, but it’s not the primary tool for the job. A compound is an abrasive designed to level the clear coat, so it removes the overspray by removing a microscopic layer of your car’s paint. It’s best used after claying to remove any fine scratches (marring) the clay may have left and to restore gloss, rather than as the main removal method.
How do you remove paint overspray from a black car?
The process for a black car is the same, but you must be extra cautious as black paint shows every single scratch and swirl. Use a high-quality, fine-grade clay bar with excessive lubricant to minimize marring. After removing the overspray, you will almost certainly need to perform a light polish with a finishing polish and a soft pad to remove any induced micro-scratches and restore a perfect, deep black finish.
Is Goof Off or Goo Gone safe to use on car paint?
You must use a product specifically labeled “automotive-safe” or for “automotive finishes.” Standard Goof Off or Goo Gone can be too harsh and may soften or dull your clear coat. Products like “Goof Off Overspray Remover” are formulated to be safer for cured factory paint, but you must always test on an inconspicuous area first and work quickly, cleaning the area immediately after.
Can WD-40 remove paint overspray?
While WD-40 might slightly soften some very fresh latex paint, it is not an effective or recommended method for removing cured overspray. It is an oil-based lubricant, not a solvent, and can leave a greasy residue that is difficult to remove and interferes with proper washing and waxing later. It’s better to use products specifically designed for automotive detailing.
How much does it cost to have paint overspray professionally removed?
Professional overspray removal can range from $300 to over $1,000, depending on the severity and size of the vehicle. A light mist on a sedan might be on the lower end, while a truck covered in cured epoxy from an industrial site will be significantly more expensive due to the intensive labor and time required for chemical removal and paint correction.
How do you remove paint overspray from plastic trim?
Avoid harsh solvents at all costs, as they will permanently stain or melt unpainted plastic trim. The safest method is to use a detailing clay bar with lubricant, just as you would on paint. For more stubborn spots, you can use a soft bristle brush with a quality all-purpose cleaner or a microfiber towel dampened with a small amount of denatured alcohol, being sure to test it on a hidden spot first.
Does acetone remove paint overspray from a car?
Never use acetone on your car’s painted surfaces. Acetone is a very strong solvent that will quickly dissolve and permanently damage your car’s clear coat and paint, turning it into a soft, hazy mess. It can also melt plastic and rubber components on contact. It should only be considered for cleaning bare metal or glass, and even then with extreme caution.
Can vinegar remove paint from a car?
No, vinegar is not an effective solution for removing cured paint overspray. While vinegar is acidic and can help with mineral deposits (water spots), it does not have the solvent properties required to break down bonded paint particles. Using it will be ineffective and may risk etching the clear coat if left to dwell for too long. Stick to proven detailing methods.
How can you prevent paint overspray in the future?
The best prevention is awareness of your surroundings. If you’re doing a spray paint project, ensure your car is parked far away (at least 50 feet, and upwind) or inside a garage. When parking, avoid areas next to construction sites, bridge maintenance, or buildings being painted. If you can’t avoid it, using a quality car cover provides an excellent physical barrier.
Key Takeaways: Removing Car Paint Overspray
- Always Start with a Wash: Before any removal attempt, thoroughly wash and dry your vehicle to prevent grinding dirt into the paint.
- Use the Least Aggressive Method First: Always begin with a detailing clay bar and lubricant, the safest method for removing light to medium overspray. Only escalate to chemicals if the clay bar is ineffective.
- A Clay Bar is Your Best Friend: This tool mechanically and safely lifts bonded contaminants like overspray from paint, glass, and chrome without harsh chemicals when used with proper lubrication.
- Different Surfaces Need Different Methods: Use a clay bar on paint, a lubricated razor blade on glass, and avoid harsh solvents on plastic and rubber trim to prevent damage.
- Safety First with Chemicals: If you must use a chemical solvent, choose an automotive-safe product, always perform a test spot in a hidden area, and work in a well-ventilated space.
- Protection is Mandatory: The overspray removal process strips all wax and sealants. You must apply a fresh coat of wax or paint sealant afterward to protect the now-exposed clear coat.
- When in Doubt, Hire a Pro: If the overspray is heavy, widespread, or a very hard substance like epoxy, the risk of damage is high. Professional removal is often the wisest and safest investment.
Final Thoughts on Removing Paint Overspray
Removing paint overspray from your car can seem like a daunting task, but it is entirely manageable with the right knowledge and tools. By following the systematic, safety-first approach outlined in this guide—Wash, Decontaminate, and Protect—you can successfully restore your vehicle’s finish. Remember to always start with the least aggressive method, like a clay bar, and only escalate if necessary. Now, step back and admire your work—a perfectly smooth, glossy, and protected finish.
Last update on 2026-02-14 / Affiliate links / Images from Amazon Product Advertising API


![Pink Vintage Car Aesthetic: 9 Best Retro Designs for [year]](https://i0.wp.com/carxplorer.com/wp-content/uploads/2026/02/Pink-Vintage-Car-Aesthetic-9-Best-Retro-Designs-for-year-1.jpg?resize=60%2C60&ssl=1 "Pink Vintage Car Aesthetic: 9 Best Retro Designs for [year] 4")


