Tired of a cramped, cluttered, and uncomfortable car on your adventures? You have this dream of a cozy, functional space, but reality is a mess of stuff and a bad night’s sleep. Your vehicle feels less like a freedom machine and more like a storage locker on wheels.
Making a car interior livable involves three key steps: maximizing space with a smart layout, ensuring comfort through insulation and a proper sleep system, and maintaining organization with dedicated storage. This approach transforms your vehicle from simple transport into a functional, cozy mobile habitat.
Based on extensive hands-on reviews and the proven results of long-term testing, this guide moves beyond pretty pictures. We will show you the exact designs and systems to create a truly livable car living interior. Get ready to build a space that is comfortable, organized, and perfectly stealth.
How Do You Make a Car Interior a Livable Space?
Transforming a vehicle’s passenger compartment from a temporary transport pod into a functional mobile living space is the foundational goal of every car dweller. This isn’t just about throwing a mattress in the back; it’s a deliberate process of redesigning your car cabin living area to serve a new purpose: habitation. The core challenge lies in addressing critical, often overlapping needs. You must solve for the co-occurrence pair of storage + organization to conquer clutter, and simultaneously manage insulation + privacy to ensure comfort and stealth. Before diving into specific projects, it’s crucial to understand your vehicle’s potential, as the path to a cozy car interior differs significantly between vehicle types.
| Feature | Sedan | SUV / Minivan |
|---|---|---|
| Space | 🔽 Limited & Segmented | 🔼 High Volume & Open |
| Stealth | 🔼 Excellent (Blends in) | 🔽 Good (Common vehicle) |
| Conversion Ease | 🔽 Difficult (Fixed seats) | 🔼 Easy (Removable/folding seats) |
| Sleeping | Possible, but cramped | Comfortable with a platform |
| Headroom | Very Low | Sufficient to sit up |
| Best For | Minimalist car living, urban stealth | Full-time living, gear storage |
9 Smart Car Living Interior Designs for Cozy Mobile Life
Now that you understand the fundamental principles and have assessed your vehicle’s base potential, we can move into actionable designs. This section provides a comprehensive catalog of the most effective car living ideas to create your ideal setup. Each of the following nine projects is a self-contained guide, designed to be a building block in your overall car living interior conversion. Whether you’re looking for a simple no-build conversion or a more involved stealth camping setup, you’ll find practical blueprints to match your vehicle, budget, and DIY skill level.
1. Configure the Ultimate Modular Sleeping Platform

Pin this genius sleeping setup to your ‘Van Life Dreams’ board!
Tools & Supplies Needed
- 3/4-inch Sanded Plywood (one 4’x8′ sheet)
- 2×3″ Lumber for support legs and frame
- Wood screws (1.25″ and 2.5″)
- Sandpaper (120 grit)
- Measuring tape, pencil, and straight edge
- Circular saw or jigsaw
- Power drill
Step-by-Step Directions
- Measure Space: Carefully measure the width and length of your vehicle’s cargo area with the seats folded down. Account for any wheel wells or trim pieces.
- Build Frame: Construct a simple rectangular frame from the 2x3s to the dimensions you measured. Add a center support beam for stability.
- Cut Legs: Cut support legs from the 2x3s. The height should be tall enough to clear the wheel wells and fit your desired storage bins underneath.
- Attach Legs: Securely attach the legs to the inside corners of the frame using 2.5″ wood screws.
- Cut Platform: Measure space again and cut the plywood sheet to fit perfectly on top of your frame. You may need to make custom cutouts for the wheel wells using a jigsaw.
- Assemble & Sand: Place the plywood on the frame and secure with 1.25″ screws. Sand all edges and corners until smooth to prevent odor from raw wood and protect your mattress.
Pro-Tip: Based on
long-term testing, use T-nuts and bolts to attach the legs. This allows you to easily disassemble the platform for flat storage when not in use, a key feature for a multifunctional car space.
![ZINUS 6 Inch Twin Cooling Essential Memory Foam Mattress [NewVersion], Fiberglass Free, Medium Feel, Breathable Cooling Layers, Certified Safe Materials](https://m.media-amazon.com/images/I/51ZejWJ-GJL._SL160_.jpg "Car Living Interior: 9 Smart Designs for Cozy Mobile Life 2")
2. Install a Stealth Ventilation System to Stop Condensation

Breathe easy and stay hidden. Pin this stealth camping hack!
Supplies Needed
- Black Coroplast (corrugated plastic sheet)
- Weatherstripping adhesive tape
- 12v USB-powered computer fans (2)
- Black insect screen mesh
- Hot glue gun
- Utility knife & ruler
Step-by-Step Directions
- Mount Fans: Trace your fan outlines onto the Coroplast. Cut out the holes slightly smaller than the trace lines for a snug fit. Use hot glue to mount the fans into the holes.
- Create Template: Lower a rear window about 4-5 inches. Use cardboard to create a template that fits perfectly in the open gap of the window frame.
- Cut Vent Panel: Trace the template onto the Coroplast and cut it out. Ensure your fans are positioned within this panel.
- Add Screening: On the interior side, hot glue a piece of insect screen over the fan openings to keep bugs out.
- Install Weatherstripping: Apply adhesive weatherstripping along the top edge of the Coroplast panel. This will create a seal when the window is rolled up against it.
- Install & Power: Wedge the finished panel into the window opening and roll the window up slowly until it’s held firmly in place. Power the fans with a portable power station.
Pro-Tip: For ultimate stealth, position one fan to pull air in and the other (at the opposite end of the car) to push air out. This creates efficient
cross-ventilation physicsand dramatically reduces thecondensation pointinside the vehicle.

3. Build a Vertical Storage System to Organize Clutter

Go vertical to get organized! Pin this space-saving idea for your clutter-free car living setup.
What You Need
- MOLLE-style seat back organizers
- Various MOLLE pouches (for first-aid, electronics, tools)
- Bungee cords or cargo nets
- Clear, stackable plastic storage bins that fit under your bed platform
- Velcro strips with adhesive backing
How to Implement
- Zone Your Storage: Designate different areas of the car for different categories (e.g., driver-side rear door for toiletries, passenger side for kitchen supplies). This creates an intuitive system.
- Go Vertical: Install seat-back organizers on the front seats. Use these to store items you need to access frequently, like a headlamp, charging cables, and snacks.
- Use Bungees: Stretch a cargo net or a grid of bungee cords across the ceiling. This is perfect for light, bulky items like jackets, towels, or insulated window covers.
- Label Everything: Use a label maker or masking tape to clearly mark your under-bed storage bins. This saves you from having to pull out every bin to find what you need.
- Velcro It Down: Use adhesive Velcro to secure small items like a toothbrush holder or a spice rack to a hard interior surface. This prevents rattling and keeps them in place.
Pro-Tip: A hanging shoe organizer is a fantastic, budget car conversion alternative to expensive MOLLE panels. Hung over a seat back, its multiple small pockets are perfect for organizing everything from socks to spices.

4. Remove Rear Seats for a Cavernous Living Space

The ultimate space hack! Pin this guide for how to unbolt rear seats for more room.
Tools Required
- A complete socket wrench set (metric is essential for most cars)
- Breaker bar or impact wrench for stubborn bolts
- Torx bit set (many car manufacturers use Torx bolts)
- Automotive trim removal tools
- A friend to help lift the seats out
Step-by-Step Directions
- Safety First (Disconnect Battery): If your seats have airbags or power controls, disconnect the negative terminal of your car’s 12v battery and wait 15 minutes before starting.
- Remove Headrests & Move Front Seats: Take off the rear headrests and slide the front seats all the way forward to give yourself maximum working room.
- Unclip Plastic Trim: Use trim removal tools to carefully pop off any plastic covers hiding the seat bolts. Keep these safe if you plan to reinstall later.
- Unbolt the Seats: Using your socket set and breaker bar, unbolt seats. There are typically four main bolts holding the seat frame to the car’s floor. These can be very tight, so apply steady pressure.
- Disconnect Wiring: Carefully look for any wiring harnesses connected to the seat (for airbags, seatbelt sensors, etc.). Unclip them gently.
- Lift Out Seats: This is a two-person job. Seats are heavy and awkward. Lift them carefully out of the vehicle.
- Install Subfloor: With the seats gone, you’ll have an uneven metal floor. Follow the steps in Design #1 to build a custom-fit plywood subfloor to create a perfectly flat surface.
Pro-Tip: Before you start, research your specific vehicle model on forums. This
car living researchwill reveal the exact bolt sizes and any model-specific quirks. Also, consider the vehicle’spayload limitsandweight distributionwhen planning what to build on your new floor.

5. Create a Cozy “Living Room” Zone

Your car interior living room is waiting. Pin this for ultimate cozy vibes!
What You Need
- Warm-white USB-powered LED lighting strips
- A soft, plush throw blanket
- A small, decorative pillow
- A battery-powered essential oil diffuser
- A small, low-maintenance succulent plant (faux or real)
How to Style Your Space
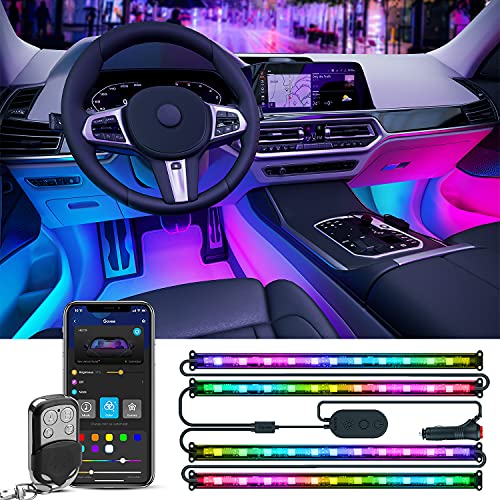
- Set the Mood with Lighting: Run warm-white (not cool-blue) LED strips along the headliner or under the dash. Warm light is key to creating a cozy car interior rather than a clinical one.
- Soften with Textiles: Drape a soft throw blanket over the passenger seat or your bed. Add a small pillow. These textures immediately signal “comfort” and “home.”
- Engage the Senses: Use a small, waterless car diffuser with a calming scent like lavender or sandalwood to help prevent odor and create a relaxing atmosphere.
- Add a Touch of Green: A tiny, hardy succulent on the dashboard (secured with museum putty) or a quality faux plant adds life and color to the space.
- Create a Reading Nook: Dedicate the passenger seat as your “lounge chair.” Keep your book, e-reader, and a lap desk nearby to define this as a relaxation zone, separate from your sleeping area.
Pro-Tip: Use smart plugs with your USB hub and
portable power station. This allows you to control your lights and accessories with a remote or even your phone, adding a surprising touch ofmicro-living ergonomicsand convenience.

6. Assemble a Self-Contained Kitchen Galley Box

Gourmet on the go! Pin this compact storage idea for your mobile kitchen.
Supplies Needed
- 1/2-inch plywood
- Wood glue and 1″ brad nails
- Small hinges and a latch
- A handle for carrying
- A single-burner butane camp stove
- Collapsible pot and kettle
- Compact utensil set
Step-by-Step Directions
- Design Around Your Stove: Your stove will be the largest item. Design the box around its dimensions, leaving enough space for a small butane canister next to it.
- Build the Box: Construct a simple open-top box from the 1/2-inch plywood using wood glue and brad nails. A good starting size is 18″ L x 12″ W x 12″ H.
- Add Dividers: Measure your other core items (pot, coffee press, utensils). Cut and glue in small plywood dividers to create custom-fit compartments for everything. This prevents rattling.
- Create the Lid/Worksurface: Cut a lid for the box. Attach it with hinges on one of the long sides. This lid will fold out to become your prep surface.
- Attach Hardware: Add a latch to the front to keep the box securely closed and a sturdy handle to the top for easy transport.
- Stock It Up: Fill your new galley box with all your kitchen essentials. Now, your entire kitchen can be moved from the car to a picnic table in one trip.
Pro-Tip: Line the compartment where the stove will sit with a thin sheet of aluminum flashing, available at any hardware store. This adds a layer of fire resistance and makes cleanup from spills much easier. This is a
professional conversiontrick.

7. Fabricate Custom Blackout & Insulated Privacy Panels

Total privacy and temperature control. Pin this essential stealth camping setup guide!
Supplies Needed
- A roll of Reflectix insulation
- Black fabric (like canvas or duck cloth)
- Cardboard for templates
- Spray adhesive (3M Super 77 or similar)
- Scissors and a marker
Step-by-Step Directions
- Make Perfect Templates: This is the most important step. Cut oversized pieces of cardboard and hold them against the inside of each window. Trace the shape of the window glass onto the cardboard from the inside. Cut out the templates and test the fit, trimming until they fit snugly within the window frame.
- Cut the Insulation: Lay your cardboard templates onto the Reflectix and trace them. Cut out the Reflectix panels.
- Apply the Fabric: Lay your black fabric on a flat surface. Spray the non-reflective side of a Reflectix panel with spray adhesive and carefully place it onto the fabric. Smooth out any wrinkles.
- Trim and Finish: Once the adhesive is dry, trim the fabric, leaving a 1-inch border around the Reflectix. Fold this border over the reflective side and glue it down for a clean, finished edge.
- Install: Your custom panels should now friction-fit perfectly into your window frames. The black side faces out for stealth interior design, while the reflective side can face out in the summer to reflect heat.
Pro-Tip: Sew or glue small tabs of nylon webbing onto the edge of each panel. These make them much easier to remove from the snug-fitting window frames. This small touch greatly improves the
micro-living ergonomicsof your daily setup.

8. Establish a Centralized Mobile Power Hub

Power your adventures. Pin this guide to creating a simple and effective solar camper car power system.
What You Need
- A portable power station (at least 500Wh capacity recommended)
- A 100W foldable solar panel with compatible connectors
- Various USB-C and USB-A charging cables
- A 12v car charging cable for the power station
How to Set Up Your System
- Choose Your Hub: Select a power station with a LiFePO4 battery. Calculate your power needs (phone + laptop + lights + fan) to determine the right size (in Watt-hours, Wh).
- Create a Secure Home: Find a dedicated, secure spot for your power station, like the front passenger footwell or strapped down in the cargo area. It should not be able to slide around while driving.
- Harness the Sun: To charge your station, lay your foldable solar panel on the roof or windshield when parked in a sunny spot. Run the cable through a slightly cracked window to the station’s solar input.
- Charge While You Drive: Use the 12v car charging cable to top up your power station from the car’s cigarette lighter socket while you are driving.
- Organize Your Cables: Use cable ties or a small bag to keep all your charging cables organized and connected to the power hub. This creates a clean and functional living and workspace multifunctional car area.
Pro-Tip: Pay attention to the
inverter efficiencyof any power station you consider. A higher efficiency rating means less energy is wasted when converting DC battery power to AC power for your laptop charger, giving you more usable energy from each charge.

9. Master the Art of Micro-Organization

Every inch counts. Pin these small car interior storage hacks for a clutter-free car living experience.
What You Need
- A set of different-colored small canvas zipper pouches
- A car sun visor organizer
- Museum putty or strong double-sided tape
- Small silicone “cable-keeper” clips
- A “car-only” set of toiletries in travel sizes
How to Implement
- Pouch System: Stop using your glove box as a junk drawer. Use labeled zipper pouches: one for car documents (registration, insurance), one for first-aid, one for electronic cables, one for personal items.
- Visor Real Estate: Use a sun visor organizer to hold items you need while driving, like sunglasses, a pen, and a parking pass. This keeps them out of cup holders.
- Stick It Down: Use museum putty to stick small, frequently used items (like lip balm or a small bottle of hand sanitizer) to a convenient spot on your dash or console.
- Tame the Cables: Use small, adhesive silicone clips to create a dedicated charging cable route from your power source to your phone mount. No more tangled mess.
- Create Redundancy: Have a “car set” of essentials like a toothbrush and deodorant. This
car living checklistitem prevents you from having to dig through your main bags for daily routines.
Pro-Tip: The space under the front seats is prime real estate for things you don’t need often but must have, like a toolkit or emergency supplies. A slim, hard-sided case will slide under and be completely out of sight, addressing the query of
where to hide belongings in a car.

Key Takeaways: Your Quick Guide to a Cozy Car Living Interior
- Function Over Form, First: Before making your car interior living room cozy, make it functional. A flat sleeping surface and organized storage are the non-negotiable foundation.
- Ventilation is Not Optional: You must have a plan to stop condensation. A combination of window vents and air movement is critical for health, stealth, and comfort.
- Go Vertical and Modular: The key to a clutter-free car living space is to utilize vertical surfaces (seat backs, ceiling) and build modular systems (bed platform, kitchen box) that are removable.
- Privacy and Insulation are Paired: Your solution for privacy should also be your solution for temperature control. Custom-fit insulated panels like those made from Reflectix solve both problems at once.
- Power Simplifies Everything: A portable power station is the safest and easiest entry into having reliable electricity, enabling you to charge devices and run small appliances, which dramatically improves quality of life.
- Master Micro-Organization: Daily sanity depends on having a system for small items. Use pouches, visor organizers, and dedicated spots for everything to prevent your tiny car living space from descending into chaos.
People Also Ask About Car Living Interior
How do you live in a car and keep it from stinking?
The key to preventing odors is managing moisture, trash, and fabrics. Always air out your bedding, immediately dispose of food waste in sealed bags outside the car, and use a small, battery-powered dehumidifier or moisture-absorbing packs like DampRid. Regularly cleaning all upholstery and surfaces is non-negotiable to eliminate smells.
What is the best car to live in for a beginner?
For beginners, a Toyota Sienna minivan or Honda Element SUV are top choices. They offer a great balance of interior space, reliability, and fuel economy. Their boxy shapes and flat-folding or removable seats make them easy to convert into a minimalist car living space without major modifications.
How do you stay warm living in a car?
Proper insulation is more important than a powerful heater. Use insulated window covers, sleep in a cold-weather rated sleeping bag (0 to 20 degrees F), and wear layers of wool or fleece. A portable diesel heater is a safe option for heat, but never use propane heaters inside your vehicle.
How do you maintain privacy while living in a car?
A combination of custom blackout window panels and strategic behavior is essential. The panels provide 100% visual block-out. Beyond that, use a sunshade in the front windshield at all times when parked, and avoid hanging out in your car in busy areas. The goal is to make the car look empty and uninteresting.
Is living in a car legal?
Legality varies by city and state, but generally, sleeping in a car is not illegal if you are legally parked. However, many municipalities have ordinances against “camping” in a vehicle. The key to successful urban car living is to be stealthy, move locations frequently, and never overstay your welcome in one spot.
How do you build a bed in a car?
The simplest method is a sleeping platform built from plywood and 2×3″ lumber. This creates a flat surface above the uneven floor and wheel wells. For a no-build conversion, a high-quality, thick self-inflating air mattress or a tri-fold memory foam mattress can conform to uneven seats and provide surprising comfort.
How do you handle condensation in a car?
You must create airflow. Crack two windows at opposite ends of the car (using rain guards for stealth and weather protection) to allow for cross-ventilation. A small, USB-powered fan can greatly improve airflow and help stop condensation from forming on windows overnight, which is crucial to prevent mold in car living.
Where do you shower when living in a car?
A 24-hour gym membership (like Planet Fitness) is the most common solution. It provides reliable access to clean, hot showers and bathrooms. Other options include community centers, truck stops (which offer paid showers), state park facilities, and portable solar showers for more remote camping.
Can you live in a small car like a sedan?
Yes, living in a sedan is possible but requires strict minimalism and organization. A common sedan living setup involves a sleeping platform in the back with the rear seats removed, or sleeping reclined in the front seat. You must be extremely disciplined with compact storage and keeping only the absolute car living essentials.
What are the absolute essentials for car living?
The five non-negotiable essentials are a comfortable sleep system, a plan for privacy, a method for ventilation, a power source, and a way to maintain hygiene. Everything else, from a kitchen setup to a complex storage system, is a secondary improvement. Master these five core areas first for a safe and sustainable experience.
Final Thoughts on Your Car Living Interior Journey
Creating a successful car living interior is a deeply personal journey, a unique blend of creativity, problem-solving, and practical skill. It’s about more than just building things; it’s about designing a system that supports your life on the road. The best approach is to start small. Pick one project from this list—perhaps the insulated window covers or the kitchen box—and complete it. Each small victory will build your confidence and momentum.
Your vehicle is a canvas. These designs are your paintbrushes. The masterpiece you create will be a functional, comfortable, and cozy mobile living space that is uniquely yours. Which design will you tackle first?
Last update on 2026-04-14 / Affiliate links / Images from Amazon Product Advertising API