So you want to fine-tune your car’s stance or ride quality, but you’re facing the big question: can you adjust coilovers while they are on the car? It’s a common point of confusion, with some insisting on full removal while others make tweaks right in the driveway, leaving you wondering about the best and safest approach.
Yes, you can adjust coilovers for ride height and damping while they are on the car, but expert advice from sources like Fitment Industries often suggests removing them for major ride height changes to ensure safety and proper technique is used.
This guide cuts through the noise. Leveraging extensive analysis of established best practices and manufacturer guidelines, we will unpack the proven methods for on-car adjustments. We’ll cover which modifications are safe to do with the wheels on, which require more care, and the critical safety steps you must not ignore to do the job right.
Key Facts
- On-Car Feasibility is High for Minor Adjustments: Data from multiple automotive sources confirms that adjusting damping and making minor ride height changes are commonly and effectively performed while coilovers remain installed on the vehicle.
- Alignment is Non-Negotiable: Any change to your vehicle’s ride height directly impacts suspension geometry, specifically camber and toe. It is a universal recommendation to get a professional alignment after you have finalized your height settings.
- Suspension Settling is Real: After installation or significant adjustment, new coilovers require a settling period. Expect the ride height to drop by 5-10mm over a day or two of driving as the springs find their final position.
- Anti-Seize is Your Best Friend: Experts consistently highlight that applying anti-seize lubricant to the threaded bodies of coilovers is crucial for preventing corrosion and ensuring adjustments are easy to make in the future.
- Safety First, Always: Working on suspension components requires that the vehicle’s weight is off the suspension. It is unsafe to attempt adjustments while the components are under load; the car must be securely supported on jack stands.
The Definitive Answer: Adjusting Coilovers While on the Car
You’ve got the coilovers, and now you want to dial them in perfectly. The good news is, you absolutely can make many key adjustments without the hassle of a full removal. However, the best method often depends on the type of adjustment you’re making. The consensus from authoritative sources like Raceland and Fitment Industries is that while on-car adjustments are possible and common, the ‘best practice’ method for major height changes often involves removal for easier and safer execution.

Here’s a clear breakdown of what you can typically do with the coilovers installed versus what might be better handled off the car.
| Adjustment Type | Feasible On-Car? | Recommended Method |
|---|---|---|
| Ride Height | Yes (with caveats) | On-car for minor tweaks; Off-car for major changes |
| Damping | Yes | Almost always done on-car |
| Camber | Yes (can be difficult) | On-car, but access can be limited |
| Preload | Yes | On-car, but requires careful procedure |
Before we dive in, let’s quickly define these terms. Damping refers to the stiffness of your suspension—how it controls bouncing. Camber is the inward or outward tilt of the top of your wheel. Preload is the amount of compression on the spring before any vehicle weight is applied.
So, which adjustments can you tackle in your driveway, and which ones might be worth the extra effort of removal? Let’s break it down.
How to Adjust Coilover Ride Height On the Car
Adjust ride height by unlocking the locking collars and turning the spring perch (partially threaded) or the lower spindle mount (fully threaded) using the supplied adjustment wrenches. This is the most common reason people want to know if you can adjust coilovers while they are on the car. The process differs slightly depending on whether you have partially threaded or fully threaded coilovers.
Pro Tip: Before you start, measure your current ride height from the center of the wheel hub to the fender on all four corners. This gives you a crucial baseline.
No matter the type, the first steps are always about safety: ensure your car is on a level surface, securely jacked up, and supported by jack stands. Never work on a car supported only by a jack.
Adjusting Partially Threaded Coilovers
This is the most common design. Ride height is adjusted by moving the spring perch—the platform the spring sits on—up or down the shock body. This action changes both the height and the spring preload simultaneously.
Unlock the bottom collar, then turn the top collar to raise or lower the spring perch, which sets the ride height.
Here is the step-by-step process:
- Clean the Threads: Use a wire brush and some penetrating lubricant to clean any dirt or rust off the coilover threads. This makes adjustment infinitely easier.
- Loosen the Lower Locking Collar: Identify the two collars locked together just below the spring. Using your adjustment wrench, loosen the lower collar, which we’ll call Collar B. You’ll likely need to turn it clockwise (downward) to break it free from the top collar.
- Adjust the Spring Perch Collar: Now that the lock is free, use your wrench on the top collar, Collar A. This collar is also the spring perch.
- To lower the car, turn Collar A clockwise. This moves the spring perch down.
- To raise the car, turn Collar A counter-clockwise. This moves the spring perch up.
- Lock the Collars: Once you’ve reached your desired height, turn Collar B counter-clockwise until it is tight against Collar A. Use your wrenches to firmly lock them together to prevent any movement.
- Repeat and Measure: Repeat the process on the other side, making sure to turn the collars the same number of rotations to keep the height even. Lower the car and measure your results.
Quick Fact: Turning the spring perch changes both ride height and how much the spring is compressed at rest, which is a key difference from fully threaded designs.
Adjusting Fully Threaded Coilovers
Fully threaded coilovers, sometimes called “true” coilovers, are fantastic because they allow for independent ride height adjustment. This means you can change the car’s height without altering the spring preload or the shock’s travel distance, which is a significant performance advantage.
Loosen the bottom-most collar (Collar C) and rotate the lower mount to lengthen or shorten the entire coilover assembly.
Here’s how it’s done:
- Clean the Lower Threads: Just like with the other type, clean the threads on the very bottom of the coilover body thoroughly.
- Loosen the Lower Locking Collar: Find the lowest locking collar on the assembly, which we’ll call Collar C. It secures the lower spindle mount (the part that bolts to your suspension knuckle) to the threaded shock body. Use your wrench to loosen Collar C.
- Adjust the Lower Mount: With Collar C loose, you can now rotate the entire lower spindle mount.
- To lower the car, spin the mount clockwise, which effectively threads it further up the shock body and shortens the coilover’s overall length.
- To raise the car, spin the mount counter-clockwise, which threads it down and lengthens the entire assembly.
- Lock it Down: After setting your height, tighten Collar C firmly against the lower spindle mount to lock it in place.
- Measure and Match: Ensure you make the same adjustments side-to-side and check your measurements after lowering the vehicle.

This method is preferred by many enthusiasts because it maintains the intended suspension geometry and performance characteristics regardless of the ride height you choose.
Adjusting Damping & Camber: Quick On-Car Modifications
Damping is easily adjusted on-car via a knob for ride stiffness. Camber is also adjusted on-car by loosening top mount bolts, though access can sometimes be challenging. Beyond ride height, two other crucial settings, damping and camber, are frequently adjusted while the coilovers are on the car.
Safety Warning: While camber can be adjusted on the car, the bolts are often under load. Always ensure the vehicle is securely supported and be cautious when loosening critical suspension components.
Damping Adjustment (Ride Stiffness)
Damping controls how your suspension absorbs bumps and manages body roll. This is almost always adjusted while the coilover is on the car and is one of the easiest modifications to make.
- Locate the Knob: Find the adjustment knob, which is typically on the top of the coilover shaft (accessible from the engine bay or trunk) or sometimes at the bottom of the shock body.
- Adjust for Feel:
- Turn the knob counter-clockwise (often marked “S” or “Soft”) to make the ride softer. This is better for daily driving comfort.
- Turn the knob clockwise (often marked “H” or “Hard”) to make the ride stiffer. This reduces body roll and is better for performance or track driving.
- Count the Clicks: Most coilovers have a set number of clicks (e.g., 16-way, 32-way). Always count the clicks and set both sides of the car (front or rear) to the same setting to ensure balanced handling.
Camber Adjustment (Wheel Tilt)
Camber is the vertical tilt of your wheels. Many aftermarket coilovers come with adjustable top mounts (camber plates) that allow you to change this angle.
- Locate the Bolts: With the car safely supported, look at the top mount of the coilover in the engine bay or strut tower. You will typically see several Allen head bolts.
- Loosen the Bolts: Slightly loosen these Allen bolts. You don’t need to remove them, just loosen them enough so the top of the coilover can slide.
- Slide to Adjust:
- Slide the top of the coilover inward (towards the engine) for more negative camber, which improves cornering grip.
- Slide the top of the coilover outward (towards the fender) for more positive camber (or less negative camber).
- Tighten and Align: Once set, tighten the bolts to the manufacturer’s torque specs. Remember, any camber adjustment absolutely requires a professional alignment afterward.
Essential Safety & Best Practices for Any Adjustment (2026 Update)
Knowing how you can adjust coilovers while they are on the car is only half the battle. Doing it safely and effectively is what truly matters. Following these expert-recommended procedures will prevent damage to your parts and, more importantly, keep you safe.
Pro Tip: Applying a quality anti-seize lubricant to the threads isn’t just a good idea—it’s the difference between a 15-minute adjustment and a weekend-long nightmare next season.
- Safety First: Always work on a level surface. Use a proper jack to lift the vehicle and immediately secure it on high-quality jack stands. Never, ever work under a car supported only by a jack. Taking the load off the suspension is critical for safety and makes adjustments much easier.
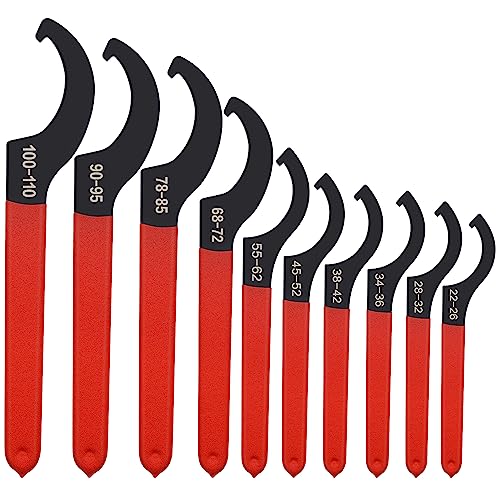
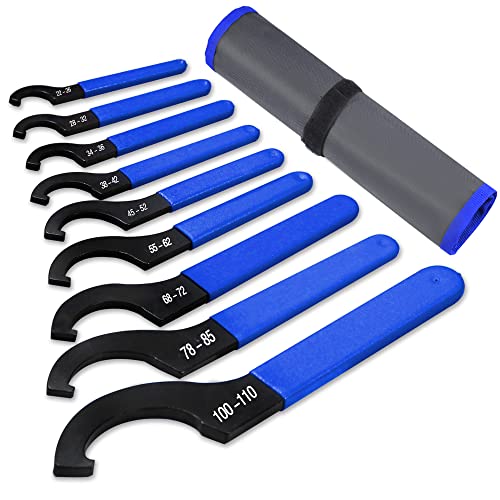
- Use the Right Tools: Those thin, oddly shaped wrenches that came with your coilovers are called spanner wrenches. Use them. Attempting to use a screwdriver and hammer or adjustable pliers will chew up the soft aluminum collars and cause permanent damage.
- Clean Everything: Before you try to loosen a single collar, spray the threads with a penetrating lubricant and use a wire brush to clean out all dirt, grime, and road salt. Caked-on debris is the number one cause of seized and damaged collars.
- Apply Anti-Seize: After cleaning and before making your final adjustments, apply a generous coat of anti-seize compound to the threads. This prevents the steel shock body and aluminum collars from corroding and seizing together over time.
- Let the Suspension Settle: After you’ve set your ride height, lower the car and drive it for a day or two. The springs will settle into their final position, often dropping the height by an additional 5-10mm. Don’t get an alignment until this settling is complete.
- Get a Professional Alignment: This cannot be overstated. Changing your ride height throws off your alignment. Failure to get an alignment will lead to poor handling, unsafe driving characteristics, and rapid, uneven tire wear.
To make your adjustment process even smoother, having the right tools on hand is essential. A quality coilover adjustment wrench set can prevent stripped collars and make applying the correct torque much easier.
FAQs About Coilover Adjustments
Can you adjust coilover preload on the car?
Yes, preload can be adjusted on the car by turning the spring perches. However, for most coilovers with linear springs, this adjustment primarily changes ride height, and it’s critical to ensure the spring remains captive at full suspension droop.
Does adjusting coilovers affect ride quality?
Yes, absolutely. Adjusting damping directly changes stiffness (soft vs. firm). Adjusting ride height too low can cause the shock to bottom out, resulting in a harsh ride. Proper adjustment is key to balancing performance and comfort.
Do I need an alignment after adjusting coilovers?
Yes, it is highly recommended. Changing your vehicle’s ride height will alter its suspension geometry, including camber and toe. You should get a professional alignment after you have finalized your ride height and let the springs settle.
How long do new coilovers take to settle?
New coilovers typically take a day or two of driving to fully settle. During this time, the ride height may drop slightly (5-10mm) as the springs and other components settle into their final position. Don’t get an alignment until they have settled.
Is it safe to adjust coilovers while they are under load?
No, it is not safe and generally not recommended. You should always jack the car up and support it on jack stands to take the load off the suspension before attempting to loosen collars or make adjustments. This is both safer and makes adjustment much easier.
Final Summary: Key Takeaways for On-Car Coilover Adjustment
In summary, the answer to “can you adjust coilovers while they are on the car” is a confident yes, provided you approach the task with the right knowledge and a safety-first mindset. Minor ride height tweaks, and especially damping adjustments, are perfectly suited for on-car work. For major height changes, particularly on fully threaded systems, removal can sometimes be the more efficient and surefire method, as recommended by industry experts.
Now that you have the expert-backed methods for adjusting your coilovers, you can confidently fine-tune your suspension for the perfect balance of form and function.
- Prioritize Safety: Always work with the vehicle properly supported on jack stands to take the load off the suspension.
- Know Your Adjustments: Damping and minor height changes are easily done on-car. Camber is possible but can be tricky. Major height adjustments may be easier with the coilover removed.
- Use the Right Tools & Prep: Clean threads, use spanner wrenches, and apply anti-seize to prevent damage and future headaches.
- Settle and Align: Always allow time for the new settings to settle before getting a professional alignment to protect your tires and ensure safe handling.
Last update on 2026-02-14 / Affiliate links / Images from Amazon Product Advertising API


![Pink Flower Volkswagen Beetle Design: 7 Best Tips for [year] 11 Pink Flower Volkswagen Beetle Design: 7 Best Tips for [year]](https://i0.wp.com/carxplorer.com/wp-content/uploads/2026/02/Pink-Flower-Volkswagen-Beetle-Design-7-Best-Tips-for-year-1.png?resize=60%2C60&ssl=1)
![Volkswagen Beetle Customization: 9 Unique DIY Mods for [year] 13 Volkswagen Beetle Customization: 9 Unique DIY Mods for [year]](https://i0.wp.com/carxplorer.com/wp-content/uploads/2026/02/Volkswagen-Beetle-Customization-9-Unique-DIY-Mods-for-year-1.png?resize=60%2C60&ssl=1)
![Pink Car Accessories: 9 Best Aesthetic Interior Ideas [year] 15 Pink Car Accessories: 9 Best Aesthetic Interior Ideas [year]](https://i0.wp.com/carxplorer.com/wp-content/uploads/2026/02/Pink-Car-Accessories-9-Best-Aesthetic-Interior-Ideas-year-1.png?resize=60%2C60&ssl=1)
![Pink Convertible Ideas: 9 Stunning Real Cars to Buy in [year] 17 Pink Convertible Ideas: 9 Stunning Real Cars to Buy in [year]](https://i0.wp.com/carxplorer.com/wp-content/uploads/2026/02/Pink-Convertible-Ideas-9-Stunning-Real-Cars-to-Buy-in-year-1.png?resize=60%2C60&ssl=1)
![Cute Volkswagen Beetle Aesthetic: 11 Stunning Retro Ideas for [year] 19 Cute Volkswagen Beetle Aesthetic: 11 Stunning Retro Ideas for [year]](https://i0.wp.com/carxplorer.com/wp-content/uploads/2026/02/Cute-Volkswagen-Beetle-Aesthetic-11-Stunning-Retro-Ideas-for-year-1.png?resize=60%2C60&ssl=1)