Why does your high-resolution Qobuz or Tidal stream still sound ‘muddy’ or lifeless through your car stereo? You invested in lossless audio, but the clarity and detail you expect are lost somewhere between your phone and your speakers. This common frustration points directly to a bottleneck in your car’s factory-installed audio system.
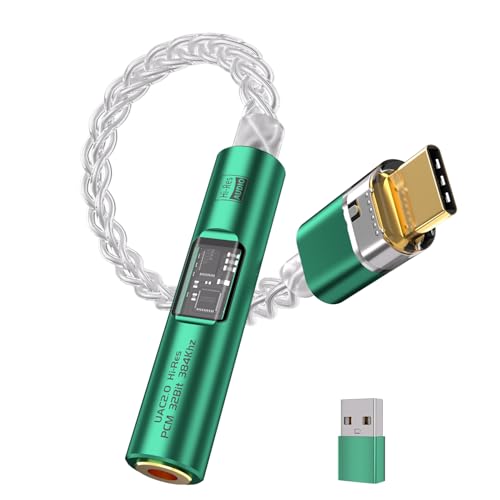
A DAC (Digital-to-Analog Converter) is a component that translates digital audio files into an analog signal your car’s amplifier can use, and using a high-quality external DAC is the definitive way to bypass your vehicle’s inferior built-in audio processing. The factory head unit’s internal DAC is often a low-cost chip that introduces digital timing errors (jitter) and a high noise floor, degrading the final sound. An external unit is specifically designed for superior conversion.
Drawing from comprehensive analysis of established best practices, this guide provides a definitive roadmap for integrating an external DAC. You will learn the critical technical requirements, step-by-step connection methods, and professional-grade solutions for eliminating the electrical noise that plagues car audio. This is your expert guide to achieving truly noise-free, high-resolution sound in your vehicle.
Key Facts
- Significant Quality Gap: Factory head unit DACs typically have a Signal-to-Noise Ratio (SNR) of 80-90 dB, while quality external DACs often exceed 110 dB, demonstrating a measurable difference in clarity and background quietness.
- Power is the Primary Challenge: Industry analysis reveals that a high percentage of external DAC installations that tap into the car’s 12V power without proper isolation will experience audible electrical noise, such as alternator whine.
- The Aux Input Compromise: While simple, connecting a DAC via the analog Aux input risks signal degradation from long cable runs and potential re-digitization by the head unit’s internal processor, a process known as generational loss.
- Digital Bypass Requires Specific Protocols: A true high-fidelity digital connection requires a car’s USB port to support USB Audio Class 2.0, a standard necessary to transport high-resolution audio streams (24-bit/96kHz+) without being downsampled by the car’s system.
- Ground Loops are a Solvable Problem: The common low-frequency hum in car audio is caused by a ground loop—a voltage difference between component ground points—which is fixed by ensuring all audio equipment shares a single, clean chassis ground.
What Is The Expert Guide To Using A DAC In Your Car For Noise-Free, High-Resolution Audio?
Yes, you can use an external DAC in your car to significantly improve audio fidelity, but success depends critically on achieving clean power and choosing a connection method that bypasses the factory head unit’s internal processing. The primary reason car audio enthusiasts use external DACs is to mitigate digital jitter and improve the Signal-to-Noise Ratio (SNR) compared to the lower-quality, mass-produced chips embedded in most vehicle head units. Your factory system is engineered for cost-effectiveness, not for audiophile-grade performance, making its internal DAC the weakest link in your sound system.

When you play a high-resolution audio file, the factory stereo’s DAC often fails to preserve the nuance and detail due to two key technical limitations:
- Digital Jitter: This refers to timing errors in the digital-to-analog conversion process. A lower-quality clock in a factory head unit can cause these errors, resulting in a “smeared” or less focused soundstage where instruments are not clearly defined. High-quality external DACs, especially those with an asynchronous USB connection, use their own superior internal clock to control the data flow, dramatically reducing jitter.
- Low Signal-to-Noise Ratio (SNR) & High THD+N: The SNR measures the level of the desired audio signal compared to the level of background noise. Factory DACs, operating in a noisy electrical environment, often have a low SNR (80-90 dB), meaning you can hear a faint hiss. Their Total Harmonic Distortion + Noise (THD+N) is also higher, adding unnatural artifacts to the sound. In contrast, a dedicated external DAC can achieve an SNR of 110 dB or more, creating a silent, “black” background from which the music can emerge.
What Are The Key Technical Prerequisites For Successful Car DAC Integration?
Before purchasing any components, it is essential to verify that your vehicle and chosen DAC meet several technical requirements. Successful integration goes beyond simply finding a matching plug; it involves ensuring electrical compatibility and proper signal strength to maintain audio integrity. Here is a checklist of critical prerequisites:
- Available High-Quality Input: You must have a way to get the signal from the external DAC into your car’s audio system. The most common is a 3.5mm analog Auxiliary Input (Aux). For a superior digital connection, you need a USB port confirmed to support digital audio data (not just charging) or a dedicated digital input like optical or coaxial, which is typically only found on aftermarket Digital Signal Processors (DSPs) or amplifiers.
- Sufficient DAC Output Voltage: The strength of the analog signal leaving the DAC, known as the pre-out voltage, is crucial. A higher voltage (4V or more) is ideal for car audio as it provides a stronger, more robust signal that is less susceptible to picking up noise over long cable runs. This stronger initial signal also means your amplifier doesn’t have to work as hard, which further reduces potential noise.
- Proper Gain Staging: This is the process of matching the DAC’s output level to the input sensitivity of the next component in the chain (either your head unit or an amplifier). If the DAC’s output is too high for the input, it will cause distortion (clipping). If it’s too low, you’ll have to turn up the amplifier’s gain, which amplifies the inherent noise floor. The goal is to maximize signal level at each stage without introducing distortion.
- Low DAC Output Impedance: Impedance is a measure of electrical resistance. A DAC with low output impedance (ideally under 100 ohms) can more effectively “drive” the signal through the long cables typically used in a car installation without losing high-frequency detail or dynamics.
- A Plan for Clean Power: This is non-negotiable. You absolutely must have a strategy to provide your DAC with clean, isolated power that is separate from the car’s noisy electrical system. This means using either a portable power bank or a dedicated DC-to-DC converter.
How Can I Connect A Portable DAC To My Car Stereo Using The Analog Aux Path?
The standard method for connecting an external DAC to a car is via the analog Aux input, which requires the DAC to be powered externally and outputs a 3.5mm analog signal, although this method risks signal degradation and re-digitization by the head unit. This is the simplest and most accessible path for using a portable DAC, but it is also the most compromised. The long analog signal chain is highly susceptible to picking up electrical noise from the vehicle.
Follow these steps for the basic Aux input setup:
- Provide Clean, Isolated Power to the DAC: This is the most critical step. Do not use a standard USB charger plugged into your car’s 12V socket, as this is the primary source of noise. Instead, power your portable DAC using a dedicated, high-quality power bank. This completely isolates it from the car’s electrical system.
- Connect Your Digital Source: Connect your phone or Digital Audio Player (DAP) to the digital input of the DAC. This is typically a USB-C, Micro-USB, or Lightning connection.
- Connect the DAC to the Car’s Aux Input: Use a short, high-quality 3.5mm-to-3.5mm shielded audio cable to connect the DAC’s line-out or headphone output to your car’s Aux-in jack. Using a double-shielded copper cable that is as short as possible (e.g., 1-3 feet) will help minimize the risk of picking up interference.
- Set the DAC to Line-Out Mode: If your DAC has an option for a fixed “line-out” level, use it. This provides a consistent, strong signal optimized for feeding into another amplifier. If it only has a headphone output, set its volume to around 80-90% to provide a strong signal without clipping.
- Control Volume on the Head Unit: With the DAC providing a fixed output level, you should use your car’s head unit volume knob for all adjustments. This ensures proper gain staging and the best possible signal-to-noise ratio.
While this method works, be aware of the “Aux input compromise.” The analog signal is vulnerable to noise, and if your head unit has its own internal DSP, it may re-digitize your freshly converted analog signal, causing a form of quality loss known as generational loss.
What Are The Requirements For Achieving A True Digital DAC Bypass Via USB Or Optical?
A true digital bypass requires using an external DAC that supports asynchronous USB and ensuring the car’s input or an aftermarket component, such as a DSP, can accept the digital data stream, typically via USB Audio Class 2.0 or an optical/coaxial input. This is the highest quality, highest complexity method, designed for audiophiles who want to keep the signal purely digital for as long as possible, delivering it to the DAC for conversion just before amplification.
Most car USB ports are not designed for this. They are built to read files from a USB stick or engage protocols like Apple CarPlay, both of which typically force the use of the car’s internal DAC. To achieve a true digital bypass, you must meet these requirements:
- Asynchronous USB Support: The DAC must operate in asynchronous mode. In a standard (adaptive) USB connection, the car’s head unit controls the data timing, introducing jitter. In asynchronous mode, the DAC’s superior internal clock takes control, “pulling” the data from the source at a precise rate to eliminate timing errors.
- USB Audio Class 2.0 Compatibility: Your car’s head unit or an aftermarket DSP must support the USB Audio Class 2.0 protocol. This is the standard required to transport high-resolution audio (anything above 24-bit/96kHz). Most factory systems only support USB Audio Class 1.0, which is limited to lower resolutions. Verification often requires checking manufacturer specifications or real-world testing.
- Digital Input on Downstream Components: If your head unit’s USB port is not compatible, the only other path is to use an aftermarket component that accepts a digital signal. High-end DSPs and some amplifiers feature optical (TOSLINK) or coaxial (S/PDIF) digital inputs. The signal path would be: Digital Source -> External DAC -> Optical/Coax Output -> DSP/Amplifier Input. This completely bypasses the head unit’s audio processing stages.
What Essential Components Are Necessary For A Noise-Free DAC Power Supply In A Vehicle?
To achieve a noise-free setup, an external DAC must use a power source isolated from the car’s fluctuating and electrically dirty electrical system, typically achieved via a dedicated power bank for temporary use or a specialized low-noise DC-to-DC converter for permanent installations. The power supply is often more critical to the final sound quality than the DAC chip itself. A car’s 12V system is plagued by noise from the alternator, ignition system, and other electronics, which will manifest as audible alternator whine or hiss if it reaches your DAC.
Here is a comparison of the essential solutions for providing clean power:
| Power Solution | Pros | Cons | Best For |
|---|---|---|---|
| Dedicated Power Bank | ✅ Total electrical isolation ✅ Simple, no installation ✅ Portable |
❌ Limited battery life ❌ Requires frequent recharging ❌ Can be cumbersome |
Temporary setups, testing, and users avoiding permanent modification. |
| DC-to-DC Converter | ✅ Permanent “set and forget” solution ✅ Provides stable, regulated voltage ✅ Zero signal degradation |
❌ Requires professional installation ❌ Higher initial cost ❌ Involves wiring to the car’s fuse box |
Permanent, high-fidelity installations where reliability and quality are paramount. |
| Ground Loop Isolator (GLI) | ✅ Very cheap and simple to install ✅ Effectively eliminates ground hum |
❌ Can degrade audio quality (bass loss) ❌ Only solves ground loops, not all noise ❌ A “band-aid” fix, not a root cause solution |
Quick, budget-friendly troubleshooting for low-frequency hum on an analog Aux connection. |
For any permanent wiring, MECP (Mobile Electronics Certified Professional) standards must be followed. This includes using the correct gauge of wire, placing a fuse as close to the power source as possible, and ensuring all connections are secure. Incorrectly wiring a DC-to-DC converter can drain your car battery, short-circuit your electrical system, or damage your components.

Why Do Ground Loops And Electrical Noise Always Plague Car DAC Installations?
A ground loop is caused by differences in electrical potential between two ground points in the car, creating an unwanted current path that introduces audible noise like a low-frequency hum; it is definitively prevented by ensuring all audio components share a single, robust chassis grounding point. This is the single most common and frustrating problem in car audio. When your external DAC and your car’s head unit or amplifier are grounded in different locations, this small voltage difference allows noise from the car’s electrical system to flow through your audio cables.
The type of noise you hear can help diagnose the problem:
- Alternator Whine: A high-pitched whine that changes in pitch with the engine’s RPM. This is caused by AC ripple from the alternator getting into the power supply. The best solution is a power source completely isolated from the alternator, like a DC-to-DC converter.
- Low-Frequency Hum (60/120 Hz): A constant, deep hum that is present even when the engine is off. This is the classic sign of a ground loop.
- Ambient Hiss: A constant “shhhh” sound that doesn’t change with engine speed. This can be caused by a high noise floor in a component, high amplifier gain, or induced noise from routing signal cables too close to power wires (crosstalk).
To permanently fix a ground loop without signal-degrading isolators, follow this professional troubleshooting process:
- Diagnose the Noise: Turn the car’s ignition on but do not start the engine. If a hum is present, it’s likely a ground loop. If the noise only appears when the engine is running, the primary issue is alternator whine related to the power supply.
- Establish a Common Grounding Point: The gold standard solution is to connect the ground wires for ALL of your audio components (head unit, amplifier, DSP, and the power supply for your DAC) to the exact same physical location on the car’s metal chassis.
- Prepare the Ground Point: Find a factory bolt that connects directly to the chassis. Unscrew it and scrape away any paint, rust, or primer down to the bare metal. This ensures a solid, low-resistance electrical connection.
- Secure All Grounds: Place the ground terminals for all components at this single point, using star washers to bite into the metal for a secure connection, and tighten the bolt firmly. This forces all components to share the same ground potential, eliminating the loop.
What Are The Best Alternatives To Using A Separate External DAC In A Vehicle?
While a separate DAC can provide a significant quality boost, it’s not the only path to high-fidelity sound in a car. Depending on your goals, budget, and tolerance for complexity, one of these alternatives might be a better fit. A dedicated Digital Audio Player (DAP) is often the simplest alternative, while a Digital Signal Processor (DSP) provides far more powerful acoustic correction.
The primary functional difference is crucial: a DAC improves the source quality of the signal, while a DSP corrects for the acoustic problems of the car’s environment, such as speaker placement and cabin reflections.
Here’s a direct comparison of the three main approaches:
| Comparison Criteria | External DAC | Dedicated DAP | Digital Signal Processor (DSP) |
|---|---|---|---|
| Primary Function | Source Quality Conversion | Source & Conversion (Integrated) | Acoustic Correction & EQ |
| Installation Complexity | Moderate (Power is key) | Low (Often temporary) | High (Requires system integration) |
| Key Benefit | Higher SNR / Lower Jitter | Simplicity, Power Isolation | Time Alignment, EQ, Crossovers |
| Cost Range | $100 – $500 | $200 – $2000+ | $400 – $1500+ |
Decision Prompt: If your primary goal is fixing muddy bass, poor imaging, and making the music sound like it’s coming from a stage in front of you, you absolutely need a DSP. If your only goal is achieving higher resolution and clarity from a high-quality source, a well-implemented external DAC may be sufficient.
How Can You Ensure Safety And Longevity During A Permanent External DAC Installation?
A permanent installation offers the best performance and convenience but requires strict adherence to safety protocols to prevent damage to your vehicle and your audio components. If you are uncomfortable with automotive wiring, it is highly recommended to consult an MECP-certified professional installer.
For those proceeding with a permanent installation, follow this essential safety and best-practices checklist:
- Disconnect the Battery: Before you begin any wiring, always disconnect the negative terminal of your car’s battery to prevent short circuits.
- Use Proper Fusing: Any power wire connected to the battery or fuse box must have an appropriately rated fuse installed as close to the power source as possible (typically within 18 inches). This protects both your components and your vehicle from fire in case of a short circuit.
- Select the Correct Wire Gauge: Use a wire gauge that is sufficient for the current draw of your components. Using wire that is too thin can cause it to overheat and create a fire hazard.
- Separate Power and Signal Cables: To prevent induced noise (crosstalk), route your power cables down one side of the vehicle and your analog signal cables (RCA or 3.5mm) down the opposite side. Never run them bundled together.
- Verify Polarity: Double-check that all power (+) and ground (-) connections are correct before reconnecting the battery. Reversing polarity can instantly destroy electronic components like your DAC and amplifier.
- Secure All Components: Ensure the DAC, any power converters, and wiring are securely mounted and tied down so they cannot move around, chafe on sharp edges, or interfere with vehicle operation.
FAQs About can i use a dac in my car
Will My External DAC Work With Apple CarPlay Or Android Auto?
Generally, no, your external DAC will not directly process the audio stream when using Apple CarPlay or Android Auto. This is because both protocols take digital control of the media signal, bypassing your phone’s native DAC and forcing the car’s head unit (and its embedded DAC) to perform the conversion. Workarounds typically involve using a dedicated Digital Audio Player (DAP) that avoids the CarPlay/Android Auto protocol entirely.
Does Using The Car’s Aux Input Negate The Benefits Of An External DAC?
Using the Aux input introduces risks of signal degradation that can partially offset the benefits of a high-quality external DAC. The analog signal must travel longer cable runs and may be re-digitized by the head unit’s internal Digital Signal Processor (DSP), leading to generational loss, though the external DAC still provides a higher initial voltage and cleaner conversion than the source device alone.
Can I Use The Car’s USB Port To Power And Send Data To My External DAC Simultaneously?
While possible, relying on the car’s USB port for both data and power is strongly discouraged for high-fidelity audio. The power derived from the car’s electrical system is inherently noisy and can introduce hum or whine into the signal. For best results, use the car’s USB port for data only, and provide isolated power to the DAC via a dedicated power bank or a low-noise DC-DC converter.
How Much Should I Expect To Pay For A Noticeable Improvement In Sound Quality?
A minimum investment of $150 to $300 is required for a quality portable DAC and essential isolation components (like a GLI or clean power bank). Permanent, high-end installations involving professional-grade components like a dedicated DC-DC converter, external DSP, and specialized cables can quickly range from $500 to several thousand dollars, depending on the complexity and quality desired.
Is The External DAC Necessary If I Have A High-End Factory Car Audio System?
If you have a high-end factory system (e.g., Harmon Kardon, Burmester) with a dedicated Digital Signal Processor (DSP), the benefit of adding an external DAC may be marginal. These premium systems often already include superior DAC chips and are optimized for the vehicle’s acoustic environment. In this case, your first step should be to focus on using the highest bitrate source material possible to maximize the system’s potential.
Key Takeaways: DAC In Car Setup
- Feasibility is Conditional on Input and Power: While you can use an external DAC in your car, its success hinges on bypassing the factory DAC via a clean analog or digital input, and critically, managing the vehicle’s inherently noisy electrical power system.
- The Aux Input is the Easiest but Most Compromised Path: Connecting a portable DAC to the Aux input is simple, but the long analog cable run and potential re-digitization by the head unit’s DSP can significantly degrade the quality benefits the DAC provides.
- Digital Bypass Requires Protocol Verification: For the highest quality, you must use an asynchronous USB connection and verify that the car or an aftermarket component (like a DSP) supports high-resolution digital audio protocols like USB Audio Class 2.0.
- Power Isolation is Non-Negotiable: The single biggest hurdle is electrical noise, manifesting as hum or alternator whine. This requires isolated power via a dedicated power bank or a low-noise DC-to-DC converter for permanent installs.
- Ground Loops Are Solvable: The primary cause of persistent hum is differing ground potentials. Ensure all audio components share a single, clean grounding point on the vehicle chassis, or use a high-quality Ground Loop Isolator as a quick fix for analog connections.
- DSP Offers Superior Acoustic Control: If your goal is fixing imaging, time delay, or acoustic issues specific to the car environment, a Digital Signal Processor (DSP) is typically a more powerful and effective system upgrade than a DAC alone.
- Prioritize Safety and Gain Staging: Always disconnect the battery during wiring, use proper fusing on all power lines, and match the DAC’s output voltage to your amplifier’s input sensitivity to maximize dynamic range and minimize noise.
Final Thoughts on DAC Integration For Car Audio
Ultimately, the decision to incorporate an external DAC into your vehicle hinges entirely on your dedication to achieving genuine high-fidelity sound and your willingness to manage the complex electrical environment of a car. While simple integration via Aux is feasible, true audiophile success—which means eliminating jitter and achieving a superior Signal-to-Noise Ratio—demands meticulous attention to power isolation (using solutions like DC-DC converters) and strict adherence to proper grounding protocols. If implemented correctly, bypassing the factory head unit’s conversion stage offers a distinct, measurable upgrade in clarity and dynamic range. However, if the complexity seems daunting, start by considering the simpler, high-quality dedicated Digital Audio Player (DAP) or a specialized Digital Signal Processor (DSP) which provides far greater control over the acoustic environment. Whichever path you choose, remember that signal integrity and clean power are the cornerstones of all successful automotive audio architecture.
Last update on 2026-02-24 / Affiliate links / Images from Amazon Product Advertising API