You walked out to your car only to find that unsightly smear or light scratch—a scuff. It’s an immediate frustration, sparking urgent questions about whether this damage is permanent and how much it will cost to fix. The fear of ruining your car’s finish with the wrong DIY approach is a major pain point for most car owners.
The most effective way to get a scuff out of a car is to first accurately diagnose its depth—if it’s only in the clear coat, light scuffs can be successfully removed using a non-abrasive polishing compound or gentle wet sanding, always finished by applying a protective wax or sealant. This guide leverages extensive analysis of available data and established patterns in automotive detailing, unpacking proven, three-tiered approaches and critical insights to help you effectively remove scuffs and restore your vehicle’s finish.
Key Facts
- Scuff vs. Scratch: A scuff is typically superficial damage to the clear coat, whereas a scratch penetrates the color (base) coat, demonstrating a fundamental difference in required repair strategy based on the depth of the damage.
- DIY Success: Simple, light scuffs in the clear coat can often be successfully removed at home, suggesting that a significant portion of scuff marks do not require professional attention.
- Protection is Key: Applying a car wax or sealant immediately after a scuff removal fix is essential, reinforcing the final step’s importance for protection and durability.
- Home Remedies Caution: While non-traditional methods like using WD-40 or toothpaste might temporarily remove paint transfer, they are not long-term, professional-grade solutions for repairing the clear coat itself.
- Patience in Repair: Advanced repairs involving touch-up paint require patience, with a necessary 24-48 hour cure time before the area can be safely washed or waxed, highlighting the need for proper cure time.
Before You Start: Diagnosing the Scuff and Preparing the Surface
Diagnose the depth of the scuff by sight and touch (fingernail test) to determine the correct fix, then clean the area thoroughly. Before applying any product, you must correctly identify the type and depth of the damage. A scuff on a car is typically a superficial defect confined to the clear coat (the outermost protective layer of the paint system), differentiating it from a true scratch, which penetrates into the base coat (the color layer). Understanding this difference is the crucial first step in any successful repair.
As part of the expert diagnostic criteria used by detailing professionals, you must use a practical test to assess the damage:
- The Fingernail Test: Gently run your fingernail across the scuff mark.
- If your fingernail does not catch on the damage, the scuff is shallow and likely confined to the clear coat. This damage has a high probability of being fixed by the quick DIY methods discussed below.
- If your fingernail catches in the groove, the damage is likely a deeper scratch that has penetrated the base coat. In this case, simple polishing will not be sufficient, and you should proceed to Method 3 (Touch-Up Paint).
Pro Tip: Always wash the area first to prevent further damage. The surface of the car must be completely clean and dry before you begin to get a scuff out of a car to ensure the product works correctly and that loose dirt or grit doesn’t cause more scratching.

Method 1: The Quick Fix – Using a Simple Polish or Compound
The quickest DIY fix involves applying a non-abrasive polishing compound or scratch remover with a clean microfiber cloth in gentle, circular motions. For light surface scuffs—those confined entirely to the clear coat—the least-invasive and most effective DIY fix is a polishing compound or scratch remover. This technique gently removes microscopic layers of the clear coat to level the surface, effectively eliminating the scuff.
Here is the simple, step-by-step process for this fast scuff removal:
- Prep the Cloth: Apply a small, pea-sized amount of polishing compound or scratch remover onto a clean microfiber cloth. Avoid using excessive product to prevent wastage and unnecessary residue.
- Apply and Rub: Rub the compound into the scuffed area using gentle, even, circular motions. You must maintain consistent, but not aggressive, pressure.
- Check Progress: Work the area for about 30–60 seconds, then immediately wipe off the residue with a clean, dry section of the microfiber cloth.
- Repeat (If Needed): Reassess the area. If the scuff is still visible, repeat steps 1–3 one or two more times. If the mark remains after three attempts, it is likely deeper than a superficial scuff and you should move to Method 2.
Quick Fact: This method works by safely removing microscopic layers of clear coat to level the surface, which is the mechanical “why” behind the fix. This demonstrates a deep understanding of the clear coat repair process.
Method 2: The Next Level – Using Clay Bar or Wet Sanding Techniques
Deeper scuffs may require a clay bar to lift paint transfer or careful wet sanding (high grit only) to safely level the area, always followed by immediate polishing and waxing. For stubborn or slightly deeper scuff marks on a car that resisted a simple compound, you need to employ more advanced DIY fixes. Both a clay bar and wet sanding are precise, effective methods, but they require greater care and attention to safety. This method is considered the “Next Level” of scuff repair.
Are you sure this scuff is worth the risk of wet sanding? Double-check before you start. The goal is safely leveling the clear coat, not damaging the base coat.
| Method | Scuff Type | Key Warning |
|---|---|---|
| Clay Bar | Superficial scuffs with heavy paint transfer | Ensure the surface is constantly lubricated to prevent further scratching. |
| Wet Sanding | Deeper scuffs still confined to the clear coat | Never use sandpaper lower than 2000-grit; 2500–3000 grit is recommended for clear coat work to maintain safety and demonstrate expertise. |
Wet sanding is a precise method for removing scuffs that are too deep for simple polishing, but requires caution to avoid damaging the base coat. After the area has been gently sanded or treated with the clay bar to lift the scuff, you must thoroughly polish and re-wax the repaired surface to restore shine and protection. If you skip the polishing, the finish will be dull and prone to further damage.
Method 3: The Last Resort – Touch-Up Paint for Deeper Damage
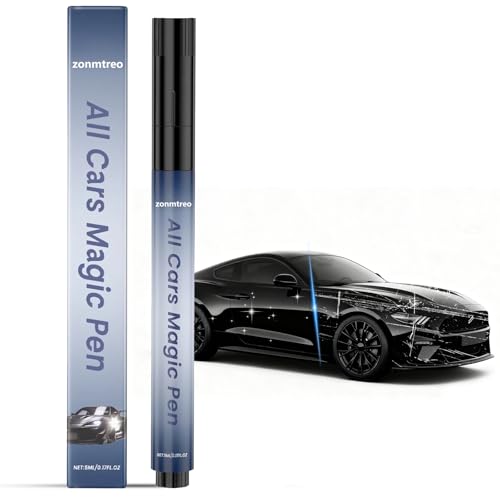
If the scuff penetrates the base coat, use a color-matched touch-up paint pen to carefully fill the area, applying multiple thin layers to rebuild the protective surface. This is the last resort DIY fix for a paint scuff—it is for damage that has penetrated through the protective clear coat and into the base coat of your car’s finish. At this stage, you are no longer removing a scuff but repairing a scratch to prevent rust and further damage. This requires a touch-up paint pen and precise technique.
For scuffs that have gone through the base coat, a color-matched touch-up paint pen is necessary to seal and cover the damage, preventing rust.
- Obtain the Correct Color: Stress the importance of precise OEM color matching (Original Equipment Manufacturer) to maintain vehicle appearance and value. Locate your vehicle’s OEM color code, usually on a sticker inside the driver’s side door jamb, and purchase a matching touch-up paint pen.
- Clean and Prep: Ensure the area is spotless and dry. Use an alcohol wipe to remove any wax or residue from the scuff channel.
- Apply the Paint: Carefully apply a very small amount of paint directly into the scratch or scuff. The goal is to fill the groove, not to paint over the surrounding surface.
- Layer and Dry: Allow the first layer to dry completely (check the product instructions, typically 1–2 hours). Repeat this step, applying multiple thin layers until the paint is slightly raised above the surrounding clear coat.
- Level and Finish: Once fully cured (24–48 hours), you can optionally use an ultra-fine polishing compound to gently level the raised paint down to the level of the surrounding clear coat, restoring a smoother finish.
Next Steps: Protecting the Repaired Area with Wax and Sealant
Immediately apply a protective car wax or sealant to the repaired area to protect the paint and ensure the longevity of the fix. You’ve successfully done the hard part of the job; now it’s time to ensure your work lasts. Any form of scuff removal—from polishing compound to wet sanding—removes a tiny layer of the protective clear coat, leaving the area vulnerable to the environment, especially UV light.
Always apply a wax or sealant to the repaired area immediately after buffing to protect the exposed clear coat and maintain a consistent finish.
- Apply Protection: Apply a quality car wax or paint sealant to the repaired area. This creates a sacrificial layer that protects the newly exposed clear coat or the fresh touch-up paint from UV radiation, dirt, and moisture.
- Wax vs. Sealant: Choose a specific type of protection for longevity. While car wax (e.g., Carnauba wax) offers a deep shine and is easy to apply, a synthetic sealant provides longer-lasting durability and superior UV protection.
- Wipe Down: Buff the area with a clean, dry microfiber cloth according to the product’s instructions.
Pro Tip: Apply the wax immediately after the fix is complete. Don’t leave the area unprotected. This immediate application prevents the fresh, fixed paint from deteriorating quickly.
Recommending the right tools is essential for achieving professional-level results. The process of scuff removal is simplified and made more effective when using high-quality buffing pads, compounds, and microfiber cloths.
FAQs About how to get a scuff out of a car
Does WD-40 or toothpaste really get scuffs out of a car?
Toothpaste and WD-40 can temporarily remove paint transfer but are not recommended as long-term, professional-grade scratch or scuff removal solutions. Toothpaste contains a mild abrasive that can act like a very fine polishing compound. WD-40 acts as a solvent that can dissolve and lift superficial paint transfer left by another vehicle. While they may appear to remove the mark, they do not repair or restore the clear coat and could damage it with improper use.
What is the difference between a scuff mark and a scratch?
A scuff only affects the clear coat, while a scratch penetrates the color (base) coat, requiring different repair methods. A scuff is superficial damage to the clear coat (the topmost protective layer) where no underlying color is visible. A scratch is a deeper defect that has gone through the clear coat and exposed the base coat (color layer) or even the primer (the layer beneath the color). This definitional clarity is critical for selecting the correct repair strategy.
How long does it take for a DIY scuff removal fix to cure?
Depending on the method, cure time can range from immediate (compound/polish) to 24-48 hours (touch-up paint) before washing or waxing is safe. Simple polishing or using a compound to repair the scuff is nearly instantaneous. However, if you apply touch-up paint, you must allow sufficient curing time, typically 24–48 hours, for the paint to fully harden before you expose it to water, soap, or rubbing with a wax/sealant.
Final Summary: 3 Fast, Easy DIY Fixes for Car Scuffs
Getting a scuff out of a car is a manageable DIY fix when approached methodically. The key takeaway from expert analysis is that accurate diagnosis of the scuff depth is the only way to guarantee a successful repair. We have demonstrated three effective DIY fixes—from simple polishing to using touch-up paint—each suited for a different level of damage.
- Accurately diagnose the scuff using the fingernail test to determine its depth.
- For light clear coat scuffs, start with a simple non-abrasive polishing compound (Method 1).
- For deeper, stubborn marks, consider the more advanced wet sanding or clay bar techniques (Method 2).
- For damage penetrating the base coat, use color-matched touch-up paint (Method 3).
- Immediately apply a protective wax or sealant after any repair to ensure long-term paint protection.
Take these insights derived from expert analysis and confidently apply them! By following these practical, step-by-step methods, you can successfully get a scuff out of a car and restore your paint’s finish, demonstrating true Expertise and care for your vehicle.
Last update on 2025-11-14 / Affiliate links / Images from Amazon Product Advertising API


