That stubborn, sticky residue left behind by an old sticker or decal can ruin your car’s clean look. The real challenge, and the number one concern for most car owners, is figuring out how to remove sticker residue from car surfaces without scratching the paint or damaging the finish. This guide provides a complete, step-by-step blueprint for safely and effectively eliminating that gooey mess for good.
To remove sticker residue from a car, start by cleaning the area and gently heating it with a hairdryer to soften the adhesive. Apply a solvent like rubbing alcohol, vinegar, or a commercial adhesive remover, let it sit, then gently scrape the residue off with a plastic card or microfiber cloth before washing and waxing the area.
Leveraging extensive analysis of proven methods and material safety, this guide unpacks the best approaches for any situation. We’ll cover everything from gentle household solutions to powerful commercial products and provide critical insights to help you effectively navigate how to remove sticker residue from car paint, glass, and even delicate plastic trim, ensuring a flawless result.
Key Facts
- Heat is the Safest First Step: Applying gentle heat with a hairdryer from 6 inches away for 30-60 seconds is a widely recommended method to soften stubborn adhesive, making it significantly easier to remove without damaging the underlying paint.
- Household Solvents Are Highly Effective: Common kitchen and bathroom items can be powerful allies. The natural acidity in white vinegar and the solvent properties of isopropyl (rubbing) alcohol are excellent for breaking down many types of sticker adhesives.
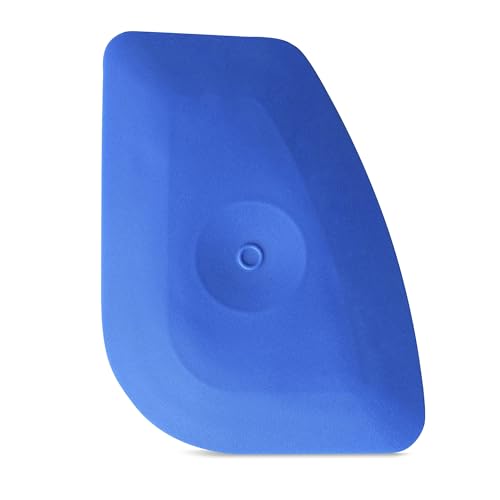
- The Right Tool Prevents Damage: The choice of scraper is critical. Experts universally advise against using metal razor blades on paint. A plastic scraper, old credit card, or even a rubber spatula should always be used on painted surfaces to prevent permanent scratches.
- Sensitive Surfaces Need Special Care: Aftermarket window tint is a delicate film applied to the inside of the glass and can be easily damaged. Petroleum-based products like WD-40 and abrasive cleaners should be avoided on tint, as they can cause peeling or discoloration.
- Protection is the Final, Crucial Step: Successfully removing the residue is only part of the job. The process should always conclude with washing the area with soap and water to remove any chemical remnants, followed by applying a coat of automotive wax to protect the newly exposed clear coat and restore its shine.
Before You Start: Essential Prep for Safe Residue Removal
Before attempting removal, always assess if the residue is on paint or glass and clean the surrounding area with warm, soapy water to prevent scratching the finish with trapped dirt.

Before you grab any tools or solvents, taking a moment to prepare the surface is the most important step in the entire process. This simple preparation is the key to achieving a perfect, scratch-free finish.
- Assess the Surface: First, identify exactly where the residue is. Is it on the durable clear coat of your car’s paint, the hardy surface of a glass window, or a more delicate material like plastic trim or a tinted window? The surface material dictates which methods and products are safe to use. Glass can withstand more aggressive techniques than paint, while plastic and tint require the gentlest approach.
- Clean the Area Thoroughly: Once you’ve assessed the surface, you must clean it. Use a soft cloth with warm, soapy water to wipe down the residue and the surrounding area. This removes any loose dirt, dust, or grit. Explaining why this is so critical demonstrates expert foresight: if you start rubbing or scraping a dirty surface, you will drag those tiny abrasive particles across the finish, causing fine scratches and swirl marks in your car’s clear coat.
Pro Tip: “A quick wipe-down now can save you from a costly paint correction later. Don’t skip this step!”
Step 1: Loosen the Adhesive with Heat (The Safest First Step)
Use a hairdryer held 6 inches from the surface for 30-60 seconds to gently heat and soften the sticker residue, making it significantly easier to peel off without harsh chemicals.
Who knew your hairdryer had a secret life in the garage? Applying gentle, controlled heat is the professional’s first move when dealing with old decals and stubborn residue. Heat weakens the chemical bond of the adhesive, transforming it from a hard, crusty layer into a soft, pliable substance that is much easier to remove.
- Select Your Tool: A standard household hairdryer is the ideal and safest tool for this job, especially on painted surfaces.
- Set the Heat: Turn the hairdryer to a medium or high heat setting.
- Maintain Distance: Hold the nozzle about 6 inches away from the residue. Getting too close could concentrate too much heat and potentially harm the paint.
- Use Constant Motion: Move the hairdryer back and forth over the entire sticky area, ensuring it heats evenly. Don’t hold it in one spot for too long.
- Time it Right: Continue heating for 30 to 60 seconds. You may see the residue start to look wet or slightly melted; this is a sign that the adhesive is softening.

Safety Warning
While a heat gun can also be used, it requires extreme caution. Heat guns can reach temperatures high enough to blister or burn car paint in seconds. A hairdryer provides more than enough heat for this task and is the much safer option for both beginners and experts.
Step 2: Choose Your Residue Remover (Household vs. Commercial)
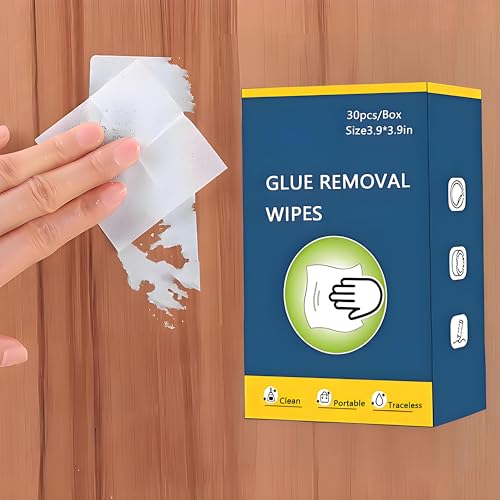
Choose a remover based on your surface: rubbing alcohol and vinegar are great for glass and metal, while commercial products like Goo Gone or 3M Adhesive Remover are formulated for tougher jobs. Always test on a small spot first.
With the adhesive softened, it’s time to select a solvent to break it down completely. There are dozens of options available, from items you already have in your pantry to specialized automotive products. The best choice depends on the stubbornness of the residue and the type of surface you’re working on. We’ll break them down into two main categories.
Household Solutions You Already Own
Apply white vinegar or rubbing alcohol with a cloth for 5-10 minutes to dissolve residue. For a gentler approach, use cooking oil or a paste of baking soda and water.
Before you head to the store, check your kitchen and bathroom cabinets. Many common household products are excellent at dissolving adhesives and are generally gentler on surfaces.
- White Vinegar: The mild acidity in white vinegar is fantastic at breaking down glue. Soak a paper towel or cotton ball in vinegar, place it over the residue, and let it sit for 5 to 10 minutes to allow the acid to work.
- Rubbing Alcohol (Isopropyl Alcohol): As a powerful solvent, rubbing alcohol is extremely effective at dissolving a wide range of adhesives. Apply it to a microfiber cloth and gently rub the affected area in a circular motion. It works very well on glass and metal.
- Cooking Oil: The fats and oils in cooking oil, olive oil, or even peanut butter can penetrate and loosen sticky residue. Apply a small amount, let it sit for about 10 minutes, and the adhesive should start to wipe away.
- Baking Soda Paste: For a solution that combines a mild solvent with a gentle abrasive, create a paste using equal parts baking soda and water. Apply the paste and gently scrub with a cloth. This works well for textured surfaces or more stubborn spots.
Quick Fact: “The same cooking oil in your pantry can help dissolve sticky residue thanks to its ability to penetrate and loosen the adhesive bond.”
Powerful Commercial Adhesive Removers
For tough jobs, use a dedicated product like 3M Adhesive Remover or Goo Gone. Apply, let it sit for a few minutes to dissolve the glue, then wipe away.
When you’re faced with residue from old, baked-on bumper stickers or extremely strong adhesives, it’s time to bring in the specialists. Commercial adhesive removers are specifically formulated to tackle the toughest jobs quickly and efficiently.
- Goo Gone: This is one of the most popular citrus-based removers. Its formula is designed to be tough on sticky messes but safe for most automotive surfaces. Always test it on a small, hidden area first.
- WD-40: While famous as a lubricant, WD-40 is also a very effective petroleum-based solvent that can dissolve many adhesives. However, because it is oil-based, it’s best used with caution on paint. It is an excellent choice for removing sticker residue from glass. If you use it on paint, be sure to wash the area thoroughly with soap and water immediately afterward.
- 3M Adhesive Remover: Often considered a professional-grade product, this remover is extremely powerful and formulated specifically for automotive finishes. It’s a top choice for detailers and body shops for removing everything from decal glue to badge adhesive.
- Rapid Remover or Citrol: These are other examples of powerful citrus-based solvents that are highly effective and generally safe on factory paint finishes.

Step 3: Gently Scrape and Wipe Away the Residue
Use a plastic scraper, old credit card, or a microfiber cloth to gently lift the loosened residue. For stubborn spots, reapply your chosen solvent and rub gently rather than scraping harder.
Now that the adhesive has been softened by heat and dissolved by a solvent, it’s time for the physical removal. The golden rule of this step is to be gentle. Let the chemicals do the heavy lifting, not brute force.
- Choose a Safe Tool: Select a scraper made of soft material. An old credit card, a plastic putty knife, a rubber spatula, or even your fingernail are all excellent choices.
- Use a Shallow Angle: Hold your plastic scraper at a shallow angle to the surface. Push gently into the softened residue, lifting it off the surface.
- Wipe and Rub: For less stubborn residue, a clean microfiber cloth is often all you need. Fold the cloth into a small square, apply a bit of your chosen solvent, and rub the area with firm, circular motions.
- Repeat if Necessary: If you scrape away a layer and find more residue underneath, don’t press harder. Simply reapply your chosen solvent, let it sit for a few more minutes, and repeat the gentle scraping process.
What NOT to Use
NEVER use metal scrapers, razor blades, steel wool, or harsh abrasive pads on your car’s painted surfaces. These items will instantly scratch and permanently damage the clear coat and paint underneath.
“Patience is your best tool here. Let the solvent do the work and avoid the temptation to apply excessive force.”
Step 4: Final Clean-Up and Surface Protection
After all residue is gone, wash the area with soap and water to remove any leftover chemicals, dry thoroughly, and apply a coat of automotive wax to protect the paint and restore its shine.
You’ve done it—the sticky mess is gone! But don’t stop now. The final step is crucial for ensuring no leftover solvents remain on the surface and for protecting the now-pristine paint.
- Wash the Area: Use a fresh, clean cloth with warm car wash soap and water to thoroughly wash the entire area you were working on. This will neutralize and remove any remaining oils, alcohols, or chemical removers that could harm the paint over time.
- Dry Completely: Use a separate, clean, and dry microfiber towel to completely dry the surface. This prevents water spots and prepares the surface for waxing.
- Protect with Wax: Apply a small amount of automotive wax to the area. This is not just for shine; waxing restores the protective barrier of the clear coat that may have been stripped away by the solvents. It seals the paint from UV rays and contaminants, ensuring a uniform and glossy finish.
Think of this as the final touch that makes your car look like the sticker was never there.
Special Considerations: How to Handle Tricky Surfaces
For tinted windows, avoid abrasive cleaners and petroleum-based products like WD-40; use soapy water and a plastic scraper only. For plastic, avoid strong solvents and test in a hidden area first.
Not all surfaces on your car are as durable as painted metal or glass. Interior plastics, exterior trim, and tinted windows are especially sensitive and require a more cautious approach.
Removing Stickers from Tinted Windows
To safely remove residue from tinted windows, use only soapy water or a tint-safe remover and a plastic scraper. Never use razor blades, WD-40, or abrasive chemicals.
It’s critical to understand that aftermarket window tint is a delicate film applied to the inside surface of the glass. Damaging this film is easy to do and expensive to fix.
- Do’s:
- Do use a solution of soap and water as your first choice.
- Do use a plastic scraper or credit card very gently.
- Do look for commercial cleaners specifically labeled “tint-safe.”
- Don’ts:
- Don’t use any ammonia-based cleaners (like standard Windex), as they can break down the tint’s adhesive.
- Don’t use a razor blade or any metal scraper.
- Don’t use harsh solvents or petroleum-based products like WD-40, which can cause the tint to peel or bubble.
Warning
Never use ammonia-based glass cleaners or sharp razor blades on tinted windows. This is the fastest way to ruin your tint, requiring a full replacement.
“When in doubt, treat your tint with extreme care. It’s much easier to damage than regular glass.”
Tackling Residue on Plastic Trim and Dashboards
For plastic surfaces, start with a mild solution like soapy water or an oil-based remover. Test any solvent, including rubbing alcohol, in a hidden spot first to prevent discoloration.
Interior and exterior plastic components, such as dashboards, door panels, and unpainted trim, can be easily discolored or even melted by strong chemical solvents.
- Always Test First: Before applying any product to a visible plastic area, test it on an inconspicuous spot first (e.g., the underside of a trim piece). Wait a few minutes to see if any discoloration or damage occurs.
- Start Mild: Begin with the gentlest methods. A cloth with warm, soapy water or a dab of cooking oil is often enough for residue on plastic.
- Use Alcohol Cautiously: Rubbing alcohol can be effective, but it can also dry out and fade some types of plastic. If you use it, apply it sparingly and wash the area with water immediately after.
- Try a Gentle Paste: For a safer alternative on delicate interior plastics, a paste made from coconut oil and baking soda provides a bit of scrubbing power without harsh chemicals.
To make sure you have the right tools for any sticky situation, from tough adhesive removers to gentle microfiber towels and plastic scrapers, consider grabbing a complete kit. A dedicated car adhesive remover kit often includes everything you need to get the job done safely and efficiently.


FAQs About How to Remove Sticker Residue From Car
Will WD-40 damage my car’s paint?
WD-40 is petroleum-based and can be an effective adhesive remover. While it generally won’t damage modern factory clear coats if used briefly, it should be used with caution. It is best suited for glass. If you use it on paint, wash the area thoroughly with soap and water immediately afterward to remove the oily residue.
What’s the best way to remove old, baked-on sticker residue?
For old, hardened residue, heat is your most powerful tool. Start by heating the area with a hairdryer for 60 seconds to soften the adhesive as much as possible. Follow this with a strong, dedicated commercial product like 3M Adhesive Remover, let it soak in, and then gently scrape with a plastic tool. This may require several applications.
Can I use Goo Gone on my car’s clear coat?
Goo Gone is generally considered safe for use on car paint and clear coats. However, it is always recommended to test it on a small, inconspicuous area of your car first to ensure there is no adverse reaction with your specific paint finish. After use, always wash the area with soapy water.
How do you remove residue from a car without damaging the paint?
The key is to use the least aggressive method that works. Start with heat and a plastic scraper. If that’s not enough, move to mild household solvents like vinegar or oil before trying stronger commercial removers. Always use soft microfiber cloths and plastic tools, and finish by washing and waxing the area to restore its protection.
Is rubbing alcohol safe to use on car paint?
Rubbing alcohol can be safe for short-term use on most modern car paints to remove residue, but it can dry out and potentially dull the clear coat if left on for too long or used too frequently. It’s best to apply it to a cloth rather than directly to the paint, use it quickly, and then clean the area with soap and water.
Can I use a razor blade to scrape a sticker off my car window?
You can use a razor blade on glass, but only on non-tinted windows and with extreme caution. Hold the blade at a very shallow angle and use a lubricating liquid like soapy water to avoid scratching the glass. Never, under any circumstances, use a razor blade on car paint or a tinted window.
Final Summary: Your Car, Residue-Free
Removing unsightly sticker residue is a straightforward task when you approach it with patience and the correct, safety-first methodology. By starting with the gentlest techniques and only escalating as needed, you can completely avoid the common pitfall of scratching or damaging your car’s finish. The core principle is simple: let the tools and solvents do the work, not force.
To guarantee a perfect, damage-free result every time, remember these critical steps:
- Prep: Always start by assessing the surface and cleaning the area thoroughly with soap and water.
- Loosen: Use gentle heat from a hairdryer to soften the adhesive’s bond, making it much easier to remove.
- Gently Remove: Choose the right solvent for the job and always use soft, non-metal tools like a plastic card or microfiber cloth to lift the residue.
- Protect: Finish by washing the area to remove any leftover chemicals and apply a coat of wax to protect the paint and restore its shine.
Now you have the complete blueprint for tackling any sticky situation. Go ahead and restore your car’s flawless finish with confidence
Last update on 2025-08-19 / Affiliate links / Images from Amazon Product Advertising API


![Car Wrap vs. Paint: Cost Guide [year]](https://carxplorer.com/wp-content/uploads/2025/08/is-it-cheaper-to-paint-or-wrap-a-car-2-60x60.jpg "Car Wrap vs. Paint: Cost Guide [year] 17")
![Are Fords Good Cars? The Unbiased Truth for [year]](https://carxplorer.com/wp-content/uploads/2025/08/is-ford-a-good-car-2-60x60.jpg "Are Fords Good Cars? The Unbiased Truth for [year] 19")