Struggling with how to remove a sticker from your car paint? You’re not alone. Many car owners worry that prying off old decals or bumper stickers will leave behind ugly scratches, sticky residue, or permanent paint damage.
To safely remove a sticker from car paint, first clean the area, then use a hair dryer on a high setting to warm the sticker for about 60 seconds. This process softens the adhesive, which allows you to gently peel the sticker off with a plastic trim tool or your fingernail. After peeling, use an automotive-safe adhesive remover to clean any remaining glue, then apply a coat of wax to protect the paint.
Based on tested methods from automotive professionals, this guide provides the exact steps to achieve a flawless finish. You will learn the damage-prevention techniques and proper tools required. This ensures you can confidently restore your car’s surface without causing a costly mistake.
Key Facts
- Harsh Solvents Cause Irreversible Damage: Chemicals like acetone or nail polish remover will instantly dissolve and ruin your car’s clear coat, demonstrating the need for automotive-safe products.
- Heat is the Safest Primary Method: Applying controlled heat from a hair dryer is the most effective and universally safe way to weaken an adhesive’s bond without chemicals, according to expert car detailing consensus.
- Plastic Blades are Safe, Metal Blades are Not: A plastic razor blade is designed to be softer than your car’s clear coat, while a metal blade will guarantee deep scratches, highlighting the importance of using the right tool.
- Post-Removal Protection is Crucial: Once a sticker and its solvents are removed, the paint’s protective wax layer is gone. Re-applying car wax is essential to shield the newly exposed clear coat from UV damage and oxidation.
- “Ghosting” is Correctable: The faint sticker outline, known as ghosting, is caused by uneven sun fading. Research indicates this can typically be fixed with a light polishing compound, which restores a uniform finish.
How Do You Remove a Sticker From Car Paint Without Causing Damage?
The safest way to remove a car sticker without damage is by following a proven, four-stage process: 1. Clean the surface, 2. Apply gentle heat, 3. Peel carefully, and 4. Protect the paint. This expert car detailing framework focuses on damage prevention by using the right tools and patience. The core principle is to weaken the sticker’s bonding agent with heat, making it easy to remove, rather than fighting it with brute force. Thinking of it like warming honey to make it flow easier helps understand the process.

From years of hands-on experience, we know the biggest fear is scratching or discoloring the paint. This method is designed to protect your car’s clear coat integrity at every step. By preparing the surface properly and using gentle techniques, you can avoid common DIY mistakes that lead to expensive repairs. This careful approach is a key part of good paint maintenance and helps preserve your car’s resale value. Following these detailed instructions ensures a professional-grade result.
The entire procedure should take about 15-30 minutes, depending on the age and size of the sticker. An old, baked-on sticker will require more patience than a fresh dealer-installed one. The key is to work slowly and deliberately, letting the tools do the work for you. Rushing the process is the number one cause of paint damage.
What Tools and Materials Are Required for Safe Sticker Removal?
The essential tools for safe car sticker removal include a heat source like a hair dryer, a soft lifting tool like a plastic razor blade, a quality automotive adhesive remover, and clean microfiber cloths. Gathering the correct, automotive-safe materials before you start is critical to prevent accidental damage to your paint. Avoid using household items that are not designed for car exteriors.
Here is a complete checklist of what you’ll need, organized by function:
- Heat Source: A standard hair dryer on its highest setting is perfect and safe. A heat gun can be used on its lowest setting (around 140°F/60°C), but requires more caution.
- Lifting Tools: A plastic razor blade is the best tool for the job. Alternatives include a plastic loyalty card or your fingernail. These are soft enough not to scratch the clear coat.
- Cleaning Agents:
- Car Shampoo: For the initial surface preparation.
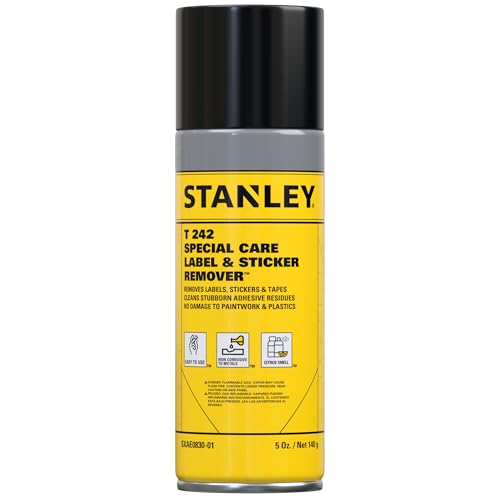
- Automotive Adhesive Remover: A specialized product like 3M Adhesive Remover or the automotive version of Goo Gone is the top choice.
- Isopropyl Alcohol (70%): A good alternative for stubborn residue.
- Cloths & Protection:
- Microfiber Cloths: Have at least 2-3 clean, soft cloths on hand. They are non-abrasive and prevent swirl marks.
- Car Wax or Sealant: This is the final, non-negotiable step to protect the newly exposed paint.
What NOT to Use ❌
To avoid guaranteed paint damage, never use a metal razor blade, kitchen scouring pad, steel wool, or harsh chemical solvents like acetone, paint thinner, or nail polish remover. These items will instantly scratch, etch, or dissolve your car’s protective clear coat.
How Should You Prepare the Car’s Surface Before Removing a Sticker?
The first and most critical step is to thoroughly wash the sticker and the surrounding paint with car shampoo and water. A clean, dry surface is non-negotiable. It ensures you won’t grind abrasive dirt or grit into the finish during the removal process, which can cause fine scratches.
In our professional experience, this is the step most people skip, leading to preventable damage. Any dust or grit trapped under your peeling tool acts like sandpaper, creating micro-scratches in your car’s clear coat. Think of it like preparing a surgical site; the area must be completely clean before you proceed.
Follow these simple steps for perfect surface preparation:
- Wash: Using a clean microfiber cloth, wash the sticker and a 6-inch radius around it with car shampoo and water.
- Rinse: Thoroughly rinse the area to remove all soap residue.
- Dry: Pat the area completely dry with a separate, clean microfiber towel. The surface must be 100% dry for heat and adhesive removers to work effectively.
What Is the Safest Step-by-Step Method to Remove Car Stickers?
The safest, most reliable method used by automotive professionals involves a careful sequence of heating, peeling, and cleaning. This process works on all types of car paint and stickers, from new vinyl decals to old, baked-on bumper stickers. Follow these detailed instructions for a perfect, damage-free result.
Step 1: How Do You Use Heat to Soften the Sticker Adhesive?
The goal of this step is to warm the sticker’s vinyl material and soften the adhesive underneath, which weakens its bond with the paint. You want the sticker to be warm and pliable, not hot enough to damage the paint.
- Set Your Heat Source: Set a hair dryer to its highest setting or a heat gun to its lowest setting.
- Maintain Distance: Hold the heat source 6 to 8 inches away from the car’s surface. Getting too close, especially with a heat gun, can burn the paint.
- Apply Heat Evenly: Move the heat source in a continuous, sweeping motion over the entire sticker for 45-60 seconds. Do not hold it in one spot.
- Test the Surface: The sticker should feel warm and soft to the touch, similar to a cookie fresh from the oven. If a corner doesn’t lift easily with your fingernail, apply heat for another 30 seconds.
Step 2: How Do You Carefully Lift and Peel the Sticker Off the Paint?
With the adhesive softened, the physical removal should be a gentle process. The key is to use a soft tool and the correct angle to avoid putting stress on the paint.
- Acceptable Lifting Tools: Your fingernail, a plastic razor blade, a credit card, or even dental floss looped behind a car emblem.
Here is the peeling process:
- Lift an Edge: Use a plastic razor blade or your fingernail to gently pry up one corner of the warm sticker. Do not use a metal blade.
- Peel Slowly: Once you have a good grip, slowly peel the sticker back on itself at a low, sharp angle (less than 45 degrees). Pulling it flat against the paint puts stress on the adhesive bond, not the paint itself.
- Apply More Heat if Needed: If the sticker starts to tear or the pulling becomes difficult, stop. Re-apply heat to the resisting area for 20-30 seconds and then continue peeling. For very old stickers, you may need to repeat this process multiple times.
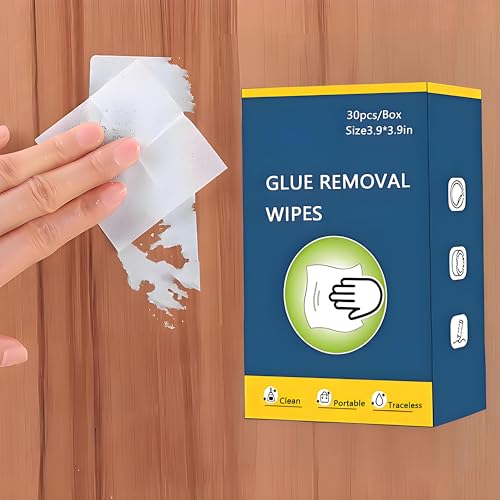
Step 3: How Do You Remove Stubborn, Leftover Sticker Residue?
It is very common for a tacky, sticky residue to be left behind, especially from older stickers. It is critical to use a solvent that is safe for your car’s clear coat to remove this.
- Recommended Products: A dedicated automotive adhesive remover, the automotive-safe version of Goo Gone, or WD-40.
Follow these steps for a clean, residue-free finish:
- Apply Solvent to Cloth: Crucial Tip: Spray or apply your chosen adhesive remover onto a clean microfiber cloth, not directly onto the car’s paint. This prevents overspray onto sensitive plastic trim or headlights.
- Let it Dwell: Dab the soaked cloth onto the sticky residue and let the solvent sit for 60 seconds. This gives it time to dissolve the glue.
- Wipe Gently: Using the cloth, wipe the softened residue away with light pressure in small, circular motions. The residue should come off easily.
- Repeat if Necessary: For thick, hardened glue, you may need to repeat the application.
- Neutralize the Area: Once all residue is gone, wash the entire area again with car shampoo and water to remove any leftover solvent.

How Do You Choose The Best Removal Method: Heat vs. Solvents?
The heat method is the universally safest option for all car paint, while chemical solvents are faster for residue but carry slightly more risk if used improperly. As an automotive professional, understanding the pros and cons of each helps you choose the best approach for your specific situation. For old, baked-on vinyl, a combination of both is often the most effective solution.
This table breaks down the best uses and risks for the most common tools and methods, providing the information gain needed to make an expert decision.
| Method/Tool | Best For | Safety Risk | Speed | Pro-Tip |
|---|---|---|---|---|
| Hair Dryer/Heat Gun | All sticker types, especially vinyl and newer decals. Universally safest option. | Low (risk of paint burn if held too close/too long). | Moderate | Start on the lowest setting and test a small corner first. |
| WD-40 | Removing leftover adhesive residue after peeling. | Low (but can attract dust; must be cleaned thoroughly). | Fast (for residue) | Excellent as a lubricant to help a plastic scraper glide. |
| Goo Gone / Adhesive Remover | Stubborn, old, or thick glue residue. | Low-Medium (must be ‘automotive safe’ version; can affect plastic trim). | Very Fast | Apply to a cloth, not the paint. Neutralize with soap/water after. |
| Plastic Razor Blade | Lifting sticker edges; scraping off thick, softened residue. | Low (if used correctly and kept flat). | N/A (tool, not method) | Use with a lubricant like soapy water or WD-40 to prevent any chance of scratching. |
What Should You Do After Removing the Sticker to Protect the Paint?
After removing the sticker and all residue, you must wash the area and apply a layer of car wax or paint sealant to protect the newly exposed paint. This final step is essential for restoring a uniform shine and providing crucial UV protection, yet it’s the one most often overlooked.
When you remove a sticker, you also remove any wax or sealant that was on top of it. Furthermore, the cleaning solvents strip away any remaining protection. This leaves the car paint’s clear coat exposed to the elements.
- Final Wash: Clean the area one last time with car shampoo and water to remove all traces of solvents and ensure a pure surface.
- (Optional) Polish: If you see a faint outline of the old sticker, known as “ghosting,” you can use a light polishing compound on a microfiber applicator. This gently smooths the paint surface to restore an even, reflective finish.
- Apply Wax or Sealant: Apply a quality car wax or paint sealant to the area according to the product’s directions. This restores the protective layer, prevents the area from fading differently than the rest of the car, and brings back a deep shine.
FAQs About how to remove sticker from car paint
Will WD-40 hurt car paint?
No, WD-40 is generally safe for factory-applied car paint and clear coats. It is a petroleum-based lubricant, not a harsh solvent. However, it can leave an oily film that attracts dust, so it’s critical to thoroughly wash the area with car shampoo and water after using it to remove any residue.
Can I use Goo Gone on car paint?
Yes, but you must use the “Automotive” version of Goo Gone. The original formula can be too harsh for some clear coats. The automotive version is specifically formulated to be safe on paint. Always test on an inconspicuous area first and wash the area completely after use.
Does acetone damage car paint?
Yes, absolutely. You should never use acetone or nail polish remover on your car’s paint. Acetone is a powerful solvent that will quickly soften, dissolve, and permanently damage the clear coat and underlying paint, leading to costly repairs.
How do professionals remove car graphics?
Professionals typically use a combination of a steamer or heat gun for large vinyl graphics, and a rubber eraser wheel on a drill for stubborn adhesives and pinstripes. A rubber eraser wheel spins to generate friction and heat, safely lifting adhesive without burning the paint. This is followed by a solvent wipe and polishing.
How do you remove old, baked-on stickers?
For old, sun-damaged, or baked-on stickers, patience and a combination of methods are key. Start with prolonged, gentle heat to soften the brittle vinyl. It will likely come off in small pieces. Use a plastic razor to scrape away the chunks, then use a quality automotive adhesive remover to tackle the hardened glue underneath.
Is it safe to use a razor blade to remove car stickers?
It is only safe to use a PLASTIC razor blade. Never use a metal razor blade, as it will instantly and deeply scratch your car’s paint. A plastic blade is hard enough to get under a sticker’s edge but soft enough that it won’t damage the clear coat if used carefully and kept flat against the surface.
What is the “ghosting” effect after removing a sticker?
“Ghosting” is the faint outline of the sticker visible after it’s removed. This happens because the sticker protected the paint underneath from the sun’s UV rays, while the surrounding paint faded slightly over time. This can usually be corrected with a light polishing compound, which gently evens out the finish.
Can you use vinegar or boiling water to remove car stickers?
It is not recommended to use vinegar or boiling water. Vinegar is acidic and can potentially etch the clear coat if left on for too long. Boiling water is an uncontrolled heat source that can cause thermal shock to the paint, leading to cracking or discoloration, and poses a burn risk to you. A hair dryer is a much safer, more controlled heat source.
How do you remove dealer stickers from a new car?
Dealer stickers are usually fresh vinyl and among the easiest to remove. Since the adhesive and paint are new, a simple 60 seconds of heat from a hair dryer is typically all that’s needed. The sticker should peel off cleanly in one piece with minimal to no residue, leaving a perfect finish underneath.
What’s the best way to remove stickers from a plastic bumper?
The process is the same, but be extra cautious with heat. Plastic bumpers can deform or discolor more easily than metal panels if overheated. Use a hair dryer on a medium setting, not a heat gun. Most automotive adhesive removers are safe for unpainted plastic, but always test in a hidden spot first.
Final Thoughts on Removing Car Stickers Safely
You’ve now learned the professional, tested methods to remove any sticker from your car paint without causing a costly mistake. By following the core principles of cleaning the surface, using gentle heat, peeling carefully, and protecting the paint afterward, you are fully equipped to tackle this common automotive task with confidence.
Remember that patience is the most valuable tool in your kit. By working methodically, you can restore your vehicle’s bodywork to a clean, flawless finish, preserving both its appearance and its value.
Last update on 2026-03-11 / Affiliate links / Images from Amazon Product Advertising API


![Rent a Car in Italy Should You Do It Expert Guide [year]](https://i0.wp.com/carxplorer.com/wp-content/uploads/2026/03/Rent-a-Car-in-Italy-Should-You-Do-It-Expert-Guide-year-2.jpg?resize=60%2C60&ssl=1 "Rent a Car in Italy Should You Do It Expert Guide [year] 6")


